Phaser 3 : 凹面の当たり判定を自動で生成してみる② : テクスチャのアルファ値を取得
前回に引き続き、凹面メッシュの自動生成に挑戦します。 gpnotes.hatenablog.jp
ドロネー図に入る前に、テクスチャのアルファ値を取得できなければ自動生成ができないので、今回はテクスチャからピクセル情報を抽出してみたいと思います。
テクスチャのデータを取得する
こちらのページにピクセルの情報の取得方法が載っていました。
Phaser 3 texture getPixels (plural) - Phaser 3 - HTML5 Game Devs Forum
紹介されている方法はPhaserのテクスチャデータを取得してcanvasに描画、作成したcanvasからピクセルを取得するという手順のようです。
//phaserのテクスチャマネージャからsourceimageを取得する
let source = this.textures.get('block').getSourceImage();;

//canvasを作成しテクスチャを描画
let canvas = this.textures.createCanvas('canvasName', source.width, source.height);
canvas.draw(0, 0, source as HTMLImageElement);

//imagedataを取得
let imageData = canvas.imageData;
imageData.data内にピクセル情報が r,g,b,aの順に入っています。
元サンプルでは取り出す際にrgbaに当てはめていますが、ここでは後で扱いやすいようにピクセル用の配列を作ります。
let x = 0;
let y = 0;
let color = new Phaser.Display.Color();

let pixels: number[][] = new Array();

//ピクセルを配列に入れる
for (let i = 0; i < canvas.imageData.data.length; i += 4) {
    let p = [canvas.imageData.data[i], canvas.imageData.data[i + 1], canvas.imageData.data[i + 2], canvas.imageData.data[i + 3]]
    pixels.push(p);
}
あとは取得したピクセルの位置にgraphicsで点を作成していきます。
colorオブジェクトを作成しcolor.setToを使うことで色をセットできます。
for (let i = 0; i < pixels.length; i ++) {

    let r = pixels[i][0];
    let g = pixels[i][1];
    let b = pixels[i][2];
    let a = pixels[i][3];

    let posX = this.sys.canvas.width / 2;
    let posY = this.sys.canvas.height / 2;

    if (a > 0) {

        let dx = posX + x ;
        let dy = posY + y ;

        color.setTo(r, g, b, a);

        let pic = this.add.graphics();
        pic.x = dx;
        pic.y = dy;
        pic.fillStyle(color.color, 1);
        pic.fillPointShape(new Phaser.Math.Vector2(0, 0), 1);


    }

    x++;

    if (x === source.width) {
        x = 0;
        y++;
    }
}
実行結果がこちらです。
 単に画像を出力しているだけに見えるかもしれませんが、実際にはpointの集合なのでpoint単位で色を変えることもできます。
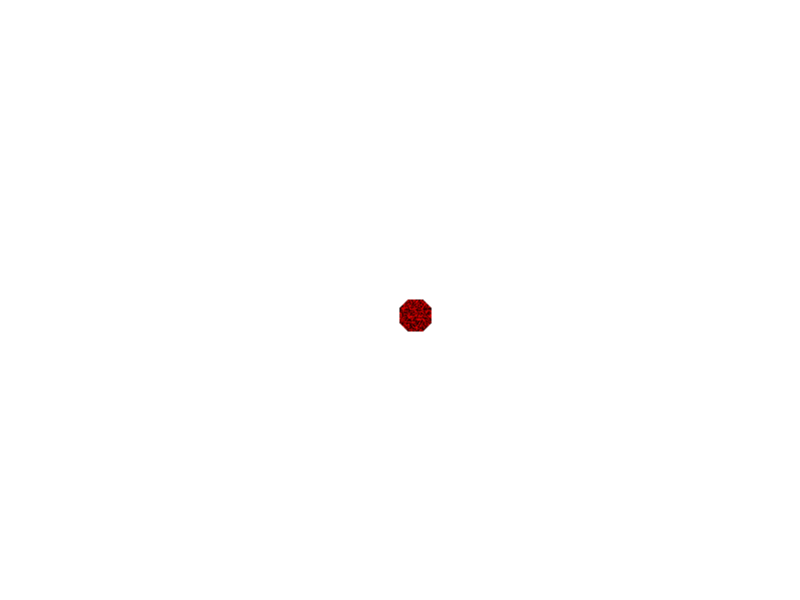
今回のピクセル取得のソースはPhaser 3 Examplesにあるものと同じようで、こちらのアニメーションもためしに実装してみます。
for (let i = 0; i < pixels.length; i ++) {

    let r = pixels[i][0];
    let g = pixels[i][1];
    let b = pixels[i][2];
    let a = pixels[i][3];

    let posX = this.sys.canvas.width / 2;
    let posY = this.sys.canvas.height / 2;

    if (a > 0) {

        let startX = Phaser.Math.Between(posX , posX+imageData.width/2+imageData.width/2);
        let startY = Phaser.Math.Between(posY + imageData.height / 2 - imageData.height, posY  +imageData.height/2+imageData.height-200);

        let dx = posX + x ;
        let dy = posY + y ;

        color.setTo(r, g, b, a);

        let pic = this.add.graphics();
        pic.x = startX;
        pic.y = startY;
        pic.fillStyle(color.color, 1);
        pic.fillPointShape(new Phaser.Math.Vector2(0, 0), 1);
        pic.setScale(0.1);

        this.tweens.add({

            targets: pic,
            duration: 2000,
            x: dx,
            y: dy,
            scaleX: 1,
            scaleY: 1,
            angle: 360,
            delay: y* 15,
            yoyo: true,
            repeat: -1,
            repeatDelay: 600,
            hold: 600

        });

    }

    x++;

    if (x === source.width) {
        x = 0;
        y++;
    }
}
}
ブロックが粉砕されるようなエフェクトができました。
 graphicsの集合で作ってしまったので実用的なパフォーマンスではないと思いますが、描画方法を工夫すれば実際のゲームでも使えそうです。
今回のソースはこちらです。
/// <reference path="../app.ts" />

namespace MyGame {

    interface XY {
        x: number;
        y: number;
    }

    export class MyScene1 extends Phaser.Scene {

        //グラフィックオブジェクトを用意
        public player: Phaser.GameObjects.Image;
        public beamGroup: Phaser.GameObjects.Group;

        public graphics: Phaser.GameObjects.Graphics;
        public points: Phaser.Math.Vector2[] = [];
        public closepath: Phaser.Math.Vector2[] = [];

        constructor() {
            super({ key: 'MyScene1', active: false });
        }

        preload() {
            this.load.image("bar", "assets/images/bar.png");
            this.load.image("block", "assets/images/block.png");
        }

        create() {

            this.cameras.main.setBackgroundColor(0xffffff);

            this.graphics = this.add.graphics();
            this.graphics.fillStyle(0x000000);

            //phaserのテクスチャマネージャからsourceimageを取得する
            let source = this.textures.get('block').getSourceImage();;

            //canvasを作成しテクスチャを描画
            let canvas = this.textures.createCanvas('canvasName', source.width, source.height);
            canvas.draw(0, 0, source as HTMLImageElement);

            //imagedataを取得
            let imageData = canvas.imageData;

            let x = 0;
            let y = 0;
            let color = new Phaser.Display.Color();

            let pixels: number[][] = new Array();

            //ピクセルを配列に入れる
            for (let i = 0; i < canvas.imageData.data.length; i += 4) {
                let p = [canvas.imageData.data[i], canvas.imageData.data[i + 1], canvas.imageData.data[i + 2], canvas.imageData.data[i + 3]]
                pixels.push(p);
            }

            for (let i = 0; i < pixels.length; i ++) {

                let r = pixels[i][0];
                let g = pixels[i][1];
                let b = pixels[i][2];
                let a = pixels[i][3];

                let posX = this.sys.canvas.width / 2;
                let posY = this.sys.canvas.height / 2;

                if (a > 0) {

                    let startX = Phaser.Math.Between(posX , posX+imageData.width/2+imageData.width/2);
                    let startY = Phaser.Math.Between(posY + imageData.height / 2 - imageData.height, posY  +imageData.height/2+imageData.height-200);

                    let dx = posX + x ;
                    let dy = posY + y ;

                    color.setTo(r, g, b, a);

                    let pic = this.add.graphics();
                    pic.x = startX;
                    pic.y = startY;
                    pic.fillStyle(color.color, 1);
                    pic.fillPointShape(new Phaser.Math.Vector2(0, 0), 1);
                    pic.setScale(0.1);

                    this.tweens.add({

                        targets: pic,
                        duration: 2000,
                        x: dx,
                        y: dy,
                        scaleX: 1,
                        scaleY: 1,
                        angle: 360,
                        delay: y* 15,
                        yoyo: true,
                        repeat: -1,
                        repeatDelay: 600,
                        hold: 600

                    });

                }

                x++;

                if (x === source.width) {
                    x = 0;
                    y++;
                }
            }
        }

        update() {
        }
    }
}
Phaser 3 : 凹面の当たり判定を自動で生成してみる① 閉路を検出
Phaser3ではメッシュを扱えるようになりましたが、画像からメッシュを自動で生成してくれるような機能がありません。
Unityではスプライトから自動で当たり判定や物理ボディを作成してくれるアセットが充実していますが、Phaserにはそれにあたるようなライブラリやプラグインもないようです。
ですが自分で用意した頂点に当たり判定をつける機能はあるので、スプライトから凹面メッシュを自動で生成するような仕組みを作ってみたいと思います。
閉路の検出
まずは点の集まりをつなげて多角形を作るところから始めてみたいと思います。
こちら計算幾何の基礎と領域探索 - RAMBOのページを参考に閉路の検出を行ってみたいと思います。
参考ページによると、y軸座標が最も小さい点を基準点とし、基準点から各点への角度と基準点の水平線のなす角度が小さい順にソートした点を結べば閉路が得られる、とのことです。
まずはPhaser.Math.Betweenを使って適当に点を配置します。
//適当に点を配置
for (let i = 0; i < 20; i++) {
    let point = new Phaser.Math.Vector2(Phaser.Math.Between(100, 400), Phaser.Math.Between(100, 400))
    this.points.push(point);
    this.graphics.fillPointShape(point,5);
}
次にsortを用いて基準点を設定します。
//基準点を検出
let origin = this.points.sort(function(a, b) {
    if (a.y > b.y) {
        return 1;
    } else if (b.y > a.y) {
        return  -1;
    }
}).shift();
次にsortを用いて基準点と各点との角度大きさ順に点を並べ替えます。
並べ替えた配列の先頭に基準点を戻します。
//基準点と各点を結ぶ直線と基準点の水平線との角度でソート
this.points.sort(function (p1, p2) {

    let dx1 = p1.x - origin.x;
    let dy1 = p1.y - origin.y;
    let dx2 = p2.x - origin.x;
    let dy2 = p2.y - origin.y;

    let a1 = Math.atan2(dy1, dx1);
    let a2 = Math.atan2(dy2, dx2);

    if (a1 > a2) {
        return 1;
    } else {
        return -1;
    }

});
最後に経路を描画します。
//基準点を配列に戻す
this.points.unshift(origin);

//パスを描く
for (let i = 0; i < this.points.length - 1; i++) {
    let path = new Phaser.Curves.Line([this.points[i].x,this.points[i].y,this.points[i+1].x,this.points[i+1].y])
    path.draw(this.graphics)
}

//始点と終点を結ぶ
let path = new Phaser.Curves.Line([this.points[this.points.length - 1].x, this.points[this.points.length - 1].y, origin.x, origin.y])
上記の実行結果がこちらです。
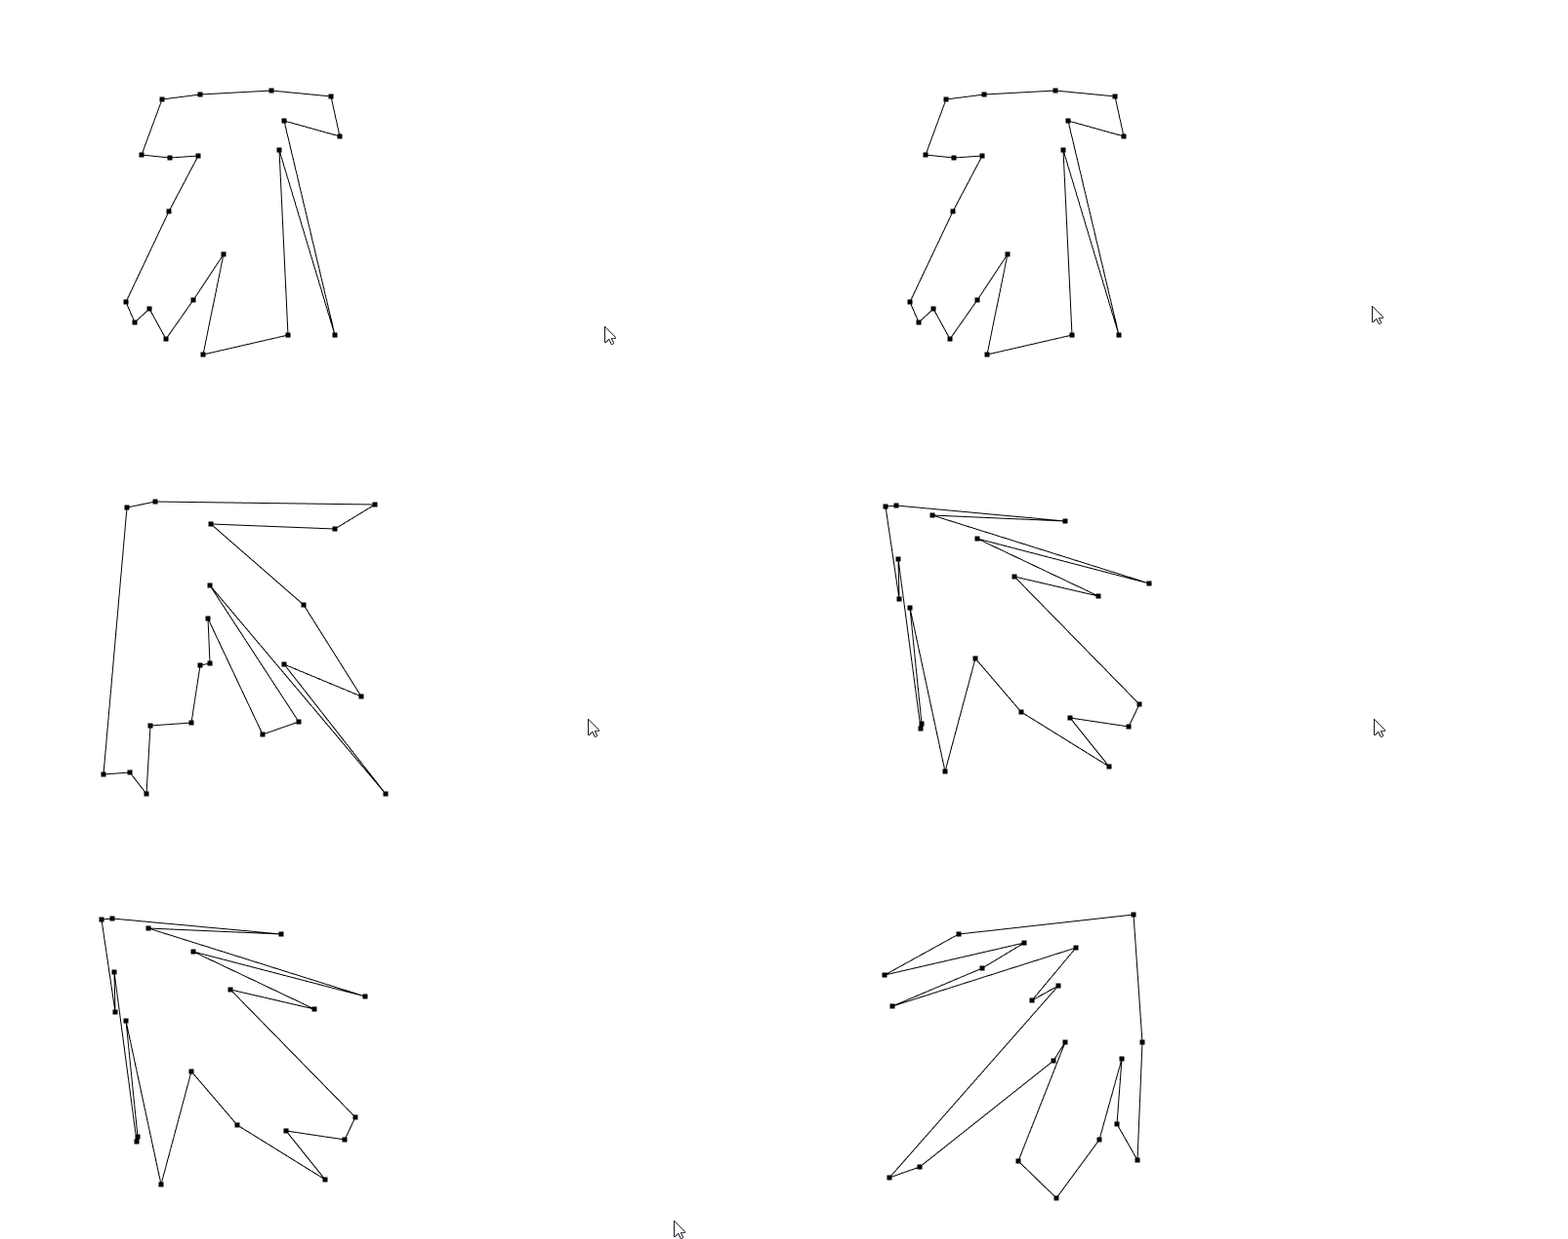
基準点から各点への直線を引いてみると三角形が作れるので、これを頂点として使用すれば凹面の当たり判定も作ることができそうです。

あとはスプライトの境界を取得すればスプライトから当たり判定を生成できそう…なのですが、この境界の判定はconvex fullと呼ばれる難しい問題のようです。
こちら[algorithm] 2D凹面を生成する効率的なアルゴリズムはありますか? [math] [geometry] - CODE Q&A 問題解決のページにはまず辺の長さの限界を設定し、多角形をドロネー分割し辺の長さの限界以上になったものをはじく、というやり方が紹介されています。
次の記事ではドロネー分割について触れてみたいと思います。
今回のソースはこちらです。
/// <reference path="../app.ts" />

namespace MyGame {

    interface XY {
        x: number;
        y: number;
    }

    export class MyScene1 extends Phaser.Scene {

        //グラフィックオブジェクトを用意
        public player: Phaser.GameObjects.Image;
        public beamGroup: Phaser.GameObjects.Group;

        public graphics: Phaser.GameObjects.Graphics;
        public points: Phaser.Math.Vector2[]=[];
        public closepath: Phaser.Math.Vector2[] = [];

        constructor() {
            super({ key: 'MyScene1', active: false });
        }

        preload() {
        }

        create() {

            this.cameras.main.setBackgroundColor(0xffffff);

            this.graphics = this.add.graphics();
            this.graphics.fillStyle(0x000000);

            //適当に点を配置
            for (let i = 0; i < 10; i++) {
                let point = new Phaser.Math.Vector2(Phaser.Math.Between(100, 400), Phaser.Math.Between(100, 400))
                this.points.push(point);
                this.graphics.fillPointShape(point,5);
            }

            //基準点を検出
            let origin = this.points.sort(function(a, b) {
                if (a.y > b.y) {
                    return 1;
                } else if (b.y > a.y) {
                    return  -1;
                }
            }).shift();


            //基準点と各点を結ぶ直線と基準点の水平線との角度でソート
            this.points.sort(function (p1, p2) {

                let dx1 = p1.x - origin.x;
                let dy1 = p1.y - origin.y;
                let dx2 = p2.x - origin.x;
                let dy2 = p2.y - origin.y;

                let a1 = Math.atan2(dy1, dx1);
                let a2 = Math.atan2(dy2, dx2);

                if (a1 > a2) {
                    return 1;
                } else {
                    return -1;
                }

            });

            //基準点を配列に戻す
            this.points.unshift(origin);

            //パスを描く
            for (let i = 0; i < this.points.length - 1; i++) {
                this.graphics.lineStyle(1,0x000000);
                let path = new Phaser.Curves.Line([this.points[i].x,this.points[i].y,this.points[i+1].x,this.points[i+1].y])
                path.draw(this.graphics)

                this.graphics.lineStyle(1,0x888888);
                let path2 = new Phaser.Curves.Line([this.points[0].x, this.points[0].y, this.points[i+1].x, this.points[i+1].y])
                path2.draw(this.graphics)

            }

            //始点と終点を結ぶ
            let path = new Phaser.Curves.Line([this.points[this.points.length - 1].x, this.points[this.points.length - 1].y, origin.x, origin.y])

            path.draw(this.graphics);
        }

        update() {
        }
    }
}
Phaser 3 リボントレイルを作る④ : blendmodeを変更する
前回に引き続きリボントレイルを作ります。 gpnotes.hatenablog.jp
particleで星空のアニメーションを作る
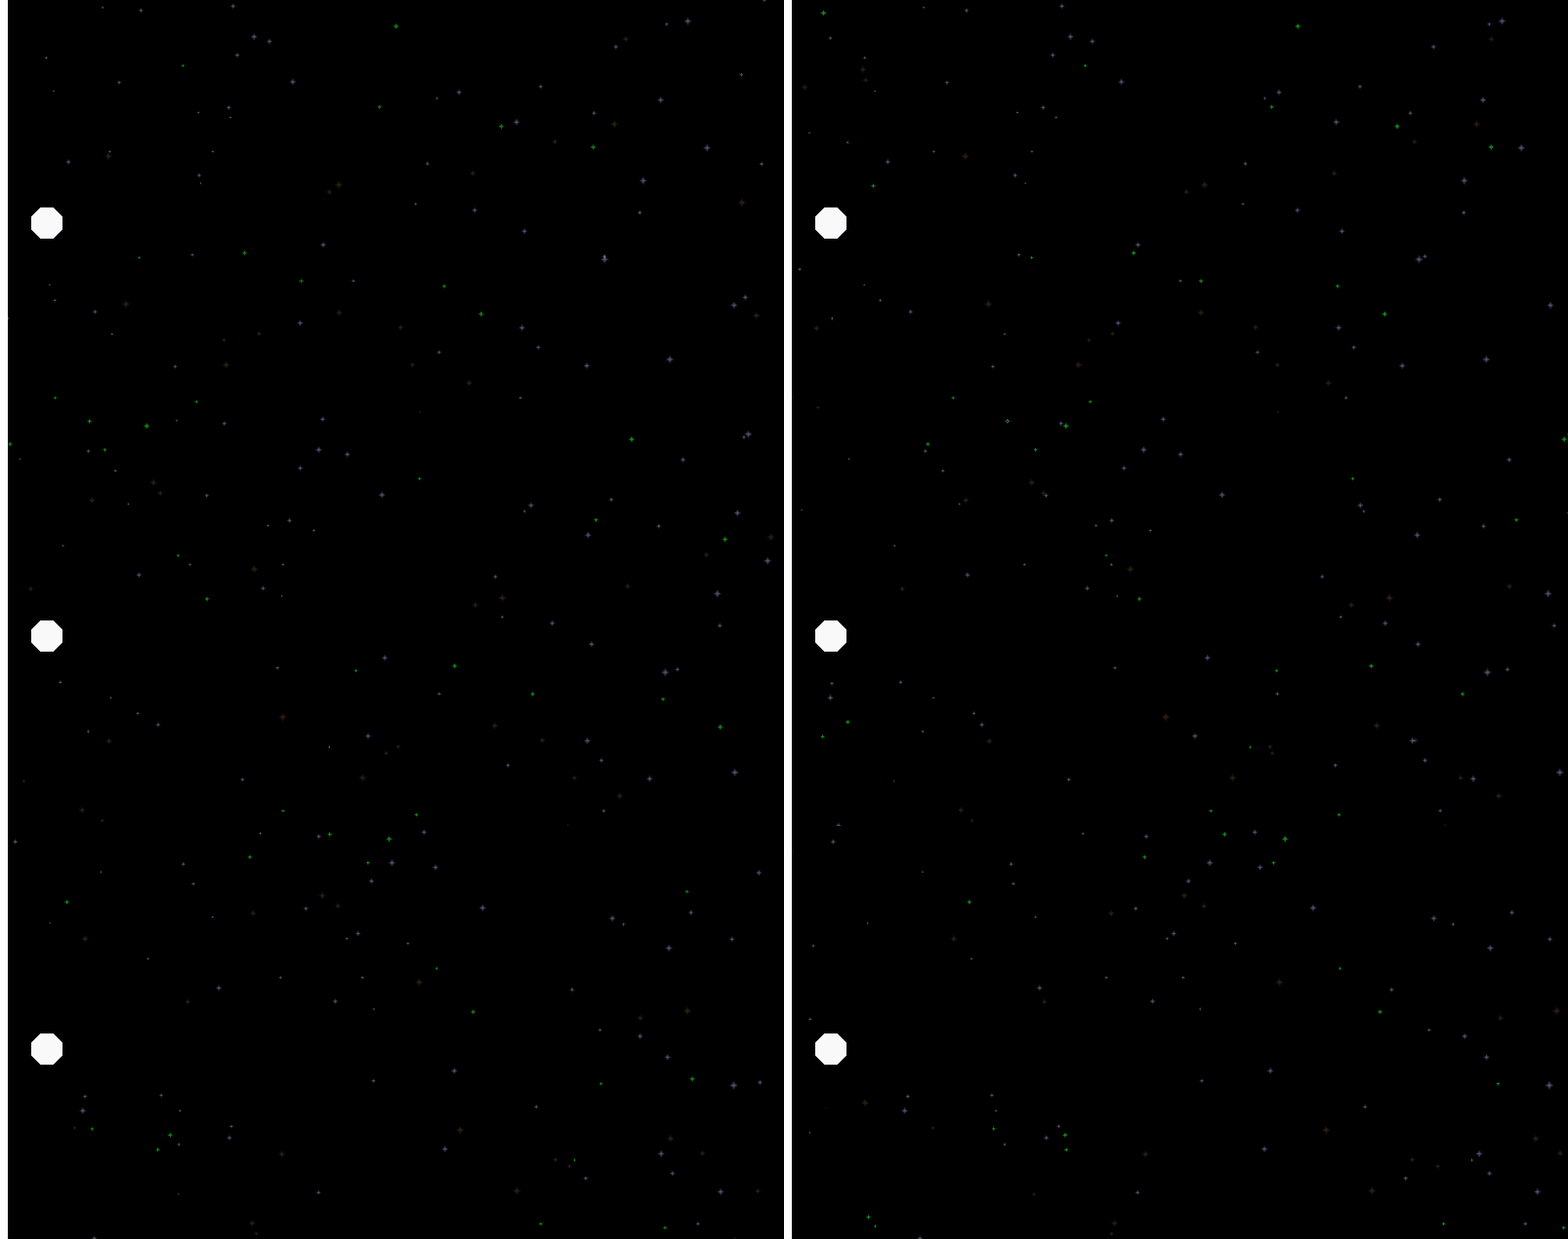
公式のサンプルを参考にして星空のアニメーションを作ります。
ソースはほとんどそのまま拝借し、手裏剣型のスプライトparticle1とparticle2を自作しました。
tintを設定することで色を変えられるようにしてあります。
        create() {

            this.player=this.add.image(40,this.sys.canvas.height/2,"block")

            this.cameras.main.setBackgroundColor(0x000000);

            let offscreen = new Phaser.Geom.Rectangle(-400, 0, 400, 600);
            let screen = new Phaser.Geom.Rectangle(-400, 0, 1200, 600);

            //パーティクルを作る
            this.add.particles('particle2', [
                {
                    emitZone: { source: offscreen },
                    deathZone: { source: screen, type: 'onLeave' },
                    frequency: 100,
                    speedX: { min: 80, max: 120 },
                    lifespan: 30000,
                    scale: { min: 0.1, max: 0.5 },
                    tint:  0x535678 ,
                    blendMode: 'ADD'
                },

            ]);

            this.add.particles('particle2', [
                {
                    emitZone: { source: offscreen },
                    deathZone: { source: screen, type: 'onLeave' },
                    frequency: 150,
                    speedX: { min: 180, max: 220 },
                    lifespan: 30000,
                    scale: { min: 0.3, max: 0.7 },
                    tint:  0x332211 ,
                    blendMode: 'ADD'
                },

            ]);

            this.add.particles('particle1', [
                {
                    emitZone: { source: offscreen },
                    deathZone: { source: screen, type: 'onLeave' },
                    frequency: 500,
                    quantity: 4,
                    speedX: { min: 280, max: 320 },
                    lifespan: 30000,
                    scale: { min: 0.3, max: 0.7 },
                    tint: 0x118811,
                    blendMode: 'ADD'
                },

            ]);

            this.beamGroup = this.add.group(null, {runChildUpdate:true})
        }
リボントレイルを使ったビームエフェクト
前回までで一応動くリボントレイルエフェクトができたので、これをビームとして撃てるようにしたいと思います。
Trailクラスを改造し、Beamクラスを作成しました。
Init関数ではメッシュの部分をビームごとに色が変わるようにし、Blendmodeで加算合成を指定しています。
加算合成は
    export class Beam extends Phaser.GameObjects.Container {

        //グラフィックオブジェクトを用意
        public graphics: Phaser.GameObjects.Graphics;
        public mesh: Phaser.GameObjects.Mesh;

        public curve: Phaser.Curves.CubicBezier;

        public curvePoints: Phaser.Math.Vector2[] = [];

        public drawDebug: boolean = false;

        public points: number = 100;

        //各ポイントの設定
        public tail: Phaser.Math.Vector2;
        public head: Phaser.Math.Vector2;
        public controlPoint1: Phaser.Math.Vector2;
        public controlPoint2: Phaser.Math.Vector2;


        //ポイント用のtween
        public tweens: Phaser.Tweens.Tween[] = [];
        public t1: Phaser.Tweens.Tween
        public t2: Phaser.Tweens.Tween
        public t3: Phaser.Tweens.Tween
        public t4: Phaser.Tweens.Tween

        public startX: number;
        public startY: number;


        public targetX: number;
        public targetY: number;


        constructor(scene: Phaser.Scene, x?: number, y?: number, children?: Phaser.GameObjects.GameObject[]) {
            super(scene, x, y, children);

        }

        Init(sx:number,sy:number,x: number, y: number) {

            this.startX = sx;
            this.startY = sy;

            this.targetX = x;
            this.targetY = y;

            this.CreateCurve();

            this.curvePoints = this.curve.getPoints(this.points);

            //頂点配列の作成
            let array = this.CreateVerts(5, this.points);

            //uv配列の作成
            let uv = this.CreateUVs(array.length / 12);
            //頂点色を適当に変化
            let colors = []
            let c = Phaser.Math.Between(0x444444, 0xeeeeee)
            for (let i = 0; i < array.length/2; i++) {
                colors.push(c);
            }


            this.mesh = this.scene.make.mesh({
                key: 'block',
                x: 0,
                y: 0,
                vertices: array,
                uv: uv,
                colors: colors
            });

            this.mesh.setBlendMode(Phaser.BlendModes.ADD);

        }

        public CreateVerts(width: number, points: number): number[] {
            let arr = [];

            let pointArray: Phaser.Geom.Point[][] = new Array();

            for (let i = 0; i < points; i++) {
                let mul = width
                let vecA = new Phaser.Math.Vector2(this.curvePoints[i + 1].x - this.curvePoints[i].x, this.curvePoints[i + 1].y - this.curvePoints[i].y).normalize();

                var point1 = new Phaser.Geom.Point(-vecA.y * mul + this.curvePoints[i + 1].x, vecA.x * mul + this.curvePoints[i + 1].y);
                var point2 = new Phaser.Geom.Point(vecA.y * mul + this.curvePoints[i + 1].x, -vecA.x * mul + this.curvePoints[i + 1].y);

                pointArray.push([point1, point2]);

            }

            for (let i = 0; i < pointArray.length - 1; i++) {


                //左上
                arr.push(pointArray[i + 1][0].x, pointArray[i + 1][0].y);

                //左下
                arr.push(pointArray[i][0].x, pointArray[i][0].y);

                //右下
                arr.push(pointArray[i][1].x, pointArray[i][1].y);

                //左上
                arr.push(pointArray[i + 1][0].x, pointArray[i + 1][0].y);

                //右下
                arr.push(pointArray[i][1].x, pointArray[i][1].y);

                //右上
                arr.push(pointArray[i + 1][1].x, pointArray[i + 1][1].y);

            }


            return arr;
        }

        public UpdateVerts(width: number, points: number): number[] {
            let arr = [];

            let pointArray: Phaser.Geom.Point[][] = new Array();

            for (let i = 0; i < points; i++) {
                let mul = width
                let vecA = new Phaser.Math.Vector2(this.curvePoints[i + 1].x - this.curvePoints[i].x, this.curvePoints[i + 1].y - this.curvePoints[i].y).normalize();

                var point1 = new Phaser.Geom.Point(-vecA.y * mul + this.curvePoints[i + 1].x, vecA.x * mul + this.curvePoints[i + 1].y);
                var point2 = new Phaser.Geom.Point(vecA.y * mul + this.curvePoints[i + 1].x, -vecA.x * mul + this.curvePoints[i + 1].y);


                pointArray.push([point1, point2]);

            }

            for (let i = 0; i < pointArray.length - 1; i++) {


                //左上
                arr.push(pointArray[i + 1][0].x, pointArray[i + 1][0].y);

                //左下
                arr.push(pointArray[i][0].x, pointArray[i][0].y);

                //右下
                arr.push(pointArray[i][1].x, pointArray[i][1].y);

                //左上
                arr.push(pointArray[i + 1][0].x, pointArray[i + 1][0].y);

                //右下
                arr.push(pointArray[i][1].x, pointArray[i][1].y);

                //右上
                arr.push(pointArray[i + 1][1].x, pointArray[i + 1][1].y);

            }


            return arr;
        }

        public CreateUVs(points: number): number[] {
            let arr = [];
            let uvincr = 1 / points;

            for (let i = 0; i < points; i++) {
                //左上
                arr.push(0);
                arr.push(uvincr * i);

                //左下
                arr.push(0);
                arr.push(uvincr * (i + 1));

                //右下
                arr.push(1);
                arr.push(uvincr * (i + 1));

                //左上
                arr.push(0);
                arr.push(uvincr * i);

                //右下
                arr.push(1);
                arr.push(uvincr * (i + 1));

                //右上
                arr.push(1);
                arr.push(uvincr * i);
            }


            return arr;
        }

        public CreateCurve() {
            //制御点を作成
            this.tail = new Phaser.Math.Vector2(this.startX, this.startY);
            this.head = new Phaser.Math.Vector2(Phaser.Math.Between(this.startX , this.startX+50), Phaser.Math.Between(this.startY-100, this.startY+100));
            this.controlPoint1 = new Phaser.Math.Vector2(Phaser.Math.Between(this.tail.x, this.head.x), Phaser.Math.Between(this.tail.y, this.head.y));
            this.controlPoint2 = new Phaser.Math.Vector2(Phaser.Math.Between(this.controlPoint1.x, this.head.x), Phaser.Math.Between(this.controlPoint1.x, this.head.y));

            this.curve = new Phaser.Curves.CubicBezier(this.tail, this.controlPoint1, this.controlPoint2, this.head);
            this.graphics = this.scene.add.graphics();


            //各制御点にtweenを作成する
            this.t1 = this.scene.tweens.add({
                targets: this.tail,
                x: this.controlPoint1.x,
                y: this.controlPoint1.y,
                duration: 5000,
                repeat: -1
            })

            this.t2 = this.scene.tweens.add({
                targets: this.controlPoint1,
                x: this.controlPoint2.x,
                y: this.controlPoint2.y,
                duration: 5000,
                repeat: -1
            })

            this.t3 = this.scene.tweens.add({
                targets: this.controlPoint2,
                x: this.head.x,
                y: this.head.y,
                duration: 5000,
                repeat: -1
            })

            this.t4 = this.scene.tweens.add({
                targets: this.head,
                x: this.scene.input.x,
                y: this.scene.input.y,
                duration: 5000,
                repeat: -1
            })


        }

        update() {
            //制御点のtweenをアップデートする

            this.t4.updateTo("x", this.targetX, true)
            this.t4.updateTo("y", this.targetY, true)

            this.t3.updateTo("x", this.head.x, true)
            this.t3.updateTo("y", this.head.y, true)

            this.t2.updateTo("x", this.controlPoint2.x, true)
            this.t2.updateTo("y", this.controlPoint2.y, true)

            this.t1.updateTo("x", this.controlPoint1.x, true)
            this.t1.updateTo("y", this.controlPoint1.y, true)

            this.curvePoints = this.curve.getPoints(100);

            this.mesh.vertices = Float32Array.from(this.UpdateVerts(5, this.points));
            this.graphics.clear();

            //ビームが目標地点に達したらゲームオブジェクトを破棄
            if (this.tail.x === this.targetX && this.tail.y === this.targetY) {
                this.graphics.clear();
                this.graphics.destroy();
                this.mesh.destroy();
                this.destroy();
            }
        }

    }
Myscene1のupdateでクリックに応じてビームを打てるようにします。
update() {
    if (this.input.activePointer.isDown) {
        let beam = new Beam(this);
        beam.Init(this.player.x, this.player.y, this.input.activePointer.x, this.input.activePointer.y)
        this.beamGroup.add(beam)
    }
}
実行結果がこちらです。

 Trailの作りが甘く、ぎこちないビームとなってしまっていますが、ビームを連射できているのがわかります。
ビームの発射自体は軽快な挙動なのですが、破棄処理がうまくできているのか不安があります。
一応Beamクラスで尾のオブジェクトが目標地点に達したとき各種オブジェクトをdestroyするようにしているのですが、これで本当に破棄できているのかは時間をとって調べてみたいと思います。
今回のソースはこちらになります。
/// <reference path="../app.ts" />
namespace MyGame {
interface XY {
x: number;
y: number;
}
export class Trail extends Phaser.GameObjects.Container {
//グラフィックオブジェクトを用意
public graphics: Phaser.GameObjects.Graphics;
public mesh: Phaser.GameObjects.Mesh;
public curve: Phaser.Curves.CubicBezier;
public curvePoints: Phaser.Math.Vector2[] = [];
public drawDebug: boolean = false;
public points: number = 100;
//各ポイントの設定
public tail: Phaser.Math.Vector2;
public head: Phaser.Math.Vector2;
public controlPoint1: Phaser.Math.Vector2;
public controlPoint2: Phaser.Math.Vector2;
//ポイント用のtween
public tweens: Phaser.Tweens.Tween[]=[];
public t1: Phaser.Tweens.Tween
public t2: Phaser.Tweens.Tween
public t3: Phaser.Tweens.Tween
public t4: Phaser.Tweens.Tween
constructor(scene: Phaser.Scene, x?: number, y?: number, children?: Phaser.GameObjects.GameObject[]) {
super(scene, x, y, children);
}
Init() {
this.CreateCurve();
this.curvePoints = this.curve.getPoints(this.points);
//頂点配列の作成
let array = this.CreateVerts(5, this.points);
//uv配列の作成
let uv = this.CreateUVs(array.length / 12);
//頂点色を適当に変化
let colors = []
for (let i = 0; i < array.length / 12; i++) {
colors.push(i);
colors.push(i * 2);
colors.push(i * 2);
colors.push(i);
colors.push(i * 2);
colors.push(i);
}
this.mesh = this.scene.make.mesh({
key: 'block',
x: 0,
y: 0,
vertices: array,
uv: uv,
colors: colors
});
this.mesh.setBlendMode(Phaser.BlendModes.ADD);
}
public CreateVerts(width: number, points: number): number[] {
let arr = [];
let pointArray: Phaser.Geom.Point[][] = new Array();
for (let i = 0; i < points; i++) {
let mul = width
let vecA = new Phaser.Math.Vector2(this.curvePoints[i + 1].x - this.curvePoints[i].x, this.curvePoints[i + 1].y - this.curvePoints[i].y).normalize();
var point1 = new Phaser.Geom.Point(-vecA.y * mul + this.curvePoints[i + 1].x, vecA.x * mul + this.curvePoints[i + 1].y);
var point2 = new Phaser.Geom.Point(vecA.y * mul + this.curvePoints[i + 1].x, -vecA.x * mul + this.curvePoints[i + 1].y);
pointArray.push([point1, point2]);
}
for (let i = 0; i < pointArray.length - 1; i++) {
//左上
arr.push(pointArray[i + 1][0].x, pointArray[i + 1][0].y);
//左下
arr.push(pointArray[i][0].x, pointArray[i][0].y);
//右下
arr.push(pointArray[i][1].x, pointArray[i][1].y);
//左上
arr.push(pointArray[i + 1][0].x, pointArray[i + 1][0].y);
//右下
arr.push(pointArray[i][1].x, pointArray[i][1].y);
//右上
arr.push(pointArray[i + 1][1].x, pointArray[i + 1][1].y);
}
return arr;
}
public UpdateVerts(width: number, points: number): number[] {
let arr = [];
let pointArray: Phaser.Geom.Point[][] = new Array();
for (let i = 0; i < points; i++) {
let mul = width
let vecA = new Phaser.Math.Vector2(this.curvePoints[i + 1].x - this.curvePoints[i].x, this.curvePoints[i + 1].y - this.curvePoints[i].y).normalize();
var point1 = new Phaser.Geom.Point(-vecA.y * mul + this.curvePoints[i + 1].x, vecA.x * mul + this.curvePoints[i + 1].y);
var point2 = new Phaser.Geom.Point(vecA.y * mul + this.curvePoints[i + 1].x, -vecA.x * mul + this.curvePoints[i + 1].y);
pointArray.push([point1, point2]);
}
for (let i = 0; i < pointArray.length - 1; i++) {
//左上
arr.push(pointArray[i + 1][0].x, pointArray[i + 1][0].y);
//左下
arr.push(pointArray[i][0].x, pointArray[i][0].y);
//右下
arr.push(pointArray[i][1].x, pointArray[i][1].y);
//左上
arr.push(pointArray[i + 1][0].x, pointArray[i + 1][0].y);
//右下
arr.push(pointArray[i][1].x, pointArray[i][1].y);
//右上
arr.push(pointArray[i + 1][1].x, pointArray[i + 1][1].y);
}
return arr;
}
public CreateUVs(points: number): number[] {
let arr = [];
let uvincr = 1 / points;
for (let i = 0; i < points; i++) {
//左上
arr.push(0);
arr.push(uvincr * i);
//左下
arr.push(0);
arr.push(uvincr * (i + 1));
//右下
arr.push(1);
arr.push(uvincr * (i + 1));
//左上
arr.push(0);
arr.push(uvincr * i);
//右下
arr.push(1);
arr.push(uvincr * (i + 1));
//右上
arr.push(1);
arr.push(uvincr * i);
}
return arr;
}
public CreateCurve() {
//制御点を作成
this.tail = new Phaser.Math.Vector2(100, 100);
this.head = new Phaser.Math.Vector2(500, 500);
this.controlPoint1 = new Phaser.Math.Vector2(Phaser.Math.Between(this.tail.x, this.head.x), Phaser.Math.Between(this.tail.y, this.head.y));
this.controlPoint2 = new Phaser.Math.Vector2(Phaser.Math.Between(this.controlPoint1.x, this.head.x), Phaser.Math.Between(this.controlPoint1.x, this.head.y));
this.curve = new Phaser.Curves.CubicBezier(this.tail, this.controlPoint1, this.controlPoint2, this.head);
this.graphics = this.scene.add.graphics();
//各制御点にtweenを作成する
this.t1 = this.scene.tweens.add({
targets: this.tail,
x: this.controlPoint1.x,
y: this.controlPoint1.y,
duration: 5000,
repeat: -1
})
this.t2 = this.scene.tweens.add({
targets: this.controlPoint1,
x: this.controlPoint2.x,
y: this.controlPoint2.y,
duration: 5000,
repeat: -1
})
this.t3 = this.scene.tweens.add({
targets: this.controlPoint2,
x: this.head.x,
y: this.head.y,
duration: 5000,
repeat: -1
})
this.t4 = this.scene.tweens.add({
targets: this.head,
x: this.scene.input.x,
y: this.scene.input.y,
duration: 5000,
repeat: -1
})
}
update() {
//制御点のtweenをアップデートする
this.t1.updateTo("x", this.controlPoint1.x, true)
this.t1.updateTo("y", this.controlPoint1.y, true)
this.t2.updateTo("x", this.controlPoint2.x, true)
this.t2.updateTo("y", this.controlPoint2.y, true)
this.t3.updateTo("x", this.head.x, true)
this.t3.updateTo("y", this.head.y, true)
this.t4.updateTo("x", this.scene.input.x, true)
this.t4.updateTo("y", this.scene.input.y, true)
this.curvePoints = this.curve.getPoints(100);
this.mesh.vertices = Float32Array.from(this.UpdateVerts(5, this.points));
this.graphics.clear();
}
}
export class Beam extends Phaser.GameObjects.Container {
//グラフィックオブジェクトを用意
public graphics: Phaser.GameObjects.Graphics;
public mesh: Phaser.GameObjects.Mesh;
public curve: Phaser.Curves.CubicBezier;
public curvePoints: Phaser.Math.Vector2[] = [];
public drawDebug: boolean = false;
public points: number = 100;
//各ポイントの設定
public tail: Phaser.Math.Vector2;
public head: Phaser.Math.Vector2;
public controlPoint1: Phaser.Math.Vector2;
public controlPoint2: Phaser.Math.Vector2;
//ポイント用のtween
public tweens: Phaser.Tweens.Tween[] = [];
public t1: Phaser.Tweens.Tween
public t2: Phaser.Tweens.Tween
public t3: Phaser.Tweens.Tween
public t4: Phaser.Tweens.Tween
public startX: number;
public startY: number;
public targetX: number;
public targetY: number;
constructor(scene: Phaser.Scene, x?: number, y?: number, children?: Phaser.GameObjects.GameObject[]) {
super(scene, x, y, children);
}
Init(sx:number,sy:number,x: number, y: number) {
this.startX = sx;
this.startY = sy;
this.targetX = x;
this.targetY = y;
this.CreateCurve();
this.curvePoints = this.curve.getPoints(this.points);
//頂点配列の作成
let array = this.CreateVerts(5, this.points);
//uv配列の作成
let uv = this.CreateUVs(array.length / 12);
//頂点色を適当に変化
let colors = []
let c = Phaser.Math.Between(0x444444, 0xeeeeee)
for (let i = 0; i < array.length/2; i++) {
colors.push(c);
}
this.mesh = this.scene.make.mesh({
key: 'block',
x: 0,
y: 0,
vertices: array,
uv: uv,
colors: colors
});
this.mesh.setBlendMode(Phaser.BlendModes.ADD);
}
public CreateVerts(width: number, points: number): number[] {
let arr = [];
let pointArray: Phaser.Geom.Point[][] = new Array();
for (let i = 0; i < points; i++) {
let mul = width
let vecA = new Phaser.Math.Vector2(this.curvePoints[i + 1].x - this.curvePoints[i].x, this.curvePoints[i + 1].y - this.curvePoints[i].y).normalize();
var point1 = new Phaser.Geom.Point(-vecA.y * mul + this.curvePoints[i + 1].x, vecA.x * mul + this.curvePoints[i + 1].y);
var point2 = new Phaser.Geom.Point(vecA.y * mul + this.curvePoints[i + 1].x, -vecA.x * mul + this.curvePoints[i + 1].y);
pointArray.push([point1, point2]);
}
for (let i = 0; i < pointArray.length - 1; i++) {
//左上
arr.push(pointArray[i + 1][0].x, pointArray[i + 1][0].y);
//左下
arr.push(pointArray[i][0].x, pointArray[i][0].y);
//右下
arr.push(pointArray[i][1].x, pointArray[i][1].y);
//左上
arr.push(pointArray[i + 1][0].x, pointArray[i + 1][0].y);
//右下
arr.push(pointArray[i][1].x, pointArray[i][1].y);
//右上
arr.push(pointArray[i + 1][1].x, pointArray[i + 1][1].y);
}
return arr;
}
public UpdateVerts(width: number, points: number): number[] {
let arr = [];
let pointArray: Phaser.Geom.Point[][] = new Array();
for (let i = 0; i < points; i++) {
let mul = width
let vecA = new Phaser.Math.Vector2(this.curvePoints[i + 1].x - this.curvePoints[i].x, this.curvePoints[i + 1].y - this.curvePoints[i].y).normalize();
var point1 = new Phaser.Geom.Point(-vecA.y * mul + this.curvePoints[i + 1].x, vecA.x * mul + this.curvePoints[i + 1].y);
var point2 = new Phaser.Geom.Point(vecA.y * mul + this.curvePoints[i + 1].x, -vecA.x * mul + this.curvePoints[i + 1].y);
pointArray.push([point1, point2]);
}
for (let i = 0; i < pointArray.length - 1; i++) {
//左上
arr.push(pointArray[i + 1][0].x, pointArray[i + 1][0].y);
//左下
arr.push(pointArray[i][0].x, pointArray[i][0].y);
//右下
arr.push(pointArray[i][1].x, pointArray[i][1].y);
//左上
arr.push(pointArray[i + 1][0].x, pointArray[i + 1][0].y);
//右下
arr.push(pointArray[i][1].x, pointArray[i][1].y);
//右上
arr.push(pointArray[i + 1][1].x, pointArray[i + 1][1].y);
}
return arr;
}
public CreateUVs(points: number): number[] {
let arr = [];
let uvincr = 1 / points;
for (let i = 0; i < points; i++) {
//左上
arr.push(0);
arr.push(uvincr * i);
//左下
arr.push(0);
arr.push(uvincr * (i + 1));
//右下
arr.push(1);
arr.push(uvincr * (i + 1));
//左上
arr.push(0);
arr.push(uvincr * i);
//右下
arr.push(1);
arr.push(uvincr * (i + 1));
//右上
arr.push(1);
arr.push(uvincr * i);
}
return arr;
}
public CreateCurve() {
//制御点を作成
this.tail = new Phaser.Math.Vector2(this.startX, this.startY);
this.head = new Phaser.Math.Vector2(Phaser.Math.Between(this.startX , this.startX+50), Phaser.Math.Between(this.startY-100, this.startY+100));
this.controlPoint1 = new Phaser.Math.Vector2(Phaser.Math.Between(this.tail.x, this.head.x), Phaser.Math.Between(this.tail.y, this.head.y));
this.controlPoint2 = new Phaser.Math.Vector2(Phaser.Math.Between(this.controlPoint1.x, this.head.x), Phaser.Math.Between(this.controlPoint1.x, this.head.y));
this.curve = new Phaser.Curves.CubicBezier(this.tail, this.controlPoint1, this.controlPoint2, this.head);
this.graphics = this.scene.add.graphics();
//各制御点にtweenを作成する
this.t1 = this.scene.tweens.add({
targets: this.tail,
x: this.controlPoint1.x,
y: this.controlPoint1.y,
duration: 5000,
repeat: -1
})
this.t2 = this.scene.tweens.add({
targets: this.controlPoint1,
x: this.controlPoint2.x,
y: this.controlPoint2.y,
duration: 5000,
repeat: -1
})
this.t3 = this.scene.tweens.add({
targets: this.controlPoint2,
x: this.head.x,
y: this.head.y,
duration: 5000,
repeat: -1
})
this.t4 = this.scene.tweens.add({
targets: this.head,
x: this.scene.input.x,
y: this.scene.input.y,
duration: 5000,
repeat: -1
})
}
update() {
//制御点のtweenをアップデートする
this.t4.updateTo("x", this.targetX, true)
this.t4.updateTo("y", this.targetY, true)
this.t3.updateTo("x", this.head.x, true)
this.t3.updateTo("y", this.head.y, true)
this.t2.updateTo("x", this.controlPoint2.x, true)
this.t2.updateTo("y", this.controlPoint2.y, true)
this.t1.updateTo("x", this.controlPoint1.x, true)
this.t1.updateTo("y", this.controlPoint1.y, true)
this.curvePoints = this.curve.getPoints(100);
this.mesh.vertices = Float32Array.from(this.UpdateVerts(5, this.points));
this.graphics.clear();
//ビームが目標地点に達したらゲームオブジェクトを破棄
if (this.tail.x === this.targetX && this.tail.y === this.targetY) {
this.graphics.clear();
this.graphics.destroy();
this.mesh.destroy();
this.destroy();
}
}
}
export class MyScene1 extends Phaser.Scene {
//グラフィックオブジェクトを用意
public player: Phaser.GameObjects.Image;
public beamGroup: Phaser.GameObjects.Group;
constructor() {
super({ key: 'MyScene1', active: false });
}
preload() {
this.load.image("block","assets/images/block1.png")
this.load.image("particle1", "assets/images/particle1.png")
this.load.image("particle2", "assets/images/particle2.png")
}
create() {
this.player=this.add.image(40,this.sys.canvas.height/2,"block")
this.cameras.main.setBackgroundColor(0x000000);
let offscreen = new Phaser.Geom.Rectangle(-400, 0, 400, 600);
let screen = new Phaser.Geom.Rectangle(-400, 0, 1200, 600);
//パーティクルを作る
this.add.particles('particle2', [
{
emitZone: { source: offscreen },
deathZone: { source: screen, type: 'onLeave' },
frequency: 100,
speedX: { min: 80, max: 120 },
lifespan: 30000,
scale: { min: 0.1, max: 0.5 },
tint: 0x535678 ,
blendMode: 'ADD'
},
]);
this.add.particles('particle2', [
{
emitZone: { source: offscreen },
deathZone: { source: screen, type: 'onLeave' },
frequency: 150,
speedX: { min: 180, max: 220 },
lifespan: 30000,
scale: { min: 0.3, max: 0.7 },
tint: 0x332211 ,
blendMode: 'ADD'
},
]);
this.add.particles('particle1', [
{
emitZone: { source: offscreen },
deathZone: { source: screen, type: 'onLeave' },
frequency: 500,
quantity: 4,
speedX: { min: 280, max: 320 },
lifespan: 30000,
scale: { min: 0.3, max: 0.7 },
tint: 0x118811,
blendMode: 'ADD'
},
]);
this.beamGroup = this.add.group(null, {runChildUpdate:true})
}
update() {
if (this.input.activePointer.isDown) {
let beam = new Beam(this);
beam.Init(this.player.x, this.player.y, this.input.activePointer.x, this.input.activePointer.y)
this.beamGroup.add(beam)
}
}
}
}
Phaser 3 : リボントレイルを作る③ tween.updateToを使ってメッシュをアニメーションさせる
前回に引き続きリボントレイルエフェクトを作っていきます。
パスの制御点を渡し変形できるようにする
パスの制御点を操作してリアルタイムにパスを変形できるようにしたいと思います。
公式のサンプル内にドラッグによる変形のサンプルが複数あります。
パスを変形するためにははじめにVector2オブジェクトを渡す必要があるようで、作成後のパスから制御点を取得することはできないようです。
始点、終点、二つの中間制御点を設定してcubicBazierを作成します。
//各ポイントの設定
public tail: Phaser.Math.Vector2;
public head: Phaser.Math.Vector2;
public controlPoint1: Phaser.Math.Vector2;
public controlPoint2: Phaser.Math.Vector2;

public CreateCurve() {
    //制御点を作成
    this.tail = new Phaser.Math.Vector2(100, 100);
    this.head = new Phaser.Math.Vector2(500, 500);
    this.controlPoint1 = new Phaser.Math.Vector2(Phaser.Math.Between(this.tail.x, this.head.x), Phaser.Math.Between(this.tail.y, this.head.y));
    this.controlPoint2 = new Phaser.Math.Vector2(Phaser.Math.Between(this.controlPoint1.x, this.head.x), Phaser.Math.Between(this.controlPoint1.x, this.head.y));

    this.curve = new Phaser.Curves.CubicBezier(this.tail, this.controlPoint1, this.controlPoint2, this.head);
    this.graphics = this.scene.add.graphics();

}
制御点にtweenを設定する
次は各制御点にtweenを設定します。
ひとまずheadをめがけて各制御点を連動させてtweenさせるようにしてみました。
//ポイント用のtween
public tweens: Phaser.Tweens.Tween[]=[];
public t1: Phaser.Tweens.Tween
public t2: Phaser.Tweens.Tween
public t3: Phaser.Tweens.Tween
public t4: Phaser.Tweens.Tween
~~~
//各制御点にtweenを作成する
this.t1 = this.scene.tweens.add({
    targets: this.tail,
    x: this.controlPoint1.x,
    y: this.controlPoint1.y,
    duration: 5000,
    repeat: -1
})

this.t2 = this.scene.tweens.add({
    targets: this.controlPoint1,
    x: this.controlPoint2.x,
    y: this.controlPoint2.y,
    duration: 5000,
    repeat: -1
})

this.t3 = this.scene.tweens.add({
    targets: this.controlPoint2,
    x: this.head.x,
    y: this.head.y,
    duration: 5000,
    repeat: -1
})
updateにメッシュ変形用の処理を記述します。
update() {
    //制御点のtweenをアップデートする

    this.curvePoints = this.curve.getPoints(100);

    this.mesh.vertices = Float32Array.from(this.UpdateVerts(5, this.points));
}
実行結果がこちらです。
 アニメーションの質はともかく、パスのtweenに沿ってメッシュが変形しているのがわかると思います。
tween.updateToを使う
tweenは作成時の値を参照するので、「制御点が次の制御点をめがけてtweenする」といった処理を書いた場合、制御点のtween中の座標めがけてtweenしてくれる、といった挙動にはなりません。
tween.updateToを用いれば、tweenの目標値をupdateで更新することができます。
update() {
    //制御点のtweenをアップデートする
    this.t1.updateTo("x", this.controlPoint1.x, true)
    this.t1.updateTo("y", this.controlPoint1.y, true)

    this.t2.updateTo("x", this.controlPoint2.x, true)
    this.t2.updateTo("y", this.controlPoint2.y, true)

    this.t3.updateTo("x", this.head.x, true)
    this.t3.updateTo("y", this.head.y, true)

    this.t4.updateTo("x", this.scene.input.x, true)
    this.t4.updateTo("y", this.scene.input.y, true)

    this.curvePoints = this.curve.getPoints(100);

    this.mesh.vertices = Float32Array.from(this.UpdateVerts(5, this.points));
}
 マウスの移動に追従してメッシュが軌跡を描いているのがわかると思います。
しかしなめらかなトレイルの描き方の実装にはもう少し調査が必要そうです。
今回のソース全文はこちらです。
/// <reference path="../app.ts" />

namespace MyGame {

    interface XY {
        x: number;
        y: number;
    }

    export class Trail extends Phaser.GameObjects.Container {

        //グラフィックオブジェクトを用意
        public graphics: Phaser.GameObjects.Graphics;
        public mesh: Phaser.GameObjects.Mesh;

        public curve: Phaser.Curves.CubicBezier;

        public curvePoints: Phaser.Math.Vector2[] = [];

        public drawDebug: boolean = false;

        public points: number = 100;

//各ポイントの設定
public tail: Phaser.Math.Vector2;
public head: Phaser.Math.Vector2;
public controlPoint1: Phaser.Math.Vector2;
public controlPoint2: Phaser.Math.Vector2;

        //ポイント用のtween
        public tweens: Phaser.Tweens.Tween[]=[];
        public t1: Phaser.Tweens.Tween
        public t2: Phaser.Tweens.Tween
        public t3: Phaser.Tweens.Tween
        public t4: Phaser.Tweens.Tween

        constructor(scene: Phaser.Scene, x?: number, y?: number, children?: Phaser.GameObjects.GameObject[]) {
            super(scene, x, y, children);

        }

        Init() {

            this.CreateCurve();

            this.curvePoints = this.curve.getPoints(this.points);

            //頂点配列の作成
            let array = this.CreateVerts(5, this.points);

            //uv配列の作成
            let uv = this.CreateUVs(array.length / 12);

            this.mesh = this.scene.make.mesh({
                key: 'block',
                x: 0,
                y: 0,
                vertices: array,
                uv: uv,
            });


        }

        public CreateVerts(width: number, points: number): number[] {
            let arr = [];

            let pointArray: Phaser.Geom.Point[][] = new Array();

            for (let i = 0; i < points; i++) {
                let mul = width
                let vecA = new Phaser.Math.Vector2(this.curvePoints[i + 1].x - this.curvePoints[i].x, this.curvePoints[i + 1].y - this.curvePoints[i].y).normalize();

                var point1 = new Phaser.Geom.Point(-vecA.y * mul + this.curvePoints[i + 1].x, vecA.x * mul + this.curvePoints[i + 1].y);
                var point2 = new Phaser.Geom.Point(vecA.y * mul + this.curvePoints[i + 1].x, -vecA.x * mul + this.curvePoints[i + 1].y);

                pointArray.push([point1, point2]);

            }

            for (let i = 0; i < pointArray.length - 1; i++) {


                //左上
                arr.push(pointArray[i + 1][0].x, pointArray[i + 1][0].y);

                //左下
                arr.push(pointArray[i][0].x, pointArray[i][0].y);

                //右下
                arr.push(pointArray[i][1].x, pointArray[i][1].y);

                //左上
                arr.push(pointArray[i + 1][0].x, pointArray[i + 1][0].y);

                //右下
                arr.push(pointArray[i][1].x, pointArray[i][1].y);

                //右上
                arr.push(pointArray[i + 1][1].x, pointArray[i + 1][1].y);

            }


            return arr;
        }

        public UpdateVerts(width: number, points: number): number[] {
            let arr = [];

            let pointArray: Phaser.Geom.Point[][] = new Array();

            for (let i = 0; i < points; i++) {
                let mul = width
                let vecA = new Phaser.Math.Vector2(this.curvePoints[i + 1].x - this.curvePoints[i].x, this.curvePoints[i + 1].y - this.curvePoints[i].y).normalize();

                var point1 = new Phaser.Geom.Point(-vecA.y * mul + this.curvePoints[i + 1].x, vecA.x * mul + this.curvePoints[i + 1].y);
                var point2 = new Phaser.Geom.Point(vecA.y * mul + this.curvePoints[i + 1].x, -vecA.x * mul + this.curvePoints[i + 1].y);


                pointArray.push([point1, point2]);

            }

            for (let i = 0; i < pointArray.length - 1; i++) {


                //左上
                arr.push(pointArray[i + 1][0].x, pointArray[i + 1][0].y);

                //左下
                arr.push(pointArray[i][0].x, pointArray[i][0].y);

                //右下
                arr.push(pointArray[i][1].x, pointArray[i][1].y);

                //左上
                arr.push(pointArray[i + 1][0].x, pointArray[i + 1][0].y);

                //右下
                arr.push(pointArray[i][1].x, pointArray[i][1].y);

                //右上
                arr.push(pointArray[i + 1][1].x, pointArray[i + 1][1].y);

            }


            return arr;
        }

        public CreateUVs(points: number): number[] {
            let arr = [];
            let uvincr = 1 / points;

            for (let i = 0; i < points; i++) {
                //左上
                arr.push(0);
                arr.push(uvincr * i);

                //左下
                arr.push(0);
                arr.push(uvincr * (i + 1));

                //右下
                arr.push(1);
                arr.push(uvincr * (i + 1));

                //左上
                arr.push(0);
                arr.push(uvincr * i);

                //右下
                arr.push(1);
                arr.push(uvincr * (i + 1));

                //右上
                arr.push(1);
                arr.push(uvincr * i);
            }


            return arr;
        }

        public CreateCurve() {
            //制御点を作成
            this.tail = new Phaser.Math.Vector2(100, 100);
            this.head = new Phaser.Math.Vector2(500, 500);
            this.controlPoint1 = new Phaser.Math.Vector2(Phaser.Math.Between(this.tail.x, this.head.x), Phaser.Math.Between(this.tail.y, this.head.y));
            this.controlPoint2 = new Phaser.Math.Vector2(Phaser.Math.Between(this.controlPoint1.x, this.head.x), Phaser.Math.Between(this.controlPoint1.x, this.head.y));

            this.curve = new Phaser.Curves.CubicBezier(this.tail, this.controlPoint1, this.controlPoint2, this.head);
            this.graphics = this.scene.add.graphics();


            //各制御点にtweenを作成する
            this.t1 = this.scene.tweens.add({
                targets: this.tail,
                x: this.controlPoint1.x,
                y: this.controlPoint1.y,
                duration: 5000,
                repeat: -1
            })

            this.t2 = this.scene.tweens.add({
                targets: this.controlPoint1,
                x: this.controlPoint2.x,
                y: this.controlPoint2.y,
                duration: 5000,
                repeat: -1
            })

            this.t3 = this.scene.tweens.add({
                targets: this.controlPoint2,
                x: this.head.x,
                y: this.head.y,
                duration: 5000,
                repeat: -1
            })

            this.t4 = this.scene.tweens.add({
                targets: this.head,
                x: this.scene.input.x,
                y: this.scene.input.y,
                duration: 5000,
                repeat: -1
            })


        }

        update() {
            //制御点のtweenをアップデートする
            this.t1.updateTo("x", this.controlPoint1.x, true)
            this.t1.updateTo("y", this.controlPoint1.y, true)

            this.t2.updateTo("x", this.controlPoint2.x, true)
            this.t2.updateTo("y", this.controlPoint2.y, true)

            this.t3.updateTo("x", this.head.x, true)
            this.t3.updateTo("y", this.head.y, true)

            this.t4.updateTo("x", this.scene.input.x, true)
            this.t4.updateTo("y", this.scene.input.y, true)

            this.curvePoints = this.curve.getPoints(100);

            this.mesh.vertices = Float32Array.from(this.UpdateVerts(5, this.points));
        }

    }

    export class MyScene1 extends Phaser.Scene {

        //グラフィックオブジェクトを用意
        public trail: Trail;

        constructor() {
            super({ key: 'MyScene1', active: false });
        }

        preload() {
            this.load.image("block","assets/images/block.png")
        }

        create() {
            this.trail = new Trail(this);
            this.trail.Init();
            this.cameras.main.setBackgroundColor(0xffffff);
            this.add.existing(this.trail);
            this.add.group(this.trail, { runChildUpdate: true })

        }
    }
}
Phaser 3 : リボントレイルを作る② パスに沿ったメッシュを作成する
前回に引き続きリボントレイルを作成します、
前回は基本的なメッシュを作成したので、今回はパスに沿ったメッシュを作成したいと思います。
gpnotes.hatenablog.jp
Phaser.Curveでベジェ曲線を作成する
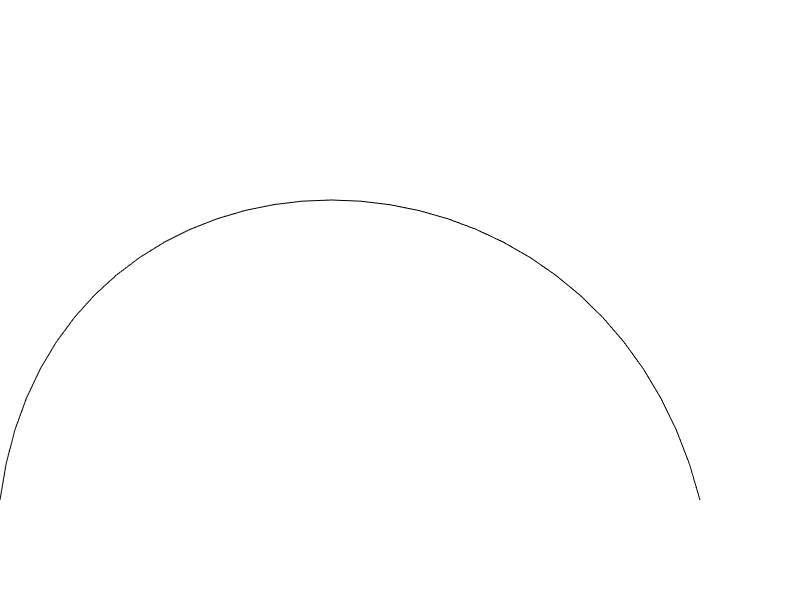
まずはPhaser.Curveでベジェ曲線を作成します。
CubicBezierで制御点を二つもつベジェ曲線を作成することができます。
//ベジェ曲線
public curve: Phaser.Curves.CubicBezier;

public CreateCurve() {
    //ベジエ曲線を作成
    var startPoint = new Phaser.Math.Vector2(0, 500);
    var controlPoint1 = new Phaser.Math.Vector2(50, 100);
    var controlPoint2 = new Phaser.Math.Vector2(600, 100);
    var endPoint = new Phaser.Math.Vector2(700, 500);

    this.curve = new Phaser.Curves.CubicBezier(startPoint, controlPoint1, controlPoint2, endPoint);

    //カーブを描画
    this.graphics = this.add.graphics();
    this.curve.draw(this.graphics);
}
カーブのポイントと次ポイントのベクトルに直交するベクトルを作る
次にパスからメッシュの各頂点を計算します。
curve.getPoints()でパスを引数で分割した座標配列を取得することがでじゅます。
this.curvePoints = this.curve.getPoints(100);
この座標配列curvePointsを使用して頂点配列を作成していきます。
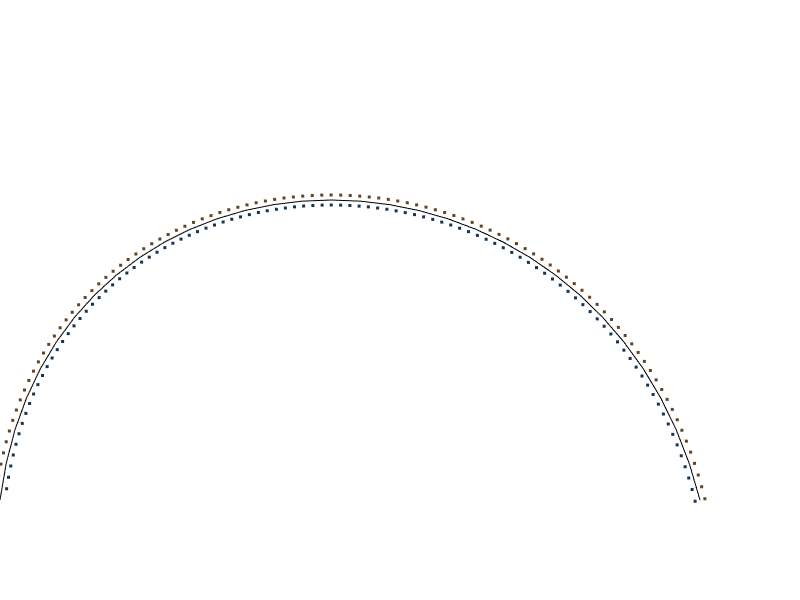
点A(x1 .y1)と点B(x2 , y2)を結ぶ直線に直交するベクトルを作成し頂点として使用すればパスを中心線としたメッシュを作れそうです。
まずは点Aと点Bを結ぶ直線を作成します。
利用しやすくするためにnormalizeで単位ベクトル化しています。
let vecA = new Phaser.Math.Vector2(this.curvePoints[i + 1].x - this.curvePoints[i].x, this.curvePoints[i + 1].y - this.curvePoints[i].y).normalize();
このベクトルに直交するベクトルの端点は
(-vecA.y , vecA.x)
(vecA.y ,-vecA.x)
でそれぞれ得ることができます。
fillpintsで点を描画してみるとパスに沿った点が作成されているのがわかります。
var point1 = new Phaser.Geom.Point(-vecA.y*mul + this.curvePoints[i + 1].x, vecA.x*mul+this.curvePoints[i + 1].y );
var point2 = new Phaser.Geom.Point(vecA.y * mul + this.curvePoints[i + 1].x, -vecA.x*mul+this.curvePoints[i + 1].y );

//点の描画
this.graphics.fillStyle(0x123456);
this.graphics.fillPointShape(point1, 3);
this.graphics.fillStyle(0x654321);
this.graphics.fillPointShape(point2, 3);
上の計算を基に頂点配列を作成し、カーブに沿った頂点からverticesを作成するようにCreateVertsを改造してみました。
public CreateVerts(width:number,points:number):number[] {
    let arr = [];

    let pointArray:Phaser.Geom.Point[][] = new Array();

    for (let i = 0; i < points; i++) {
        let mul = width
        let vecA = new Phaser.Math.Vector2(this.curvePoints[i + 1].x - this.curvePoints[i].x, this.curvePoints[i + 1].y - this.curvePoints[i].y).normalize();

        var point1 = new Phaser.Geom.Point(-vecA.y*mul + this.curvePoints[i + 1].x, vecA.x*mul+this.curvePoints[i + 1].y );
        var point2 = new Phaser.Geom.Point(vecA.y * mul + this.curvePoints[i + 1].x, -vecA.x * mul + this.curvePoints[i + 1].y);

        //点の描画
        this.graphics.fillStyle(0x123456);
        this.graphics.fillPointShape(point1, 3);
        this.graphics.fillStyle(0x654321);
        this.graphics.fillPointShape(point2, 3);

        pointArray.push([point1,point2]);

    }

    for (let i = 0; i < pointArray.length-1 ; i++) {


        //左上
        arr.push(pointArray[i + 1][0].x, pointArray[i + 1][0].y);

        //左下
        arr.push(pointArray[i][0].x, pointArray[i][0].y);

        //右下
        arr.push(pointArray[i][1].x, pointArray[i][1].y);

        //左上
        arr.push(pointArray[i + 1][0].x, pointArray[i + 1][0].y);

        //右下
        arr.push(pointArray[i][1].x, pointArray[i][1].y);

        //右上
        arr.push(pointArray[i + 1][1].x, pointArray[i + 1][1].y);

    }


    return arr;
}
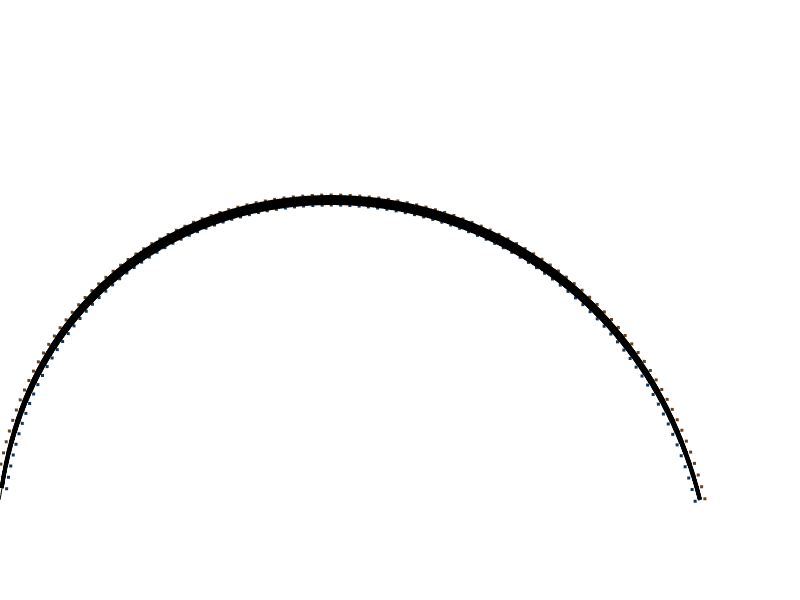
パスに沿ってテクスチャが張り付けられているのがわかります。
updateでuvをアニメーションさせることもできます。
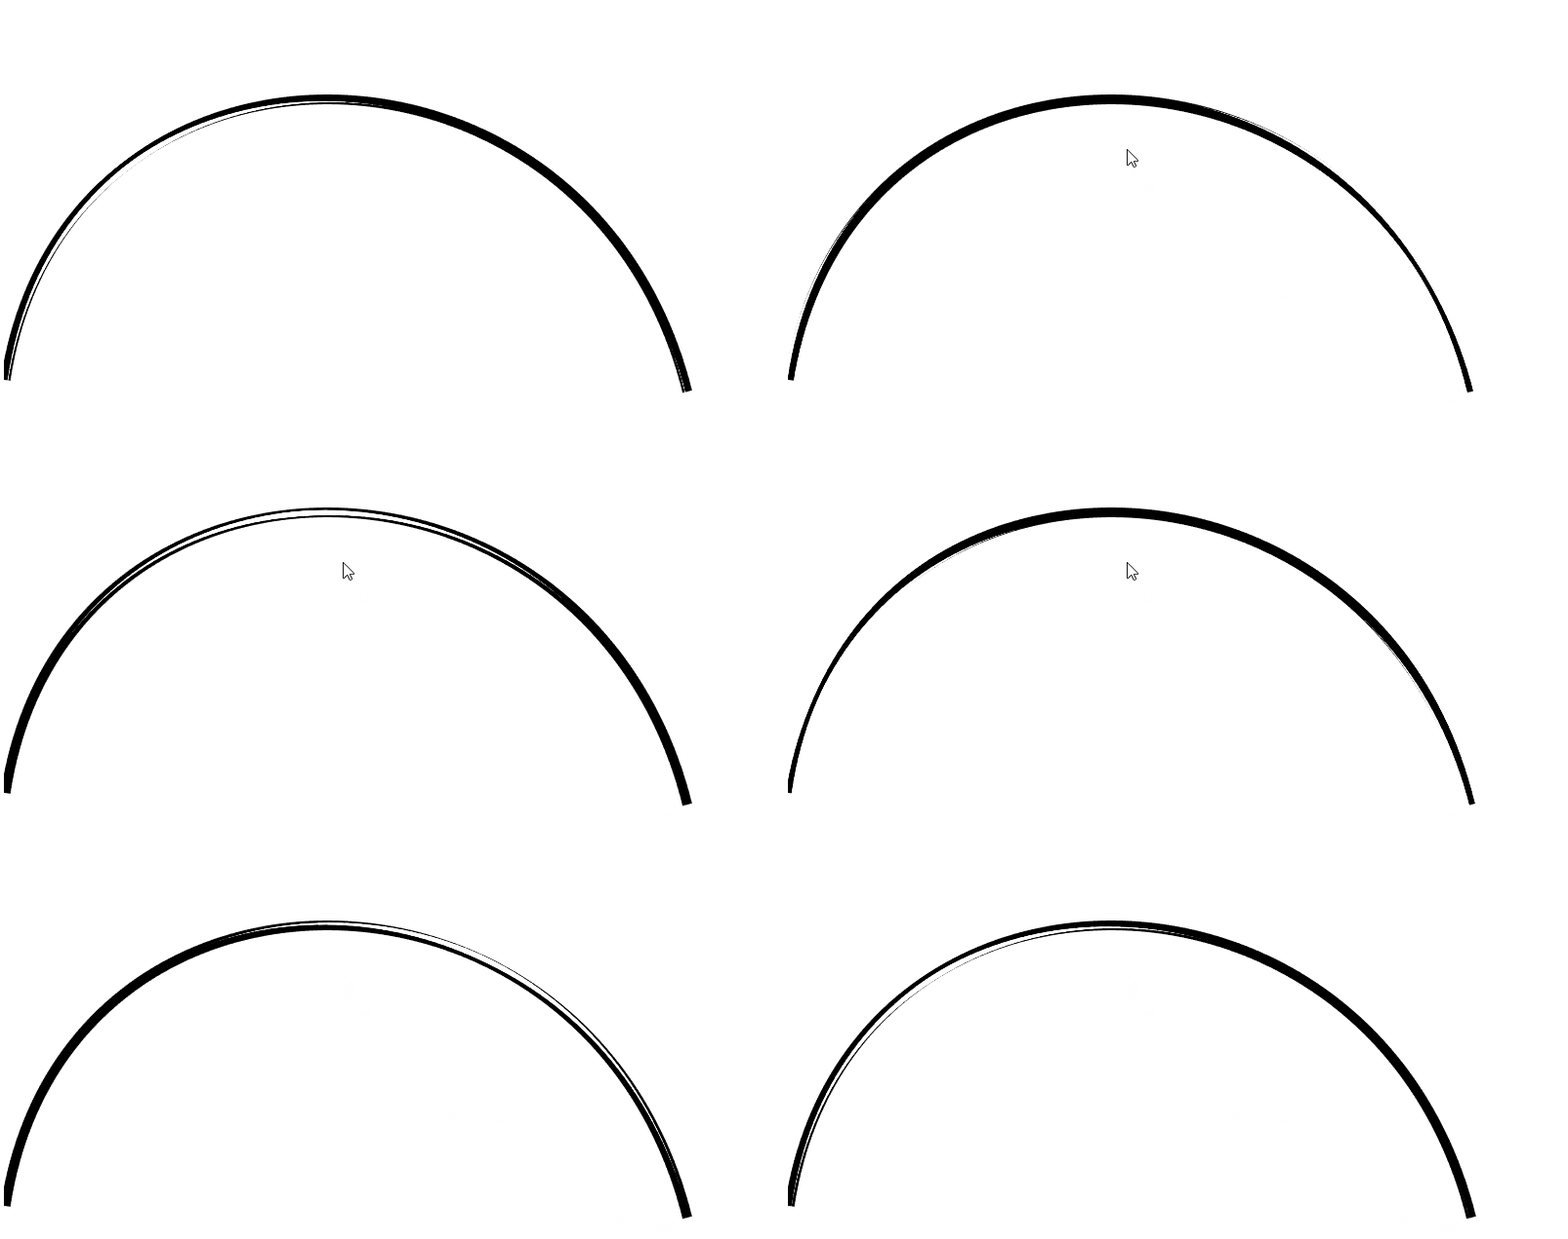
これでパスに沿ったメッシュの作成ができました。
次回からはリアルタイムなパスの変形に合わせてメッシュをアニメーションしてみたいと思います。
今回のソース全文はこちらです。
/// <reference path="../app.ts" />

namespace MyGame {

    interface XY {
        x: number;
        y: number;
    }

    export class MyScene1 extends Phaser.Scene {

        //グラフィックオブジェクトを用意
        public graphics: Phaser.GameObjects.Graphics;
        public mesh: Phaser.GameObjects.Mesh;

        public curve: Phaser.Curves.CubicBezier;

        public curvePoints: Phaser.Math.Vector2[]=[];

        public drawDebug: boolean = false;

        constructor() {
            super({ key: 'MyScene1', active: false });
        }

        preload() {
            this.load.image("block","assets/images/block.png")
        }

        create() {

            this.cameras.main.setBackgroundColor(0xffffff);

            this.CreateCurve();

            this.curvePoints = this.curve.getPoints(100);

            //ポリゴンの分割精度
            let points = 100;

            //頂点配列の作成
            let array = this.CreateVerts(5, points);

            //uv配列の作成
            let uv = this.CreateUVs(array.length/12);
            /*
            //頂点色を適当に変化
            let colors = []
            for (let i = 0; i < points; i++) {
                colors.push(i);
                colors.push(i * 2);
                colors.push(i * 2);
                colors.push(i);
                colors.push(i * 2);
                colors.push(i);
            }
            */
            this.mesh = this.make.mesh({
                key: 'block',
                x: 0,
                y: 0,
                vertices: array,
                uv: uv,
            });

        }

        public CreateVerts(width:number,points:number):number[] {
            let arr = [];

            let pointArray:Phaser.Geom.Point[][] = new Array();

            for (let i = 0; i < points; i++) {
                let mul = width
                let vecA = new Phaser.Math.Vector2(this.curvePoints[i + 1].x - this.curvePoints[i].x, this.curvePoints[i + 1].y - this.curvePoints[i].y).normalize();

                var point1 = new Phaser.Geom.Point(-vecA.y*mul + this.curvePoints[i + 1].x, vecA.x*mul+this.curvePoints[i + 1].y );
                var point2 = new Phaser.Geom.Point(vecA.y * mul + this.curvePoints[i + 1].x, -vecA.x * mul + this.curvePoints[i + 1].y);

                if (this.drawDebug) {
                    //点の描画
                    this.graphics.fillStyle(0x123456);
                    this.graphics.fillPointShape(point1, 3);
                    this.graphics.fillStyle(0x654321);
                    this.graphics.fillPointShape(point2, 3);

                }

                pointArray.push([point1,point2]);

            }

            for (let i = 0; i < pointArray.length-1 ; i++) {


                //左上
                arr.push(pointArray[i + 1][0].x, pointArray[i + 1][0].y);

                //左下
                arr.push(pointArray[i][0].x, pointArray[i][0].y);

                //右下
                arr.push(pointArray[i][1].x, pointArray[i][1].y);

                //左上
                arr.push(pointArray[i + 1][0].x, pointArray[i + 1][0].y);

                //右下
                arr.push(pointArray[i][1].x, pointArray[i][1].y);

                //右上
                arr.push(pointArray[i + 1][1].x, pointArray[i + 1][1].y);

            }


            return arr;
        }

        public CreateUVs(points: number): number[] {
            let arr = [];
            let uvincr = 1 / points;

            for (let i = 0; i < points; i++) {
                //左上
                arr.push(0);
                arr.push(uvincr * i);

                //左下
                arr.push(0);
                arr.push(uvincr * (i +1));

                //右下
                arr.push(1);
                arr.push(uvincr * (i+1));

                //左上
                arr.push(0);
                arr.push(uvincr * i);

                //右下
                arr.push(1);
                arr.push(uvincr * (i+1));

                //右上
                arr.push(1);
                arr.push(uvincr * i);
            }


            return arr;
        }

        public CreateCurve() {
            //ベジエ曲線を作成
            var startPoint = new Phaser.Math.Vector2(0, 500);
            var controlPoint1 = new Phaser.Math.Vector2(50, 100);
            var controlPoint2 = new Phaser.Math.Vector2(600, 100);
            var endPoint = new Phaser.Math.Vector2(700, 500);

            this.curve = new Phaser.Curves.CubicBezier(startPoint, controlPoint1, controlPoint2, endPoint);
            this.graphics = this.add.graphics();
            if (this.drawDebug) {

                this.curve.draw(this.graphics);
            }
            }

        update() {
            for (let i = 0; i < this.mesh.uv.length;i++) {
                    this.mesh.uv[i] += 0.01;
            }
        }
    }
}
Phaser 3 : リボントレイルを作る① Meshを使う
今回からはトレイルエフェクトを作ってみたいと思います。
トレイルはオブジェクトが動いた際の軌跡を描くエフェクトです。
もっとも簡単なトレイルの実装はスプライト等表示物そのものを複製しながらアルファ値を変えるなどして通過点上に配置するやりかたですが、Phaser3ではmeshを扱えるようになったのでポリゴンで尾を引くようなトレイルを作成してみたいと思います。
リボントレイルとも呼ばれるものですね。
meshを使う
まずは以前作ったブロックオブジェクトを基として単純なmeshを描いてみようと思います。
meshの基本構造を知る
meshはscene.make.meshで作成することができます。
optionのkeyでテクスチャを指定し、verticesとuvで頂点配列とuv配列をそれぞれ指定します。
this.mesh = this.make.mesh({
    key: 'block',
    x: 0,
    y: 0,
    vertices: array,
    uv: uv,
    colors:colors
});
頂点を作成する
まずはmeshに渡すための頂点配列を作成します。
meshはポリゴンの集合体で、順序通りに作成しないと描画されません。
phaser3では右回りにポリゴンを作らないと裏向きと判断され描画されないので、右回りでポリゴンを作っていきます。
公式サンプルにわかりやすい例が載っていたので引用します。
//  A          A----C
//  |\         \  2 |
//  | \         \   |
//  |  \         \  |
//  | 1 \         \ |
//  |    \         \|
//  B----C          B
//  The mesh x/y defines the center of the mesh.
//  Vertice coordinates are relative to that.
要するに一枚の矩形を描画するためには
左上(x , y)
左下(x , y)
右下(x , y)
左上(x , y)
右下(x , y)
右上(x , y)
の順に頂点を追加すればいい、ということになると思います。
始点のxy座標と終点のxy座標を指定し、指定された数の矩形を作成するCreateVertsを作成しました。
interface XY {
    x: number;
    y: number;
}

public CreateVerts(start: XY, end: XY,width:number,points:number):number[] {
    let arr = [];
    let yincr = (end.y - start.y )/ points;


    for (let i = 0; i < points; i++) {

        //左上
        arr.push(start.x - width / 2 + Math.sin(i),start.y + yincr*i );
        //左下
        arr.push(start.x - width / 2 + Math.sin(i), start.y + yincr * (i + 1));
        //右下
        arr.push(start.x + width / 2 + Math.sin(i), start.y + yincr * (i + 1));

        //左上
        arr.push(start.x - width / 2 + Math.sin(i), start.y + yincr * i);
        //右下
        arr.push(start.x + width / 2 + Math.sin(i), start.y + yincr * (i + 1));
        //右上
        arr.push(start.x + width / 2 + Math.sin(i), start.y + yincr * i);
    }

    return arr;
}
uvを作成する
次にuvを作成します。
uvとはテクスチャ内の座標を指定するもので、vertecesと紐づけられます。
uが横方向、vが縦方向を指し、0~1までの範囲を指定することで「各頂点がテクスチャのどのあたりにいるか」を指定することができます。
たとえば
vertices[0] = 100,vertices[1] = 100,
uv[0] = 0.1 , uv[1] =0.1
であれば最初の頂点(100,100)は指定されたテクスチャの左上から1/10の位置を参照する、ということです。
u:0 v:0は左上、u:1 v:1は右下を指します。
uvもverticesと同じ順番で作成する必要がありますので、createverticesと同じ要領でcreateUvsを作成します。
public CreateUVs(points: number): number[] {
    let arr = [];
    let uvincr = 1 / points;

    for (let i = 0; i < points; i++) {
        //左上
        arr.push(0);
        arr.push(uvincr * i);

        //左下
        arr.push(0);
        arr.push(uvincr * (i +1));

        //右下
        arr.push(1);
        arr.push(uvincr * (i+1));

        //左上
        arr.push(0);
        arr.push(uvincr * i);

        //右下
        arr.push(1);
        arr.push(uvincr * (i+1));

        //右上
        arr.push(1);
        arr.push(uvincr * i);
    }


    return arr;
}
上記の実行結果がこちらです。
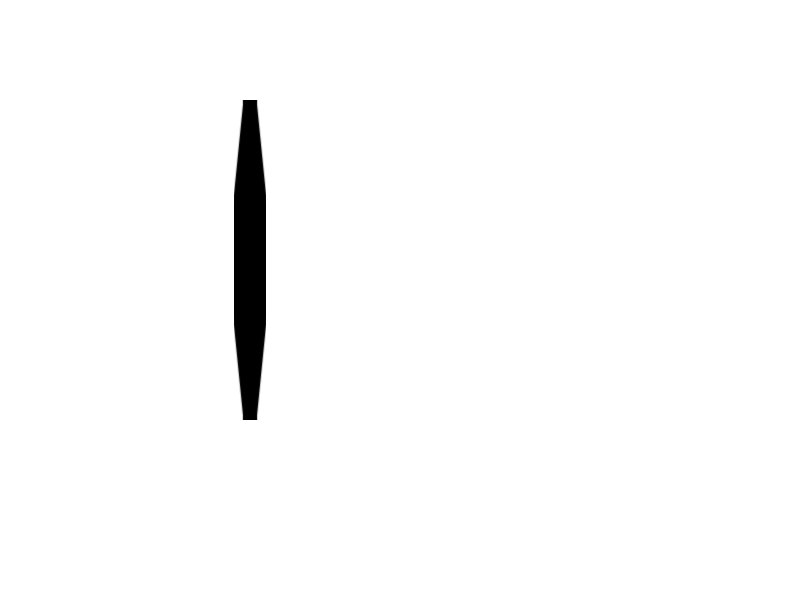
頂点色を変更する
以上では普通にスプライトを引き延ばして作ったものと変わりがないように見えるので、各頂点のx座標を揺らしてみました。
public CreateVerts(start: XY, end: XY,width:number,points:number):number[] {
    let arr = [];
    let yincr = (end.y - start.y )/ points;


    for (let i = 0; i < points; i++) {

        //左上
        arr.push(start.x - width / 2 + Math.sin(i),start.y + yincr*i );
        //左下
        arr.push(start.x - width / 2 + Math.sin(i), start.y + yincr * (i + 1));
        //右下
        arr.push(start.x + width / 2 + Math.sin(i), start.y + yincr * (i + 1));

        //左上
        arr.push(start.x - width / 2 + Math.sin(i), start.y + yincr * i);
        //右下
        arr.push(start.x + width / 2 + Math.sin(i), start.y + yincr * (i + 1));
        //右上
        arr.push(start.x + width / 2 + Math.sin(i), start.y + yincr * i);
    }

    return arr;
}
さらに頂点色を設定して各ポリゴンの色を変えてみます。
//頂点色を適当に変化
let colors = []
for (let i = 0; i < points; i++) {
    colors.push(i);
    colors.push(i*2);
    colors.push(i*2);
    colors.push(i);
    colors.push(i*2);
    colors.push(i);
}

this.mesh = this.make.mesh({
    key: 'block',
    x: 0,
    y: 0,
    vertices: array,
    uv: uv,
    colors:colors
});
以上の実行結果がこちらです。
各頂点のx座標が波打っているので、1枚のスプライトではなくポリゴンが集まってできているものだとわかると思います。
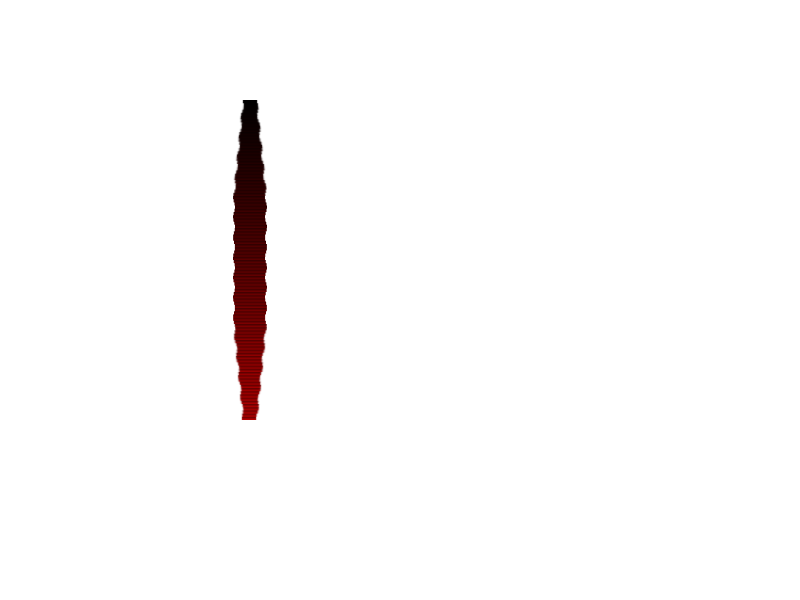
次回からはこのmeshをアニメーションさせる方法を考えていきたいと思います。
今回のソース全文はこちらです。
/// <reference path="../app.ts" />

namespace MyGame {

    interface XY {
        x: number;
        y: number;
    }

    export class MyScene1 extends Phaser.Scene {
        //グラフィックオブジェクトを用意
        public graphics: Phaser.GameObjects.Graphics;
        public mesh: Phaser.GameObjects.Mesh;
        constructor() {
            super({ key: 'MyScene1', active: false });
        }

        preload() {
            this.load.image("block","assets/images/block1.png")
        }

        create() {

            this.cameras.main.setBackgroundColor(0xffffff);

            //ポリゴンの分割精度
            let points = 100;

            //頂点配列の作成
            let array = this.CreateVerts({ x: 250, y: 100 }, { x: 250, y: 420 }, 32, points);

            //uv配列の作成
            let uv = this.CreateUVs(points);

            //頂点色を適当に変化
            let colors = []
            for (let i = 0; i < points; i++) {
                colors.push(i);
                colors.push(i*2);
                colors.push(i*2);
                colors.push(i);
                colors.push(i*2);
                colors.push(i);
            }

            this.mesh = this.make.mesh({
                key: 'block',
                x: 0,
                y: 0,
                vertices: array,
                uv: uv,
                colors:colors
            });


        }

        public CreateVerts(start: XY, end: XY,width:number,points:number):number[] {
            let arr = [];
            let yincr = (end.y - start.y )/ points;


            for (let i = 0; i < points; i++) {

                //左上
                arr.push(start.x - width / 2 + Math.sin(i),start.y + yincr*i );
                //左下
                arr.push(start.x - width / 2 + Math.sin(i), start.y + yincr * (i + 1));
                //右下
                arr.push(start.x + width / 2 + Math.sin(i), start.y + yincr * (i + 1));

                //左上
                arr.push(start.x - width / 2 + Math.sin(i), start.y + yincr * i);
                //右下
                arr.push(start.x + width / 2 + Math.sin(i), start.y + yincr * (i + 1));
                //右上
                arr.push(start.x + width / 2 + Math.sin(i), start.y + yincr * i);
            }

            return arr;
        }

        public CreateUVs(points: number): number[] {
            let arr = [];
            let uvincr = 1 / points;

            for (let i = 0; i < points; i++) {
                //左上
                arr.push(0);
                arr.push(uvincr * i);

                //左下
                arr.push(0);
                arr.push(uvincr * (i +1));

                //右下
                arr.push(1);
                arr.push(uvincr * (i+1));

                //左上
                arr.push(0);
                arr.push(uvincr * i);

                //右下
                arr.push(1);
                arr.push(uvincr * (i+1));

                //右上
                arr.push(1);
                arr.push(uvincr * i);
            }


            return arr;
        }

        update() {

        }
    }
}
Phaser3 : Web Speech Apiを用いた読み上げ神経衰弱
今回はWeb Speech APIを用いた合成音声の読み上げをしてみます。
合成音声の読み上げにはSpeechSynthesisとSpeechSynthesisUtteranceの設定が最低限必要になります。
Web Speech APIはPhaserの機能ではないので、ブラウザから取得する必要があります。
SpeechSynthesisUtterrance.langで読み上げるテキストのロケールを選択することができます。
以上でWebSpeechSynthesisの設定ができました。
次はクリックされたときに音声を呼び出すタイルオブジェクトSpeechTileを作成します。
SpeechTileクラスに初期設定用の関数Initを作成します。
クリック時にはMyScene1のSpeechと判定用のJudge関数を呼び出しています。 MyScene1に戻り、判定用の配列と関数を作成します。
以上で簡単な読み上げ式の神経衰弱ができました。
Web Speech APIはPhaser3独自の機能というわけではないのですが、Phaser3と組み合わせて使うことができるので、試しにこちらを使って読み上げ式の神経衰弱を作ってみようと思います。

SpeechSynthesisを作る
SpeechSynsethisで読み上げ用を行うオブジェクトを作成し、SpeechSynthesisUtteranceは読み上げの設定をするというようなイメージです。
//テキスト読み上げ用のSpeechSynthesisを作成
protected Voice: SpeechSynthesis;
protected VoiceText: SpeechSynthesisUtterance;
create(){
~~
//PhaserではなくブラウザからSpeechSynthesisを取得
this.Voice = (<any>window).speechSynthesis;
this.VoiceText = new (<any>window).SpeechSynthesisUtterance("");

~~
}
"ja-JP"を指定すれば日本語で読み上げることができます。//読み上げる声のロケールを選択
this.VoiceText.lang = "ja-JP";
あとはSpeechSynthesisUtterance.textで読み上げるテキストを設定し、SpeechSynthesis.speakで設定したテキストを読み上げることができます。//音声の再生
public Speech(str: string) {
this.VoiceText.text = str;
this.Voice.speak(this.VoiceText);
}
graphicsに当たり判定をつける
SpeechTileはcontainerを拡張して作ることにします。export class SpeechTile extends Phaser.GameObjects.Container {
public graphics: Phaser.GameObjects.Graphics;
public myNum: number;
constructor(scene: Phaser.Scene, x?: number, y?: number, children?:Phaser.GameObjects.GameObject[]) {
super(scene, x, y, children);
}
}
Initではgraphicsの描画に用いたrectを流用してgraphics.setInteractive(rect, Phaser.Geom.Rectangle.Contains);でgraphicsにクリック判定を設定しています。
昨日textにsetintractiveを設定したときは引数が不要でしたが、graphicsにはデフォルトではクリック判定が用意されていないのでrectを渡す必要があります。
this.graphics.setInteractiveは第一引数を設定した場合、第二引数のcallbackを設定しないとエラーが起きてしまうのでPhaser.Geom.Rectangle.Containsを設定しています。export class SpeechTile extends Phaser.GameObjects.Container {
~~~
public Init(mynumber: number, color: number) {
//当たり判定と表示に使用する矩形を作成する
let rect = new Phaser.Geom.Rectangle(0, 0, 32, 32);
//グラフィックス作成
this.graphics = this.scene.add.graphics();
this.graphics.fillStyle(color);
this.graphics.fillRectShape(rect);
//コンテナにグラフィックスを追加
this.add(this.graphics);
//rectを範囲としたクリック判定
this.graphics.setInteractive(rect, Phaser.Geom.Rectangle.Contains);
this.myNum = mynumber;
this.graphics.on('pointerdown', function () {
let scene = this.scene as MyScene1;
//mynumberの読み上げ
scene.Speech(mynumber.toString());
scene.judgeArray.push(this);
scene.Judge();
}, this);
}
~~
}
this.graphics.on('pointerdown', function () {
let scene = this.scene as MyScene1;
//mynumberの読み上げ
scene.Speech(mynumber.toString());
scene.judgeArray.push(this);
scene.Judge();
}, this);
タイルをクリックすることでjudgeArrayにクリックされたタイルが格納され、配列の長さに応じてjudge関数が実行されます。export class MyScene1 extends Phaser.Scene {
//グラフィックオブジェクトを用意
public graphics: Phaser.GameObjects.Graphics;
//テキスト読み上げ用のSpeechSynthesisを作成
protected Voice: SpeechSynthesis;
protected VoiceText: SpeechSynthesisUtterance;
//左用のタイルと右用のタイルを作成
public lefts: SpeechTile[] = [];
public rights: SpeechTile[] = [];
public judgeArray: SpeechTile[] = [];
constructor() {
super({ key: 'MyScene1', active: false });
}
preload() {
}
create() {
//タイルのために0から9までの数値をシャッフルした配列を作る
let l: number[] = [];
let r: number[] = [];
for (let i = 0; i <= 9; i++) {
l.push(i);
r.push(i);
}
l = this.Shuffle(l);
r = this.Shuffle(r);
//背景を白に
this.cameras.main.setBackgroundColor("#ffffff");
//PhaserではなくブラウザからSpeechSynthesisを取得
this.Voice = (<any>window).speechSynthesis;
this.VoiceText = new (<any>window).SpeechSynthesisUtterance("");
//読み上げる声のロケールを選択
this.VoiceText.lang = "ja-JP";
//SpeechTileを並べる
for (let i = 0; i < 9; i++) {
let left = new SpeechTile(this, this.sys.canvas.width/2 -60, 50 * i + 50);
left.Init(l[i], 0x2a2a2a);
this.add.existing(left);
this.lefts.push(left);
let right = new SpeechTile(this, this.sys.canvas.width / 2 + 60, 50 * i + 50);
right.Init(r[i], 0x8a8a8a);
this.add.existing(right);
this.rights.push(right);
right.graphics.input.enabled = false;
}
}
//配列のシャッフル
public Shuffle(array: number[]) {
let ary = array.slice();
for (let i = ary.length - 1; 0 < i; i--) {
let r = Math.floor(Math.random() * (i + 1));
// ary[i] <-> ary[r]
[ary[i], ary[r]] = [ary[r], ary[i]];
}
return ary;
}
update() {
}
//音声の再生
public Speech(str: string) {
    this.VoiceText.text = str;
    this.Voice.speak(this.VoiceText);

}
//神経衰弱の判定
public Judge() {
switch(this.judgeArray.length){
case 1:
for (let l of this.lefts) {
l.graphics.input.enabled = false;
if (l !== this.judgeArray[0]) {
l.Tween(0.3);
}
}
for (let r of this.rights) {
r.graphics.input.enabled = true;
r.Tween(1);
}
break;
case 2:
for (let l of this.lefts) {
l.graphics.input.enabled = true;
l.Tween(1);
}
for (let r of this.rights) {
r.graphics.input.enabled = false;
if (r !== this.judgeArray[1]) {
r.Tween(0.3);
}
}
if (this.judgeArray[0].myNum === this.judgeArray[1].myNum) {
this.lefts.splice(this.lefts.indexOf(this.judgeArray[0]),1)
this.rights.splice(this.rights.indexOf(this.judgeArray[1]), 1)
this.judgeArray[0].Clear();
this.judgeArray[1].Clear();
}
this.judgeArray = [];
break;
}
}
}
プレイしてみた動画がこちらです。
今回のソース全文はこちらです。
/// <reference path="../app.ts" />
namespace MyGame {
export class SpeechTile extends Phaser.GameObjects.Container {
public graphics: Phaser.GameObjects.Graphics;
public myNum: number;
constructor(scene: Phaser.Scene, x?: number, y?: number, children?:Phaser.GameObjects.GameObject[]) {
super(scene, x, y, children);
}
public Init(mynumber: number, color: number) {
//当たり判定と表示に使用する矩形を作成する
let rect = new Phaser.Geom.Rectangle(0, 0, 32, 32);
//グラフィックス作成
this.graphics = this.scene.add.graphics();
this.graphics.fillStyle(color);
this.graphics.fillRectShape(rect);
//コンテナにグラフィックスを追加
this.add(this.graphics);
//rectを範囲としたクリック判定
this.graphics.setInteractive(rect, Phaser.Geom.Rectangle.Contains);
this.myNum = mynumber;
        this.graphics.on('pointerdown', function () {
            let scene = this.scene as MyScene1;

            //mynumberの読み上げ
            scene.Speech(mynumber.toString());
            scene.judgeArray.push(this);
            scene.Judge();
        }, this);
}
//各種演出
public Tween(n: number) {
this.scene.add.tween({
targets: this,
alpha: n,
duration:100
})
}
public Clear() {
this.scene.add.tween({
targets: this,
scaleX: 0,
duration: 100,
onComplete: () => {
this.destroy();
}
})
}
}
export class MyScene1 extends Phaser.Scene {
    //グラフィックオブジェクトを用意
    public graphics: Phaser.GameObjects.Graphics;

    //テキスト読み上げ用のSpeechSynthesisを作成
    protected Voice: SpeechSynthesis;
    protected VoiceText: SpeechSynthesisUtterance;

    //左用のタイルと右用のタイルを作成
    public lefts: SpeechTile[] = [];
    public rights: SpeechTile[] = [];

    public judgeArray: SpeechTile[] = [];


    constructor() {
        super({ key: 'MyScene1', active: false });
    }

    preload() {

    }

    create() {

        //タイルのために0から9までの数値をシャッフルした配列を作る
        let l: number[] = [];
        let r: number[] = [];

        for (let i = 0; i <= 9; i++) {
            l.push(i);
            r.push(i);
        }
        l = this.Shuffle(l);
        r = this.Shuffle(r);

        //背景を白に
        this.cameras.main.setBackgroundColor("#ffffff");
        //PhaserではなくブラウザからSpeechSynthesisを取得
        this.Voice = (<any>window).speechSynthesis;
        this.VoiceText = new (<any>window).SpeechSynthesisUtterance("");

        //読み上げる声のロケールを選択
        this.VoiceText.lang = "ja-JP";

        //SpeechTileを並べる
        for (let i = 0; i < 9; i++) {

            let left = new SpeechTile(this, this.sys.canvas.width/2 -60, 50 * i + 50);
            left.Init(l[i], 0x2a2a2a);
            this.add.existing(left);
            this.lefts.push(left);

            let right = new SpeechTile(this, this.sys.canvas.width / 2 + 60, 50 * i + 50);
            right.Init(r[i], 0x8a8a8a);
            this.add.existing(right);
            this.rights.push(right);
            right.graphics.input.enabled = false;
        }
    }

    //配列のシャッフル
    public Shuffle(array: number[]) {
        let ary = array.slice();
        for (let i = ary.length - 1; 0 < i; i--) {
            let r = Math.floor(Math.random() * (i + 1));
            // ary[i] <-> ary[r]
            [ary[i], ary[r]] = [ary[r], ary[i]];
        }
        return ary;
    }

    update() {

    }

    //音声の再生
    public Speech(str: string) {
        this.VoiceText.text = str;
        this.Voice.speak(this.VoiceText);

    }

    //神経衰弱の判定
    public Judge() {

        switch(this.judgeArray.length){
            case 1:
                for (let l of this.lefts) {
                    l.graphics.input.enabled = false;
                    if (l !== this.judgeArray[0]) {
                        l.Tween(0.3);
                    }
                }

                for (let r of this.rights) {
                    r.graphics.input.enabled = true;
                    r.Tween(1);
                }
                break;

            case 2:

                for (let l of this.lefts) {
                    l.graphics.input.enabled = true;
                    l.Tween(1);
                }

                for (let r of this.rights) {
                    r.graphics.input.enabled = false;
                    if (r !== this.judgeArray[1]) {
                        r.Tween(0.3);
                    }
                }

                if (this.judgeArray[0].myNum === this.judgeArray[1].myNum) {
                    this.lefts.splice(this.lefts.indexOf(this.judgeArray[0]),1)
                    this.rights.splice(this.rights.indexOf(this.judgeArray[1]), 1)
                    this.judgeArray[0].Clear();
                    this.judgeArray[1].Clear();
                }

                this.judgeArray = [];
                break;
        }


    }
}
}