Phaser3 ゲームオブジェクトの拡張② : maskを使う
前回に引き続きオブジェクト拡張を使いながらアニメーションを作っていきます。
maskを使う
maskを使って黒電話のダイアル部分を作ってみます。
まずはダイアルの下地のグラフィックスを用意します。
create(){
~~
//グラフィックスオブジェクトを追加
let dialGraphics = this.add.graphics();

dialGraphics.fillStyle(0xf8a8a8a);

//ベースの円を作成
dialGraphics.fillStyle(0x2a2a2a);
dialGraphics.fillCircle(0, 0, 110);
dialGraphics.fillStyle(0x8a8a8a);
dialGraphics.fillCircle(0, 0, 30);
~~

}
次にダイアルの穴の部分に当たる位置にグラフィックスを追加します。
先に作ったテキストオブジェクトに重なるようにサークルを配置しました。
//ダイアルの穴部分
let g = this.add.graphics({});
for (let i = 0; i < 10; i++) {
    g.fillStyle(0xff00ff);
    g.fillCircle(texts[i].x + this.baseContainer.x, texts[i].y + this.baseContainer.y, 15);

}
let t = g.generateTexture("dialtemp");
g.destroy();
テクスチャ化したダイアル用グラフィックを用い、imageを拡張した自作のダイアル用クラスを作成します。
ダイアル用クラスの中にはダイアルを回すアニメーション用の関数Dialを用意しました。
export class DialMask extends Phaser.GameObjects.Image {

    constructor(scene: Phaser.Scene, x: number, y: number, texture: string, frame?: number | string) {
        super(scene, x, y, texture, frame);
    }

    //ダイヤルを回すアニメーション
    public Dial(n:number) {
        this.scene.tweens.add({
            targets: this,
            angle: n,
            duration: 100,
        })
    }
    //ダイヤルの角度が0でなければ0までもどす
    update() {
        if (!this.scene.tweens.isTweening(this)) {
            if (this.angle != 0) {
                this.angle -= 10;
            }
        }
    }

}
~~
 this.dial = new DialMask(this,this.sys.canvas.width/2, this.sys.canvas.height/2, "dialtemp");
~~
以上でダイアル部分の穴ができたので、ダイアルグラフィックのマスクとして使用します。 image.maskでマスクを作ります。
dialGraphics.mask = new Phaser.Display.Masks.BitmapMask(this, this.dial);
上記の実行結果がこちらです。
 ダイアル部分の穴にあたる部分に円が表示されており、ダイアルの数字が隠されてしまっています。
mask.invertAlphaで画像を切り抜く
maskはmaskとして扱われた画像のアルファ値に従って元画像を描画する機能なので、上の処理だとちょうどダイアル部分に円を描く処理になってしまっていました。
phaser3で追加された機能のmask.invertAlphaを使えばアルファ値を反転させダイアル部分に穴をあけることができます。
dialGraphics.mask.invertAlpha = true;
実行結果がこちらです。
狙い通りにダイアルに穴をあけられていることがわかります。
Phaser2ではグラフィックスオブジェクトに穴をあけたいと思ったらシェーダーを書くなどして対応しなければならなかったので、この機能は非常にありがたいです。

.onでテキストにクリック処理を追加する
ダイアルの数字をクリックすることでダイアルをアニメーションさせます。
DialMaskクラスにはアニメーション用の関数Dialを実装してあるので、数字クリックでDialを実行させます。
phaserのGameObjectにはonなどのイベントリスナが用意されているので、クリック時のイベントpointerdownにDialを登録します。
インプット処理を追加するオブジェクトはsetinteractive()を実行しないとインプット処理が有効にならないので、忘れずに実行しましょう。
ダイアルの数字に応じて回転角度を変化させています。
for (let i = 10; i > 0; i--) {
    let t = this.add.text(0, 0, i.toString());
    texts.push(t);
    t.setColor("#ffffff")
    t.setOrigin(0.5);
    //テキストがクリックされた際にダイヤル関数を実行
    t.setInteractive();
    t.on('pointerdown', function () {
        this.dial.Dial((10 - texts.indexOf(t)) * 10 + 90);
    }, this);

}
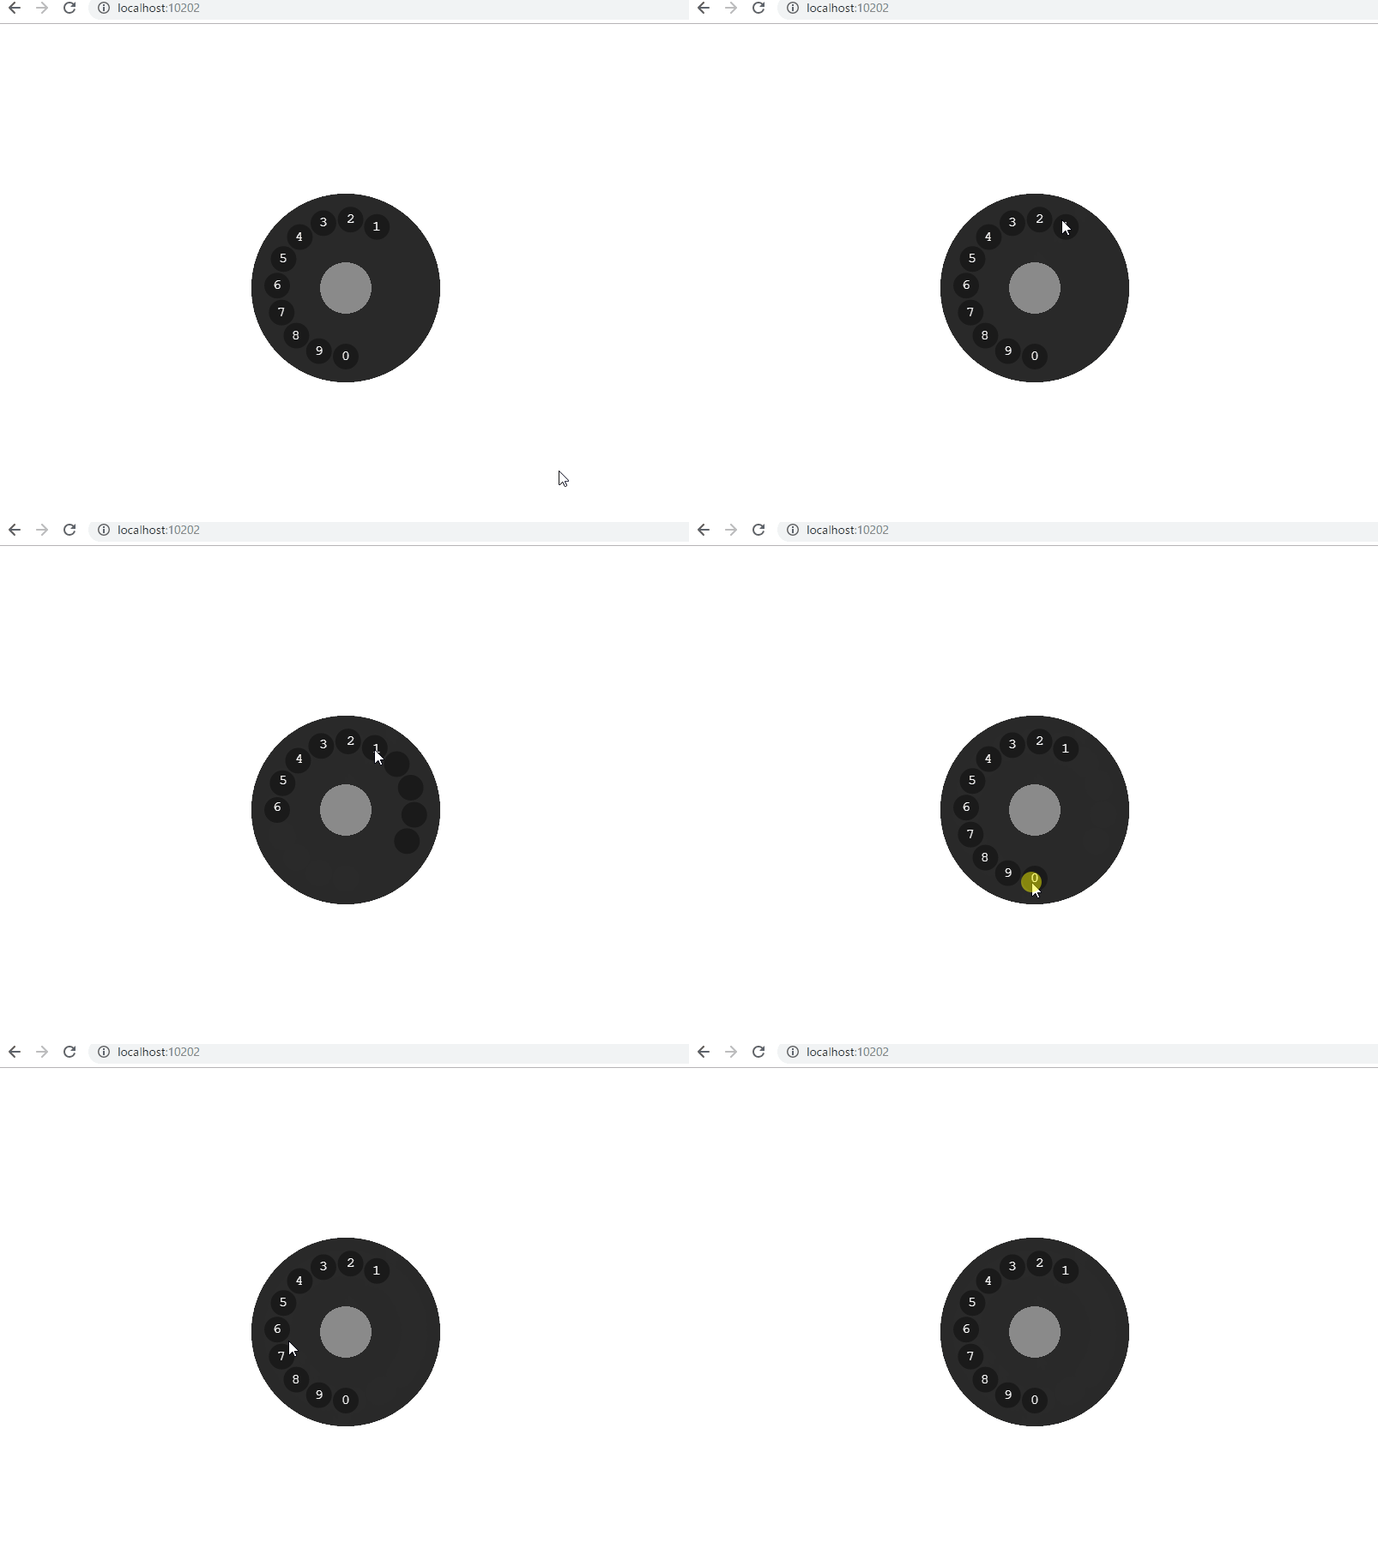
以上の実行結果がこちらです。
mask部分がアニメーションしているのがわかると思います。
今回のソースはこちらです。
/// <reference path="../app.ts" />
/// <reference path="./Astar/AStar.ts" />

namespace MyGame {


    export class BaseContainer extends Phaser.GameObjects.Container {
        constructor(scene: Phaser.Scene, x?: number, y?: number, children?: Phaser.GameObjects.GameObject[]) {
            super(scene, x, y, children);
        }

    }

export class DialMask extends Phaser.GameObjects.Image {

    constructor(scene: Phaser.Scene, x: number, y: number, texture: string, frame?: number | string) {
        super(scene, x, y, texture, frame);
    }

    //ダイヤルを回すアニメーション
    public Dial(n:number) {
        this.scene.tweens.add({
            targets: this,
            angle: n,
            duration: 100,
        })
    }
    //ダイヤルの角度が0でなければ0までもどす
    update() {
        if (!this.scene.tweens.isTweening(this)) {
            if (this.angle != 0) {
                this.angle -= 10;
            }
        }
    }

}


    export class MyScene1 extends Phaser.Scene {
        //グラフィックオブジェクトを用意
        public graphics: Phaser.GameObjects.Graphics;

        public baseContainer: BaseContainer;

        //ダイヤル用のマスク
        public dial: DialMask;

        constructor() {
            super({ key: 'MyScene1', active: false });
        }

        preload() {

            this.load.image("block", "assets/images/block1.png")
            //背景を白に
            this.cameras.main.setBackgroundColor("#ffffff");

        }

        create() {
            this.baseContainer = new BaseContainer(this);

            //グラフィックスオブジェクトを追加
            this.graphics = this.add.graphics();

            //コンテナを宣言
            this.baseContainer.add(this.graphics);

            //ベースの円を作成
            this.graphics.fillStyle(0x1a1a1a);
            this.graphics.fillCircle(0, 0, 110);

            //※拡張で作成したオブジェクトはexistingでシーンへの追加を忘れないようにする
            this.add.existing(this.baseContainer);

            //文字の作成
            let texts: Phaser.GameObjects.Text[] = [];

            for (let i = 10; i > 0; i--) {
                let t = this.add.text(0, 0, i.toString());
                texts.push(t);
                t.setColor("#ffffff")
                t.setOrigin(0.5);
                //テキストがクリックされた際にダイヤル関数を実行
                t.setInteractive();
                t.on('pointerdown', function () {
                    this.dial.Dial((10 - texts.indexOf(t)) * 10 + 90);
                }, this);

            }

            texts[0].text = "0";


            let circle = new Phaser.Geom.Circle(0, 0, 80);
            //円周上に配置
            Phaser.Actions.PlaceOnCircle(texts, circle, Phaser.Math.DEG_TO_RAD * 90, Phaser.Math.DEG_TO_RAD * 320);

            this.baseContainer.add(texts);

            this.baseContainer.x = this.sys.canvas.width / 2;
            this.baseContainer.y = this.sys.canvas.height / 2;

            this.add.group(this.baseContainer, { runChildUpdate: true });


            //ダイアルの穴部分
            let g = this.add.graphics({});
            for (let i = 0; i < 10; i++) {
                g.fillStyle(0xff00ff);
                g.fillCircle(texts[i].x + this.baseContainer.x, texts[i].y + this.baseContainer.y, 15);

            }

            let t = g.generateTexture("dialtemp");
            g.destroy();


            this.dial = new DialMask(this,this.sys.canvas.width/2, this.sys.canvas.height/2, "dialtemp");

            //グラフィックスオブジェクトを追加
            let dialGraphics = this.add.graphics();

            dialGraphics.fillStyle(0xf8a8a8a);

            //ベースの円を作成
            dialGraphics.fillStyle(0x2a2a2a);
            dialGraphics.fillCircle(0, 0, 110);
            dialGraphics.fillStyle(0x8a8a8a);
            dialGraphics.fillCircle(0, 0, 30);

            dialGraphics.mask = new Phaser.Display.Masks.BitmapMask(this, this.dial);
            dialGraphics.mask.invertAlpha = true;

            dialGraphics.x = this.sys.canvas.width / 2
            dialGraphics.y = this.sys.canvas.height / 2

            this.add.group(this.dial, {runChildUpdate:true})

        }

        update() {

        }

    }


}
Phaser3 ゲームオブジェクトの拡張①: runChildUpdateを使う
今回はゲームオブジェクトの拡張について勉強します。
ゲームオブジェクトの拡張
以前の記事中リンクで紹介しましたが、ゲームオブジェクトに子要素を追加するにはコンテナを用いるかゲームオブジェクトを拡張する方法が紹介されていました。
今回からはゲームオブジェクトを拡張してダイヤル電話のアニメーションを作ってみたいと思います。
コンテナを拡張したMyContainerを用意します。
export class MyContainer extends Phaser.GameObjects.Container {
    constructor(scene: Phaser.Scene, x?: number, y?: number, children?: Phaser.GameObjects.GameObject[]) {
        super(scene, x, y, children);
    }
}
MyContainerにはまだ独自の機能が何もありません。
add.existingでシーンへの追加を行う
次にcreateでMyContainerを初期化します。
拡張したオブジェクトはscene.add.existing()でシーンへの追加を忘れないようにします。
拡張オブジェクトのコンストラクタ内でシーンへの追加を行う方法もあります。
Phaser.Actions.PlaceOnCircleの第三引数、第四引数でオブジェクト配置の始点角度と終点角度を指定することができます。
この角度はラジアンで渡す必要があるので、 Phaser.Math.DEG_TO_RAD でラジアンを出しています。
    export class MyScene1 extends Phaser.Scene {
        //グラフィックオブジェクトを用意
        public graphics: Phaser.GameObjects.Graphics;

        public baseContainer: MyContainer;

        constructor() {
            super({ key: 'MyScene1', active: false });
        }

        preload() {

            this.load.image("block", "assets/images/block1.png")
            //背景を白に
            this.cameras.main.setBackgroundColor("#ffffff");

        }

        create() {

            this.baseContainer = new MyContainer(this);

            //グラフィックスオブジェクトを追加
            this.graphics = this.add.graphics();

            this.graphics.fillStyle(0xff00ff);

            //コンテナを宣言
            this.baseContainer.add(this.graphics);

            //ベースの円を作成
            this.graphics.fillStyle(0x1a1a1a);
            this.graphics.fillCircle(0, 0, 110);

            //※拡張で作成したオブジェクトはexistingでシーンへの追加を忘れないようにする
            this.add.existing(this.baseContainer);

            //文字の作成
            let texts: Phaser.GameObjects.Text[] = [];

            for (let i = 10; i > 0; i--) {
                let t = this.add.text(0, 0, i.toString());
                texts.push(t);
                t.setColor("#ffffff")
                t.setOrigin(0.5);
            }

            texts[0].text = "0";

            let circle = new Phaser.Geom.Circle(0, 0, 80);
            //円周上に配置
            Phaser.Actions.PlaceOnCircle(texts, circle, Phaser.Math.DEG_TO_RAD * 90, Phaser.Math.DEG_TO_RAD * 320);

            this.baseContainer.add(texts);

            this.baseContainer.x = this.sys.canvas.width / 2;
            this.baseContainer.y = this.sys.canvas.height / 2;

        }

        update() {

        }

    }
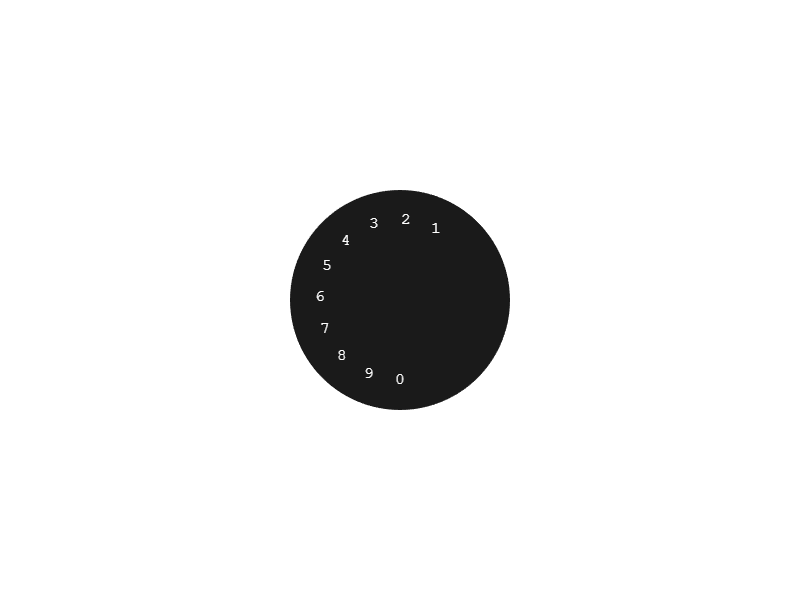
以上で電話の文字盤ができました。
runChildUpdateでオブジェクトにupdateを実行させる
上の文字盤を回転させてみたいと思います。
まずはMyContainerクラスにupdateを追加します。
MyContainer(){
~~
    update() {
        //円盤を回転させる
        this.angle += 1;

        //テキストの角度を補正する
        for (let obj of this.list) {
            if (obj instanceof Phaser.GameObjects.Text) {
                (obj as Phaser.GameObjects.Text).angle = -this.angle;
            }
        }
    }
~~
}
次にMyScene1のcreateに以下を追加します。
groupの作成時にrunChildUpdate: trueのオプションを追加しておくとgroup内のオブジェクトに記述されているupdateを実行することができます。
let group = this.add.group(this.baseContainer, { runChildUpdate: true });
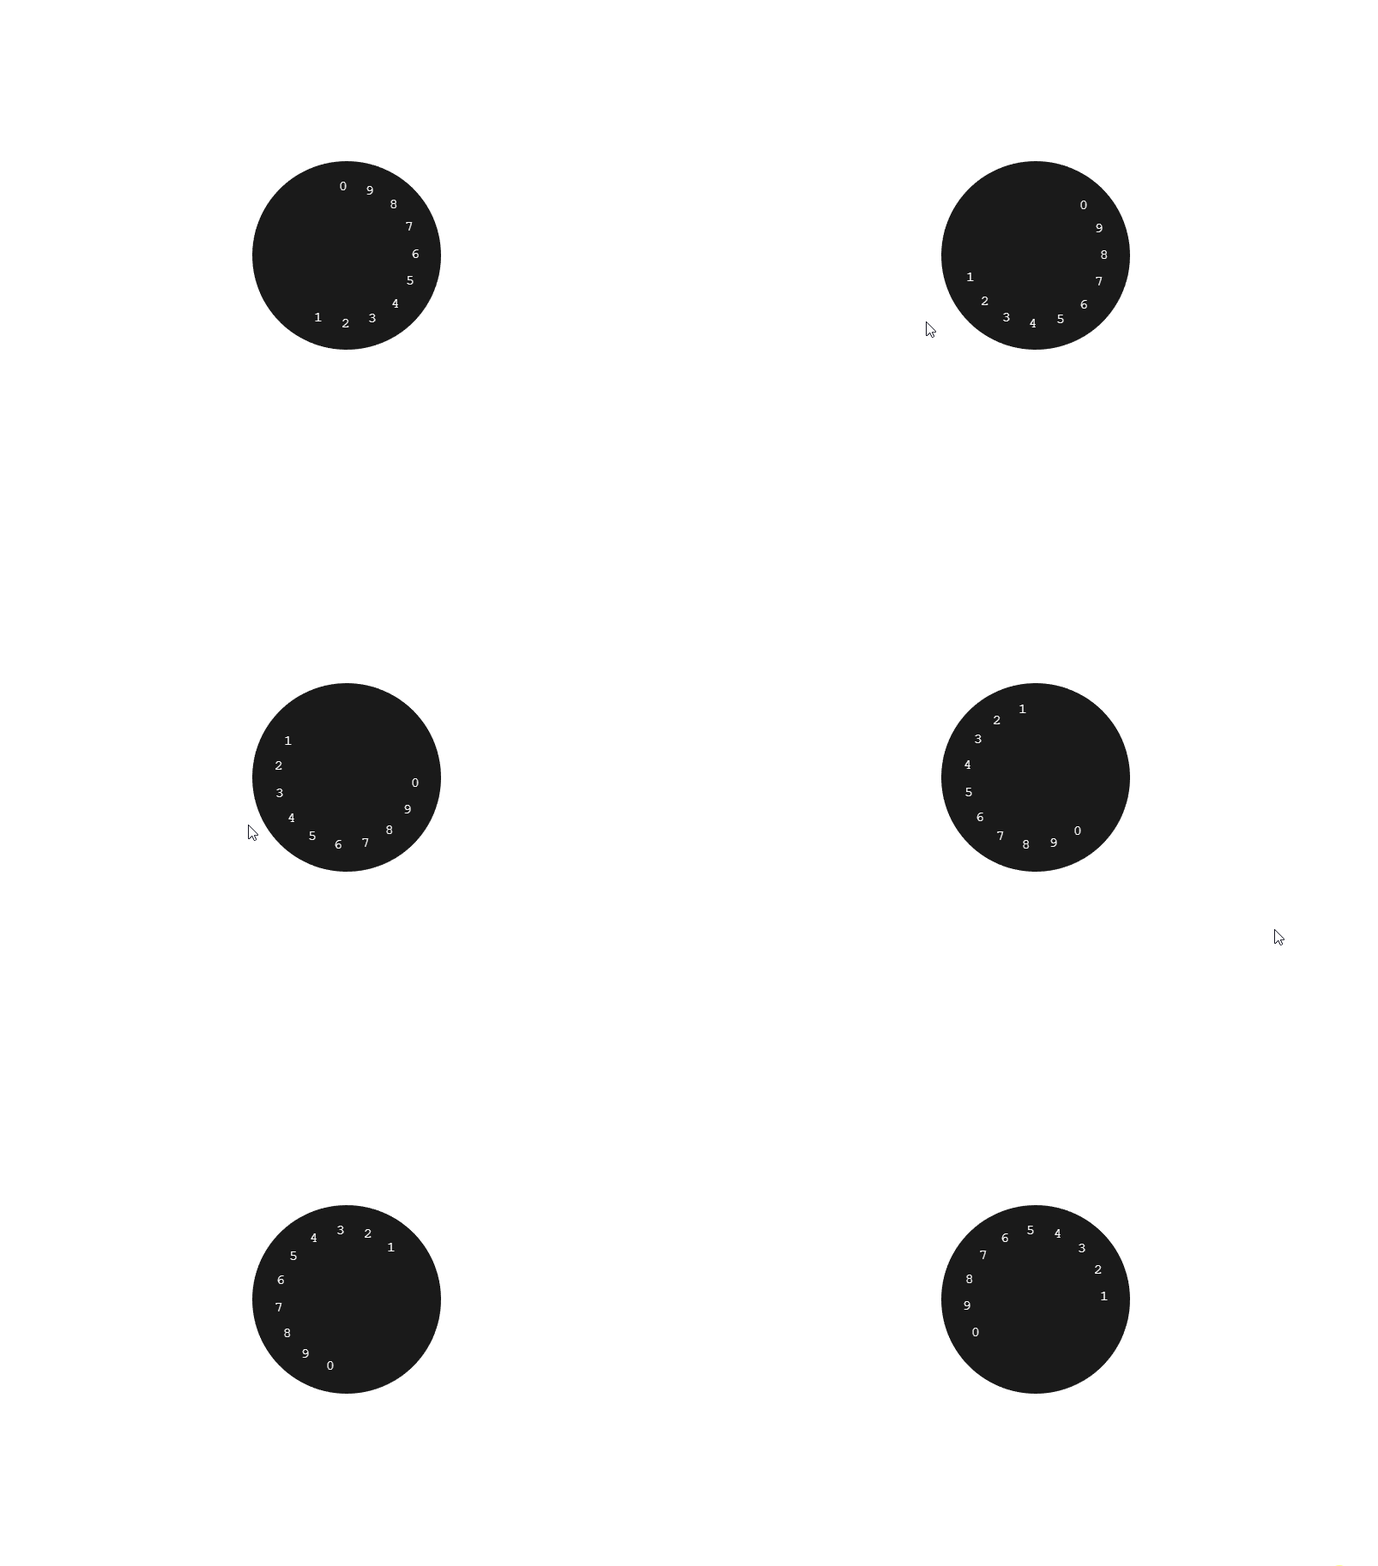
上記の実行結果がこちらです。
今回のソースがこちらです。
MyScene1ではupdateが空なのが確認できます。
namespace MyGame {


export class MyContainer extends Phaser.GameObjects.Container {
    constructor(scene: Phaser.Scene, x?: number, y?: number, children?: Phaser.GameObjects.GameObject[]) {
        super(scene, x, y, children);
    }

    update() {
        //円盤を回転させる
        this.angle += 1;

        //テキストの角度を補正する
        for (let obj of this.list) {
            if (obj instanceof Phaser.GameObjects.Text) {
                (obj as Phaser.GameObjects.Text).angle = -this.angle;
            }
        }

    }

}


    export class MyScene1 extends Phaser.Scene {
        //グラフィックオブジェクトを用意
        public graphics: Phaser.GameObjects.Graphics;

        public baseContainer: MyContainer;
        public dialContainer: MyContainer;

        constructor() {
            super({ key: 'MyScene1', active: false });
        }

        preload() {

            this.load.image("block", "assets/images/block1.png")
            //背景を白に
            this.cameras.main.setBackgroundColor("#ffffff");

        }

        create() {

            this.baseContainer = new MyContainer(this);

            //グラフィックスオブジェクトを追加
            this.graphics = this.add.graphics();

            this.graphics.fillStyle(0xff00ff);

            //コンテナを宣言
            this.baseContainer.add(this.graphics);

            //ベースの円を作成
            this.graphics.fillStyle(0x1a1a1a);
            this.graphics.fillCircle(0, 0, 110);

            //※拡張で作成したオブジェクトはexistingでシーンへの追加を忘れないようにする
            this.add.existing(this.baseContainer);

            //文字の作成
            let texts: Phaser.GameObjects.Text[] = [];

            for (let i = 10; i > 0; i--) {
                let t = this.add.text(0, 0, i.toString());
                texts.push(t);
                t.setColor("#ffffff")
                t.setOrigin(0.5);
            }

            texts[0].text = "0";

            let circle = new Phaser.Geom.Circle(0, 0, 80);
            //円周上に配置
            Phaser.Actions.PlaceOnCircle(texts, circle, Phaser.Math.DEG_TO_RAD * 90, Phaser.Math.DEG_TO_RAD * 320);

            this.baseContainer.add(texts);

            this.baseContainer.x = this.sys.canvas.width / 2;
            this.baseContainer.y = this.sys.canvas.height / 2;

            let group = this.add.group(this.baseContainer, { runChildUpdate: true });
        }

        update() {

        }

    }


}
Phaser3 Pathを使ってみる
先日経路探索ライブラリを導入したので、今回はPhaserのPathを用いて経路を表示してみたいと思います。
Pathで曲線描画
PathはPhaser3から導入された新機能で、各種曲線や直線を作成することができます。
作成したpathは画面への描画だけではなく、tweenの経路に用いることもできます。
Phaser2では直線一つ描くのにも一苦労だったので、Pathは非常にありがたい機能です。
まずはパスオブジェクトを宣言します。
//パス
public curve: Phaser.Curves.Path;
次にupdateを以下のように変更します。
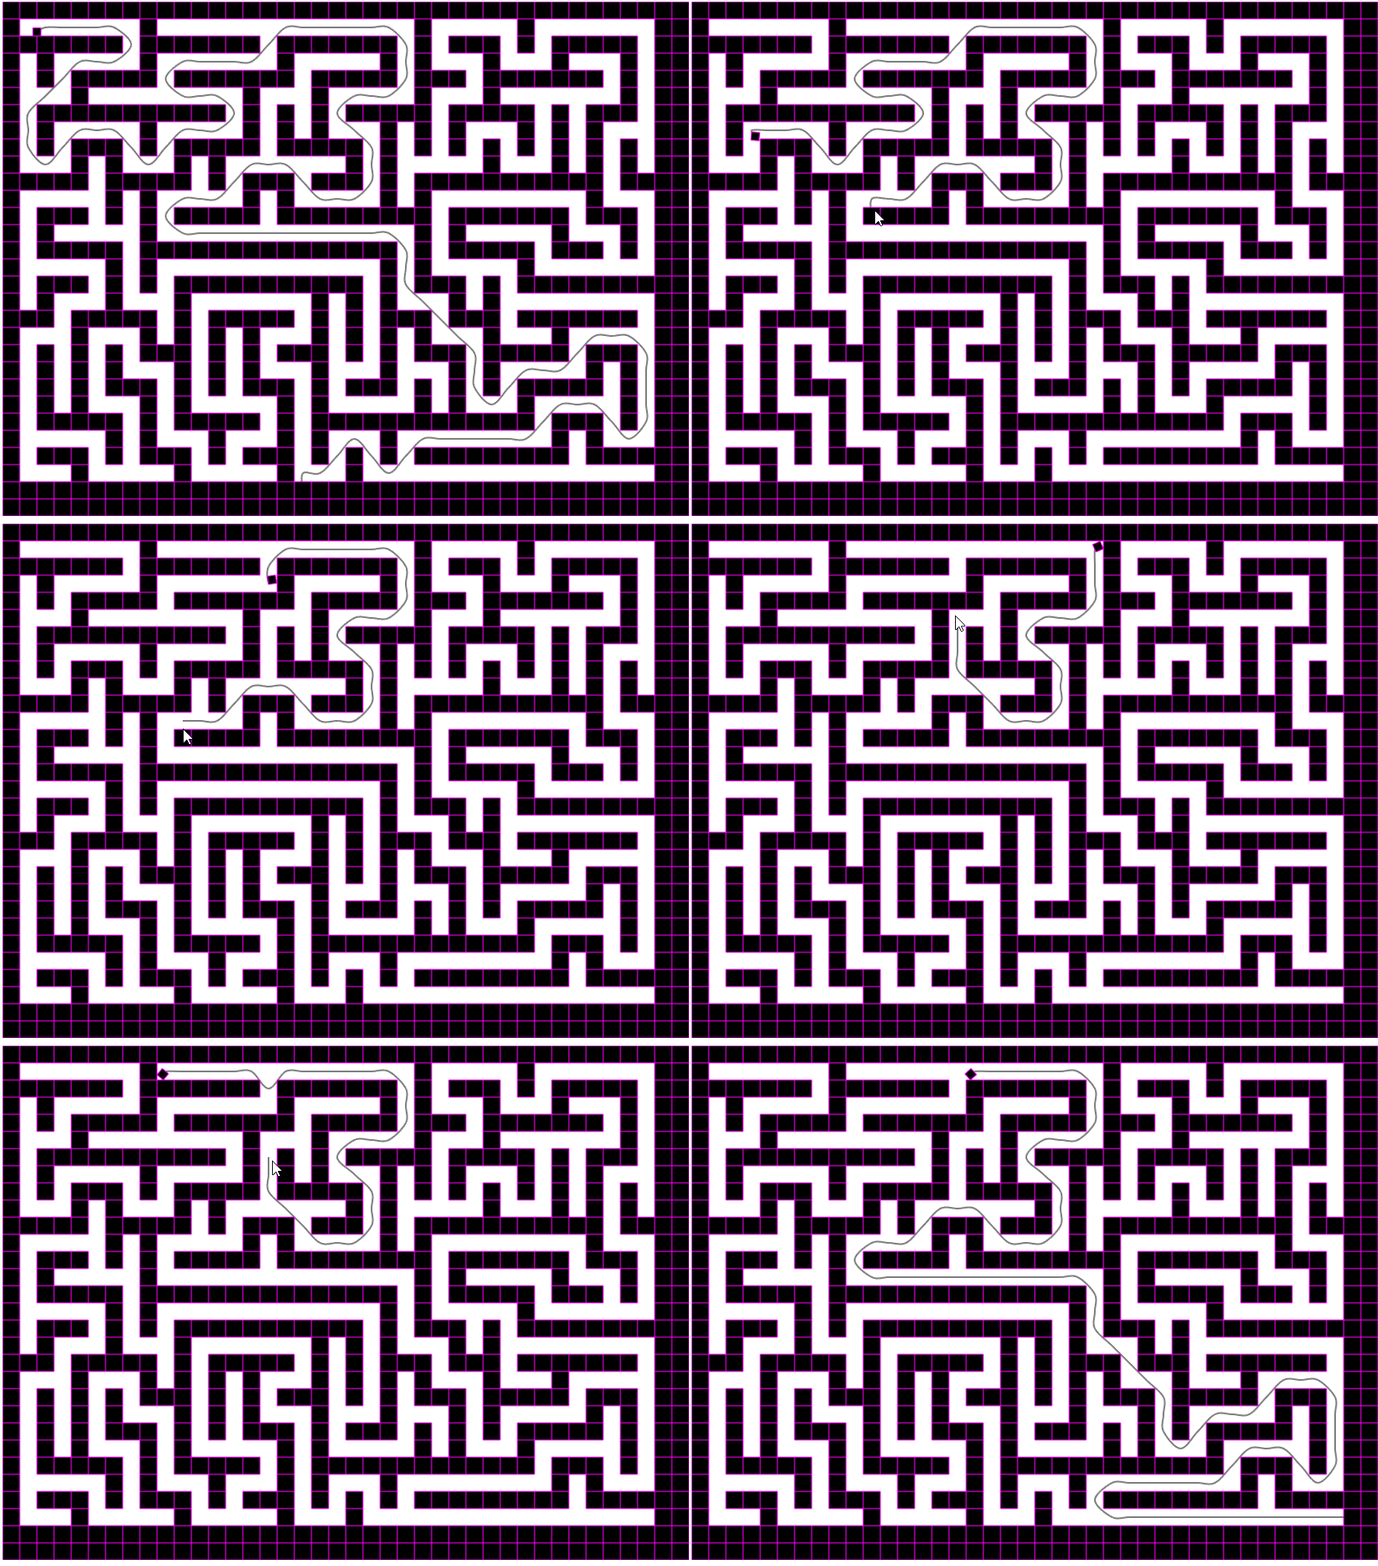
フレーム毎にプレイヤーオブジェクトからマウスポインタへの経路を表示するようにしてみました。
update() {
    //プレイヤーの移動処理
    this.player.angle += this.controller.xRotate * this.speed;
    this.player.setVelocity(this.controller.xAxis * this.speed, this.controller.yAxis * this.speed);

        //曲線の初期値を設定する
        this.curve = new Phaser.Curves.Path(this.player.x, this.player.y);

        this.pathgraphics.clear();
        this.pathgraphics.fillStyle(0xf08300, 1);

        //プレイヤーの現在位置とクリックされた位置をasterに渡す
        let nodeA = this.astar.getNode(Math.floor(this.player.x / this.tileSize), Math.floor(this.player.y / this.tileSize));
        let nodeB = this.astar.getNode(Math.floor(this.input.activePointer.x / this.tileSize), Math.floor(this.input.activePointer.y / this.tileSize));

        let path = this.astar.path(nodeA, nodeB);

        //curveに渡す配列を用意する
        let pathArray = [];

        for (let p of path) {
            //this.pathgraphics.fillRect(p.x * this.tileSize, p.y * this.tileSize, this.tileSize, this.tileSize);
            pathArray.push(p.x * this.tileSize + this.tileSize / 2, p.y * this.tileSize + this.tileSize / 2);
        }

        //カーブを描く
        this.curve.splineTo(pathArray);


        //パスを描く
        this.pathgraphics.lineStyle(2, 0x000000, 0.5);
        this.curve.draw(this.pathgraphics,1000)

}
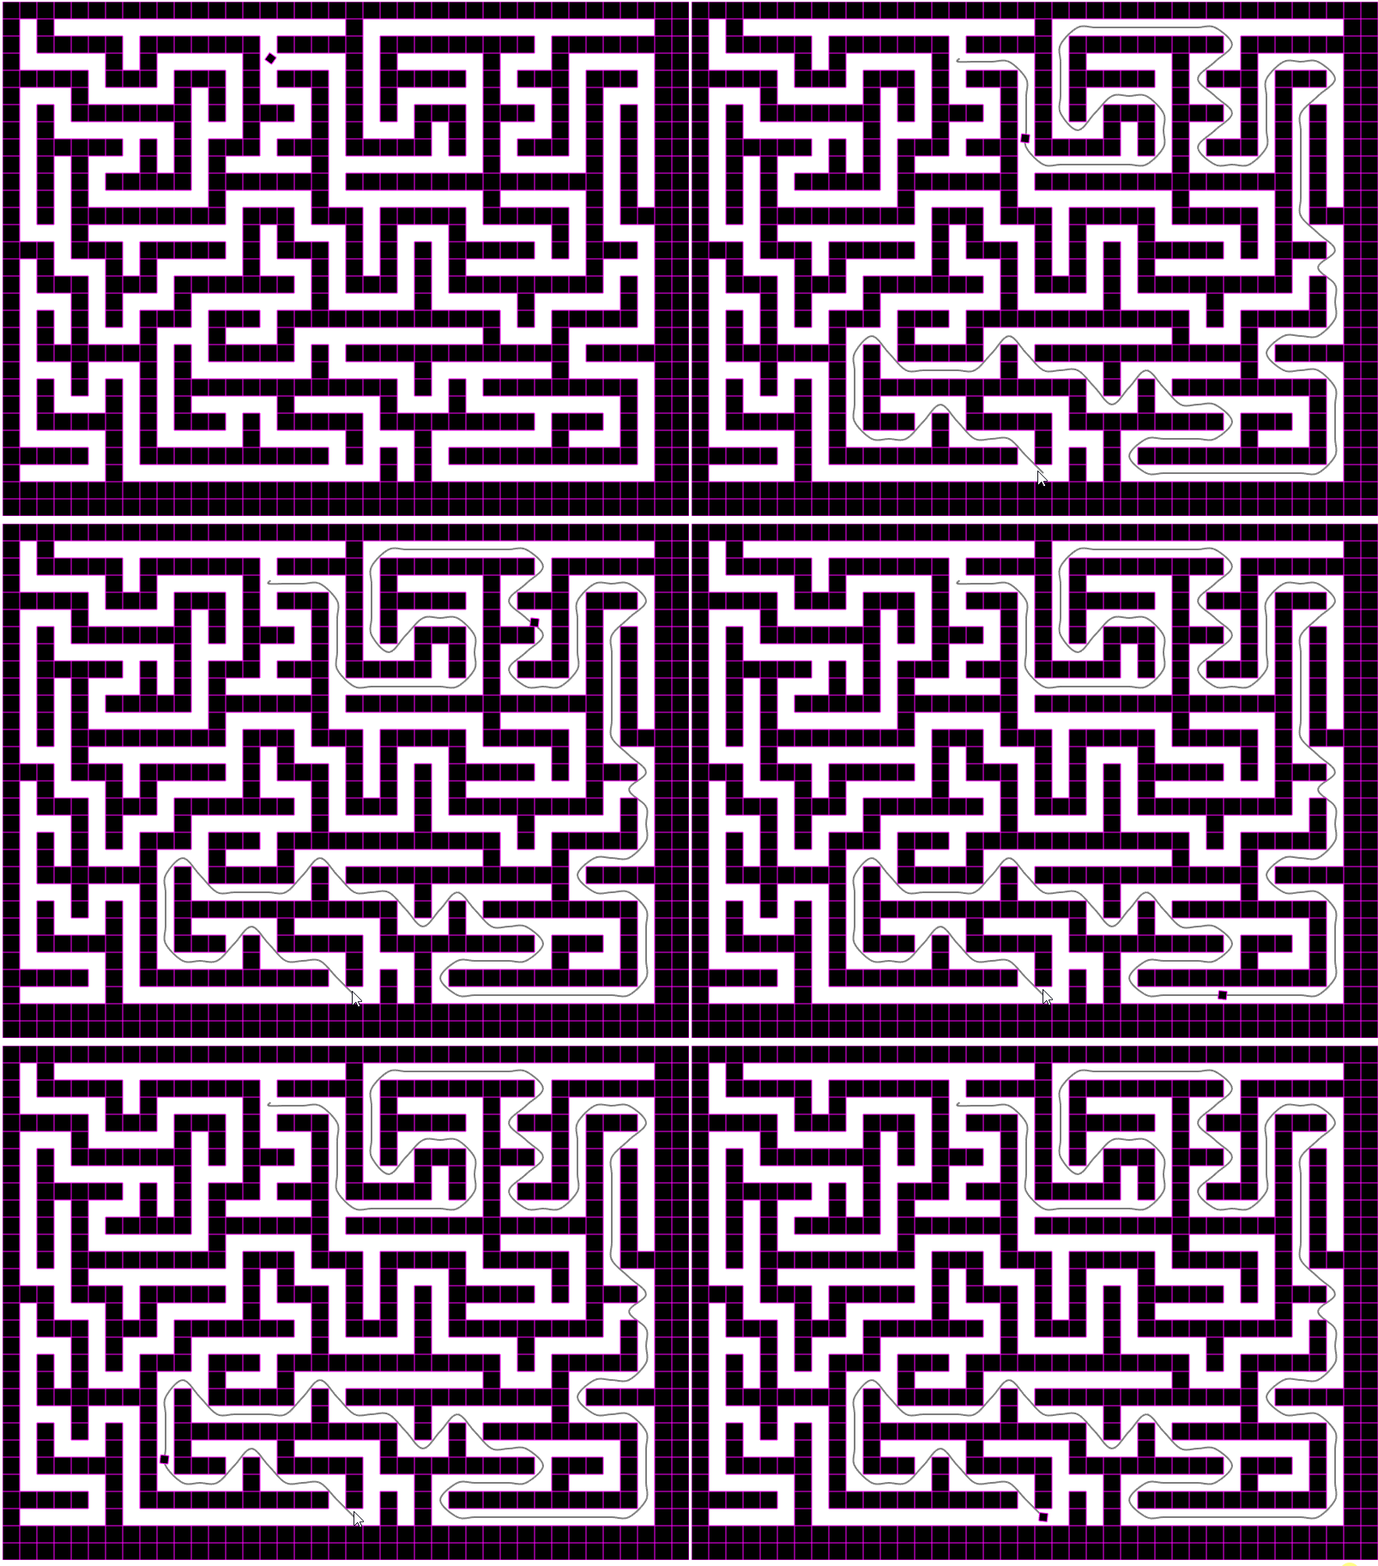
this.curve = new Phaser.Curves.Path(this.player.x, this.player.y);の部分で直線の開始位置を指定し、pathのforループでパスにポイントを追加、this.curve.splineToでポイントを節としたスプライン曲線が作成されます。
this.curve.drawに描画対象のgraphicsを渡すことでカーブを描画できます。
第二引数でカーブの描画に使う点を設定します。
数値を大きくすればなめらかな曲線を得ることができます。
(このプレイヤーオブジェクトは自分が操作しています)
pathを使ったtween
次はPathをtweenに利用してみます。
まずは公式のサンプルにならいtweenするためだけの構造をもったfollowerクラスを作成します。
 //パスをなぞるためのフォロワークラス
    export class Follower {

        public t: number;
        public vec: Phaser.Math.Vector2;

        constructor() {
            this.t = 0;
            this.vec = new Phaser.Math.Vector2();
        }
    }
updateを変更します。
update() {
    //プレイヤーの移動処理
    this.player.angle += this.controller.xRotate * this.speed;
    this.player.setVelocity(this.controller.xAxis * this.speed, this.controller.yAxis * this.speed);

    if (this.input.activePointer.justDown) {
        //曲線の初期値を設定する
        this.curve = new Phaser.Curves.Path(this.player.x, this.player.y);

        this.pathgraphics.clear();
        this.pathgraphics.fillStyle(0xf08300, 1);

        //プレイヤーの現在位置とクリックされた位置をasterに渡す
        let nodeA = this.astar.getNode(Math.floor(this.player.x / this.tileSize), Math.floor(this.player.y / this.tileSize));
        let nodeB = this.astar.getNode(Math.floor(this.input.activePointer.x / this.tileSize), Math.floor(this.input.activePointer.y / this.tileSize));

        let path = this.astar.path(nodeA, nodeB);

        //curveに渡す配列を用意する
        let pathArray = [];

        for (let p of path) {
            pathArray.push(p.x * this.tileSize + this.tileSize / 2, p.y * this.tileSize + this.tileSize / 2);
        }

        //カーブを描く
        this.curve.splineTo(pathArray);

        this.follower.t = 0;

        //プレイヤーの代わりにフォロワーの値をtweenする
        this.tweens.add({
            targets: this.follower,
            t:1,
            ease: 'Sine.easeInOut',
            duration: 5 * this.curve.getLength(),
            onUpdate: () => {
                this.curve.getPoint(this.follower.t, this.follower.vec)
                this.player.x = this.follower.vec.x
                this.player.y = this.follower.vec.y
            }
        });

        //パスを描く
        this.pathgraphics.lineStyle(2, 0x000000, 0.5);
        this.curve.draw(this.pathgraphics,1000)

    }
}
前回はtimelineで経路をなぞるアニメーションを作成しましたが、今回は一つのtweenだけを作成しています。
followerクラスのtをtweenさせ、this.curve.getPoint()でカーブの途中の点を取得しています。
getpointは第一引数でカーブの位置を指定、第二引数に取得したカーブの座標を代入します。
例えばgetpoint(0.5,vec)と書けば、vecにpathの真ん中の座標が代入されます。
onUpdateでtween中の処理を書くことができるので、getpointとプレイヤーオブジェクトの座標変更をここで行うことでcurve上を移動させることができます。
        //プレイヤーの代わりにフォロワーの値をtweenする
        this.tweens.add({
            targets: this.follower,
            t:1,
            ease: 'Sine.easeInOut',
            duration: 5 * this.curve.getLength(),
            onUpdate: () => {
                this.curve.getPoint(this.follower.t, this.follower.vec)
                this.player.x = this.follower.vec.x
                this.player.y = this.follower.vec.y
            }
        });
描画されたパスに沿って移動しているのがわかります。
今回のソースはこちらです。
http://firestorage.jp/download/36288339ca2f4e517ce9202742efce96b22c413d
Phaser 3 :迷路ゲームを作る④ 経路探索ライブラリを使う、timelineを使う
引き続き迷路ゲームを作っていきます。
今回は経路探索ライブラリを用いて目的地まで自動で移動する処理を作ってみます。
gpnotes.hatenablog.jp
経路探索ライブラリを使う
こちらのライブラリを使って経路探索をしてみます。
github.com
A-starアルゴリズムを用いたライブラリで、typescriptで使えるもので一番使い勝手が良さそうなのがこちらでした。
上記のプロジェクトをダウンロードし、scriptsディレクトリ内に解凍します。
main.tsのリファレンスにAster.tsを追加します。
/// <reference path="AStar.ts" />
今回はズーム処理はしないで全体を見たいと思いますのでtilesizeを20にし、迷路の幅と高さも800*600に戻します。
MyScene1
~~~
//迷路の道幅
public tileSize: number = 20;
public mapSize: number = 1;
~~~
//経路探索ライブラリの読み込み
public astar: AStar;
経路探索ライブラリ用の配列を作成する
次にasterに渡す用の配列を作成します。
asterは[迷路行1,迷路行2,迷路行3,...]という作りの配列を渡さなければならないようなので、maze配列からcolumn配列を作成します。
maze配列では0が道、1が壁として数値が入っていますが、Astarの経路探索では配列に入れた数値がウェイトとして採用され、コスト(移動距離)とウェイトの総計が最低になるパスを返すため、目的地によっては壁を通過してしまうことがあります。
例 :xが目的地の場合
[ 0, 0, 0, 0, 0 ] ,
[ 1, 1, 1, 1, 0 ] ,
[ x, 0, 0, 0, 0 ] ,
[ 0, 0, 0, 0, 0 ] ,
右側を通る道のコスト
→,→,→,→, ↓, ↓, ←, ←, ←, ← 計10コスト
壁を突っ切る道のコスト
↓ + ウェイト1, ↓ 計3コスト
→壁を突っ切るルートが採用されてしまう
なので、壁には十分大きな値をウェイトとして設定します。
create() {
    //経路探索ライブラリ用に配列を作る
    this.astar = new AStar(new ManhattenHeuristic());

    //1行を1つの配列にまとめ、それをプッシュしていく
    let column: number[][] = new Array();
    for (let i = 0; i < this.mazeHeight; i++) {
        column[i] = new Array();
        let row: number[] = []
        for (let j = 0; j < this.mazeWidth; j++) {
            //壁の部分はウェイトを大きな値に設定(ウェイトが低いと壁を通路として選択してしまう場合がある)
            row.push(this.maze[i][j] * 99999);
        }
        column[i] = row;
    }
    //asterに作成した配列を渡す
    this.astar.load(column);

    //経路表示用のグラフィック
    this.pathgraphics = this.add.graphics();
    this.pathgraphics.depth = -1;
}
次にupdateでクリック時のパス解析処理を追加します。
astar.getNodeで現在位置と目的地のノードを取得し、aster.pathにノードを渡すことでパスの配列が得られます。
update(){
~~


    if (this.input.activePointer.justDown) {
        this.pathgraphics.clear();
        this.pathgraphics.fillStyle(0xf08300, 1);

        //プレイヤーの現在位置とクリックされた位置をasterに渡す
        let nodeA = this.astar.getNode(Math.floor(this.player.x / this.tileSize), Math.floor(this.player.y / this.tileSize));
        let nodeB = this.astar.getNode(Math.floor(this.input.activePointer.x / this.tileSize), Math.floor(this.input.activePointer.y / this.tileSize));

        let path = this.astar.path(nodeA, nodeB);

        for (let p of path) {
            this.pathgraphics.fillRect(p.x * this.tileSize, p.y * this.tileSize, this.tileSize, this.tileSize);
        }
    }

~~
}
実行結果がこちらです。
クリック部分までのパスが作成されていますね。

斜め移動を許すライブラリのようなので、曲がり角では斜め移動が行われています。
tween.timelineで経路に沿ったtweenを作成する
次に、解析したパスにそってプレイヤーオブジェクトを動かす処理を作りましょう。
tween.timelineを使うことでtweenを段階的に実行することができます。
timelineはtimeline.addによって付け足された処理を逐次実行します。
今回の例ではプレイヤーオブジェクトをパス上の点に順次移動させています。
update() {
    //プレイヤーの移動処理
    this.player.angle += this.controller.xRotate * this.speed;
    this.player.setVelocity(this.controller.xAxis * this.speed, this.controller.yAxis * this.speed);

    if (this.input.activePointer.justDown) {
        this.pathgraphics.clear();
        this.pathgraphics.fillStyle(0xf08300, 1);
        //プレイヤーの現在位置とクリックされた位置をasterに渡す
        let nodeA = this.astar.getNode(Math.floor(this.player.x / this.tileSize), Math.floor(this.player.y / this.tileSize));
        let nodeB = this.astar.getNode(Math.floor(this.input.activePointer.x / this.tileSize), Math.floor(this.input.activePointer.y / this.tileSize));

        let path = this.astar.path(nodeA, nodeB);

        //できたpathをforループでタイムラインに渡す
        let timeline = this.tweens.createTimeline({});

        //timelineに追加された順にtweenが実行される
        for (let p of path) {

            this.pathgraphics.fillRect(p.x * this.tileSize, p.y * this.tileSize, this.tileSize, this.tileSize);

            timeline.add({
                targets: this.player,
                x: p.x*this.tileSize + this.tileSize/2,
                y: p.y * this.tileSize + this.tileSize/2,
                ease: Phaser.Math.Easing.Linear,
                duration: 100
            });
        }

        timeline.play();
    }

}
上の実行結果がこちらです。
 パスに沿って動いているのがわかりますね。
今回のソースはこちらです。
http://firestorage.jp/download/736eeb06cd7c1d36e50b86273ba4b49140588515
Phaser 3 : 迷路ゲームを作る③ カメラのズーム
引き続き迷路ゲームを作っていきます。
今回は迷路を移動できるプレイヤーオブジェクトを作ってみます。
gpnotes.hatenablog.jp
画面からキャンバスサイズ以上のスプライトを作成する
迷路が画面サイズだとせせこましくなるので、大き目の迷路を作っておきます。
tileSizeを40、mazeWidthとmazeHeightを画面幅の二倍に設定します。
MyScene1
~~
//迷路の道幅
public tileSize: number = 40;

Preload(){
~~
//大きいステージを作るために幅と高さを2倍に
this.mazeWidth = this.sys.canvas.width *2/ this.tileSize
this.mazeHeight = this.sys.canvas.height *2/ this.tileSize
~~
}
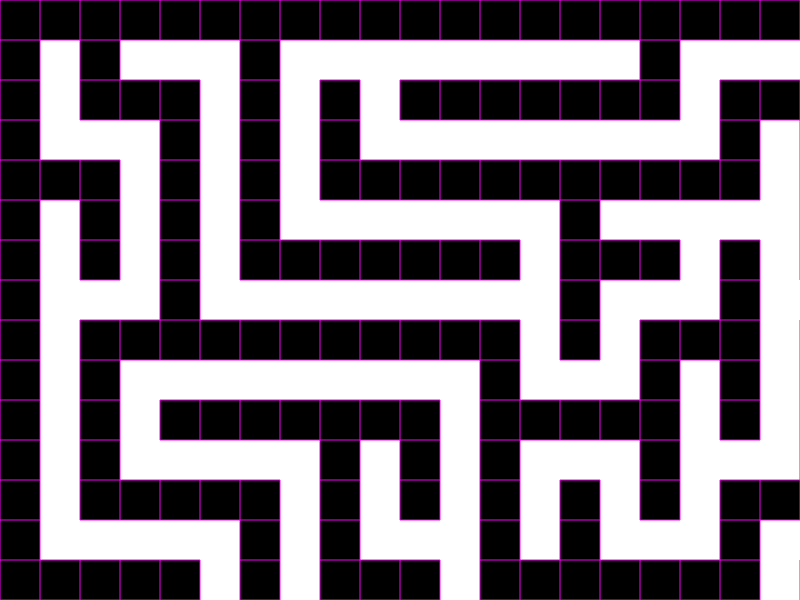
generateTextureはデフォルトでは画面幅でしかテクスチャを作成してくれませんが、引数を指定するとキャンバスに描画されていない部分もきちんとテクスチャ化してくれます。
//テクスチャの作成
this.graphics.generateTexture("maze",this.sys.canvas.width*2,this.sys.canvas.height*2);
実行すると大きくなった迷路が取得できます。
camera.zoomとcamera.centerOnでカメラを調節する
全体を映すためにカメラをズームアウトしてみます。
camera.zoomでカメラのズーム率を変更できます。
今回は迷路の二辺を画面サイズの二倍で作っているので、ズーム率に0.5を指定します。

ズームはされたものの、中心がずれてしまっているので、camera.centerOnを使って中心を指定します。
camera.centerOnの引数に迷路の中心点(800,600)を指定します。
this.cameras.main.centerOn(800, 600);
これでカメラが迷路全体を映せるようになりました。
前回の結果と大差ないように見えますが全体の大きさが二倍になっています。

カメラをプレイヤーに追従させる
迷路内を移動できるプレイヤーを作成してみます。
移動の制御には前回のブロック崩しで作成したコントローラーシーンを流用します。
MyScene1{
~~
//プレイヤー
public player: Phaser.Physics.Matter.Image;

//自機の移動速度
public speed: number = 10;

//入力検知シーンの設定
public controller: InputManager;
~~
preload(){

//InputManagerシーンを実行
this.scene.launch("InputManager")
this.controller = this.scene.get("InputManager") as InputManager;
~~
//球を画面中央に配置
this.player = this.matter.add.image(50, 50, 'block');
this.player.setScale(0.5, 0.5);
this.player.setTint(0x1a1a1a, 0x1a1a1a, 0x1a1a1a, 0x1a1a1a);
this.player.setIgnoreGravity(true);
}

update(){
//プレイヤーの移動処理
this.player.angle += this.controller.xRotate * this.speed;
this.player.setVelocity(this.controller.xAxis * this.speed, this.controller.yAxis * this.speed);
}
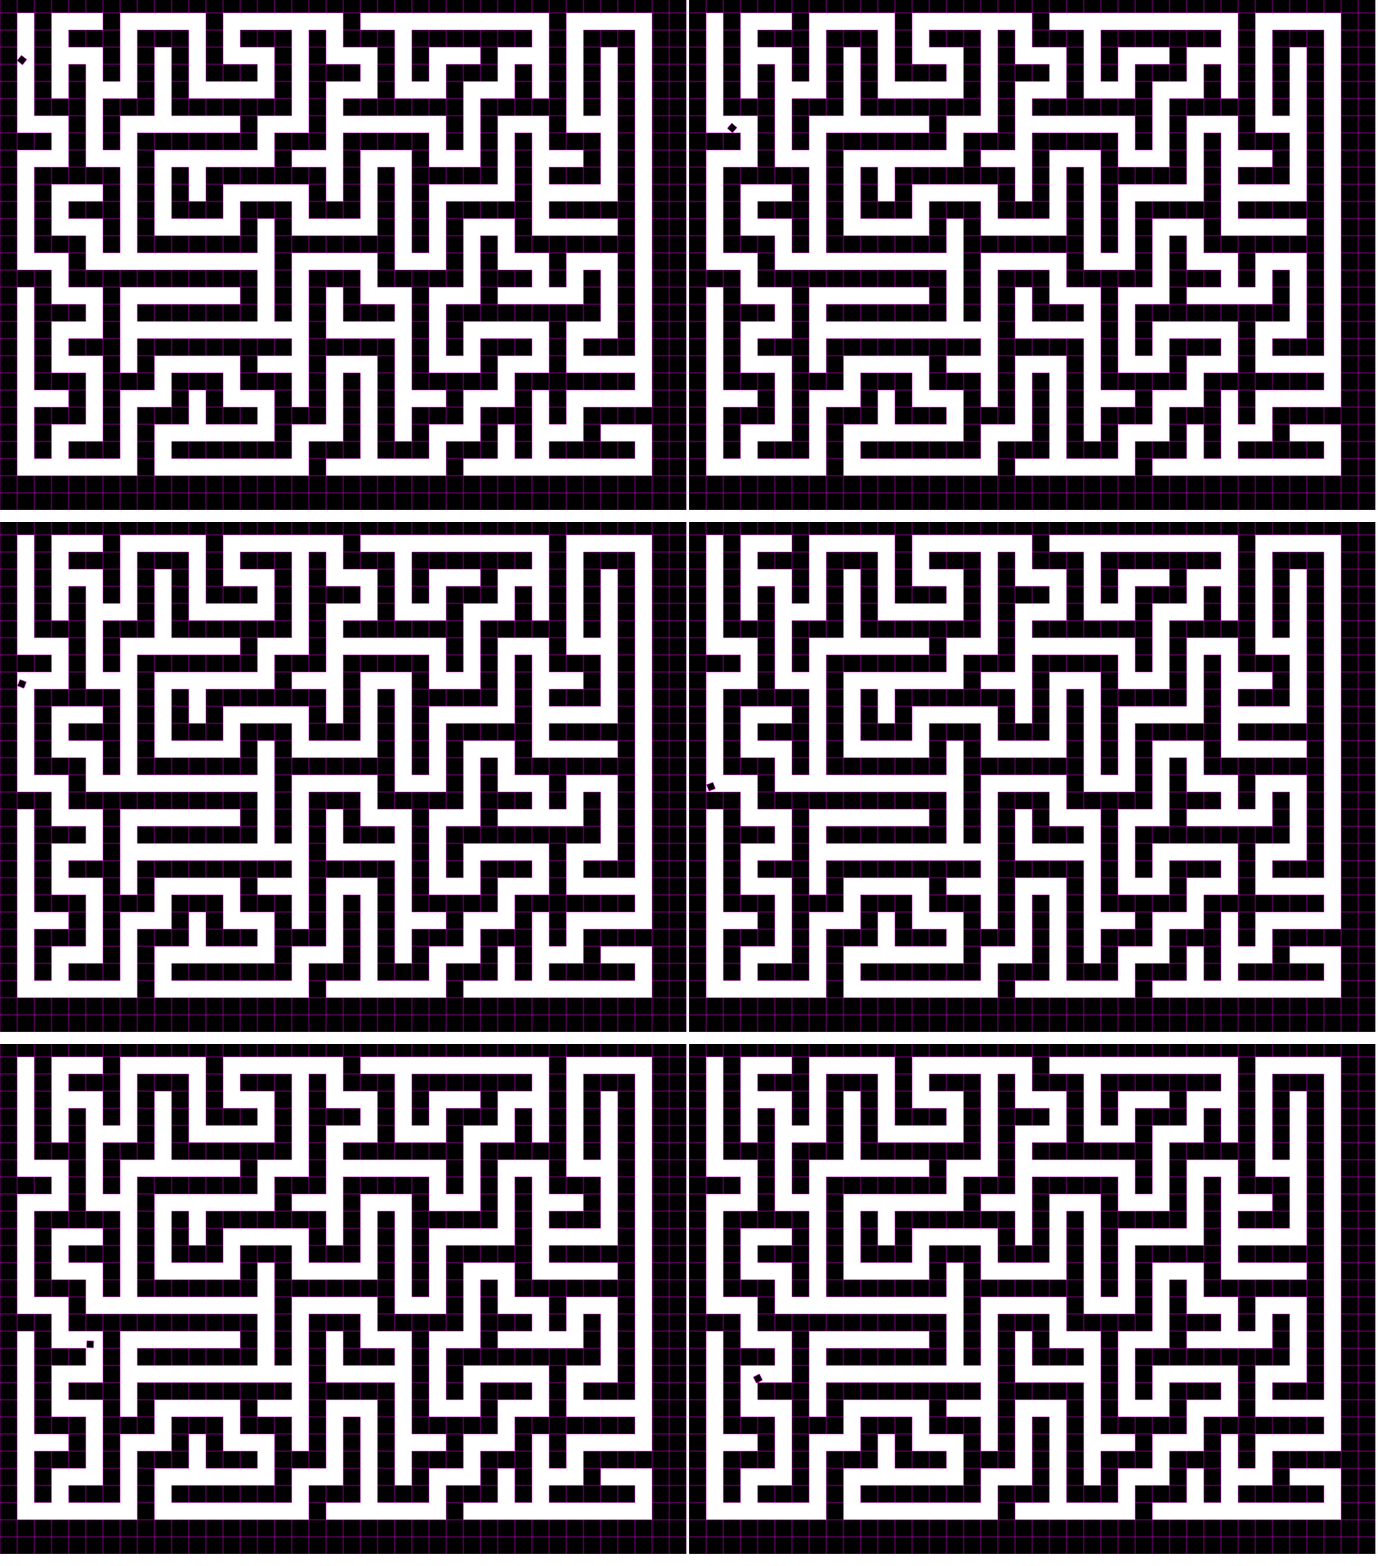
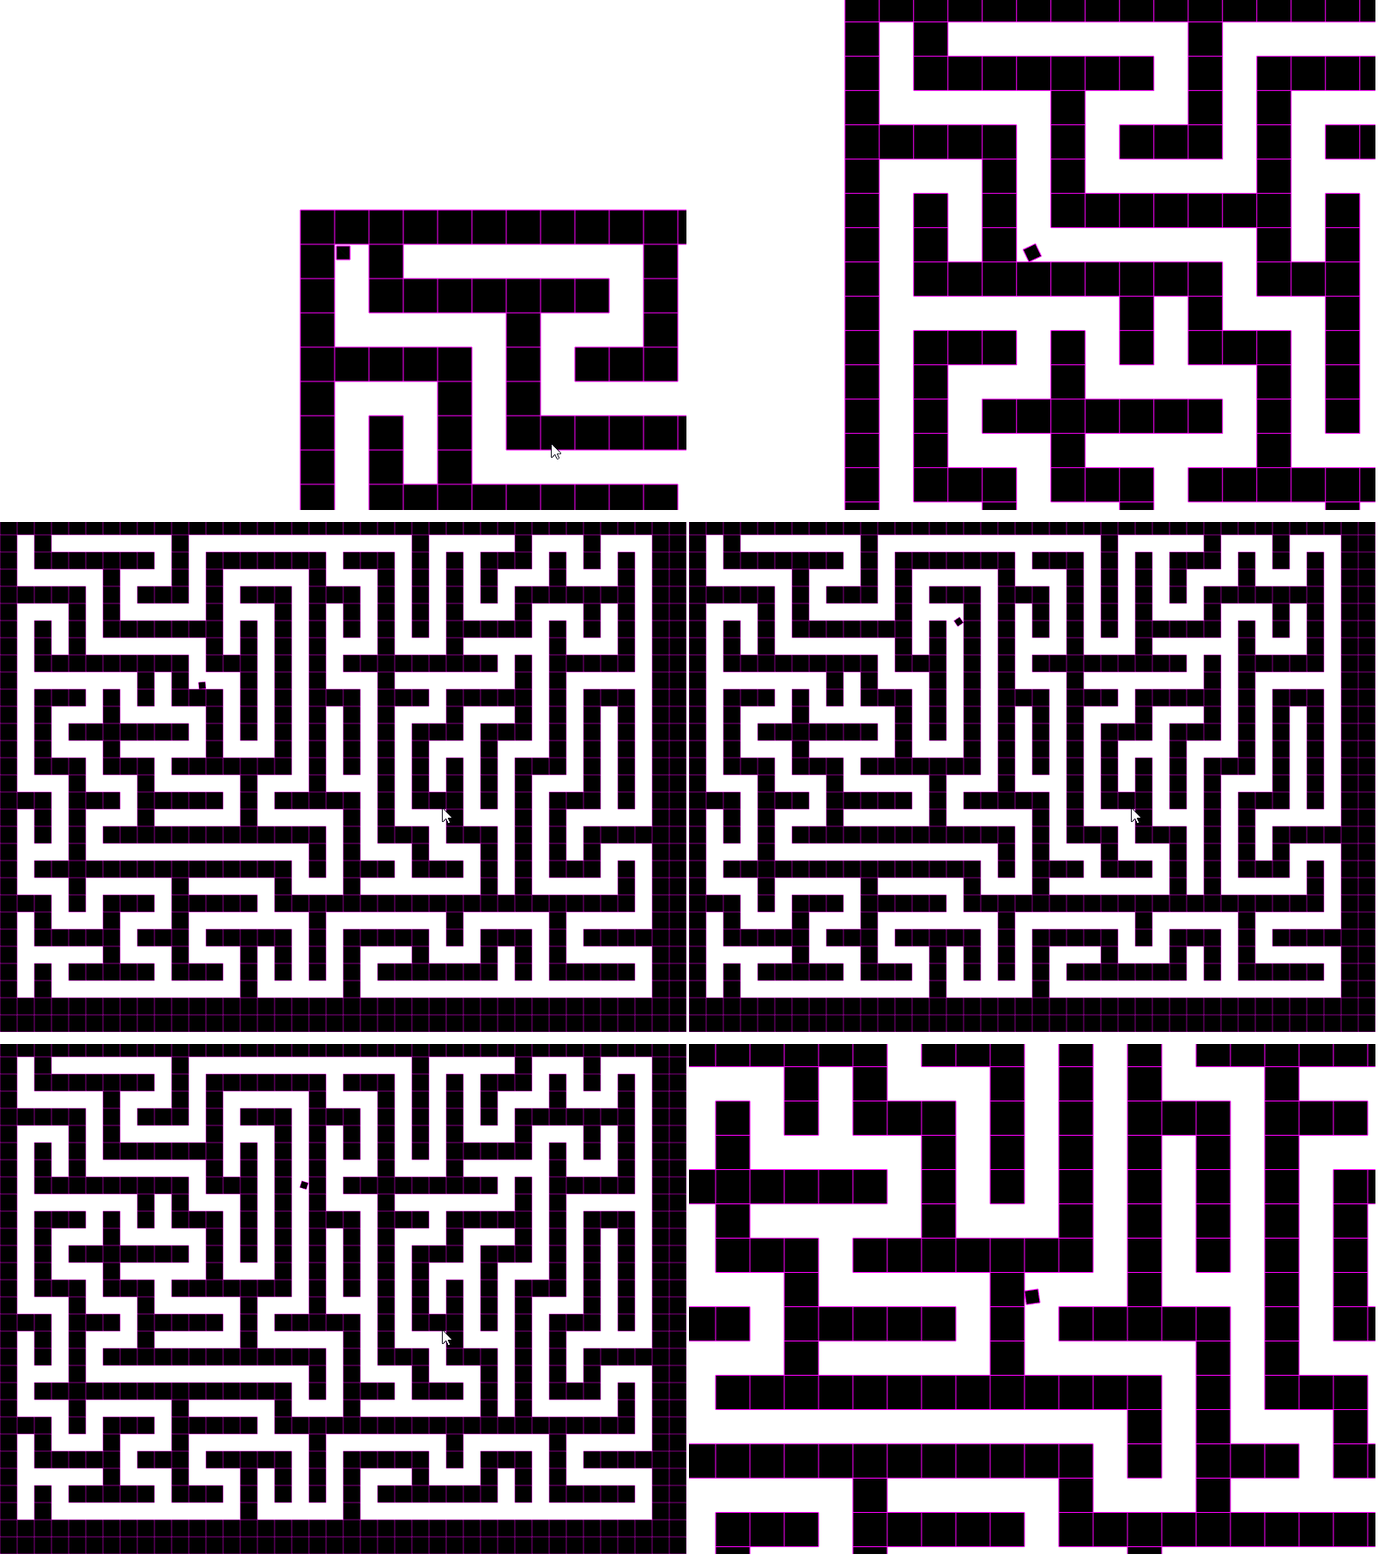
zoomとcenterOnを用いズームイン/アウトを切り替える機能とプレイヤーへのカメラ追従機能を付けます。
update() {

    //プレイヤーの移動処理
    this.player.angle += this.controller.xRotate * this.speed;
    this.player.setVelocity(this.controller.xAxis * this.speed, this.controller.yAxis * this.speed);

    if (this.zoom) {
        this.cameras.main.centerOn(this.player.x, this.player.y);
    }

    if (this.input.activePointer.justDown) {
        if (this.zoom) {
            //全体カメラ
            this.cameras.main.zoom = 0.5;
            this.cameras.main.centerOn(800, 600);
        } else {
            //自機中心カメラ
            this.cameras.main.zoom = 1;
            this.cameras.main.centerOn(this.player.x, this.player.y);
        }

        this.zoom = !this.zoom

    }

}
これで迷路内を動くプレイヤーに追従するカメラができました。
今回のソースはこちらになります。
http://firestorage.jp/download/8648795eb14f5c5e89f642568d0dc9ace21b38f1
phaser 3: 迷路ゲームを作る② generateTexutureによるテクスチャの動的生成
前回に引き続き探索ゲームを作成します。
generateTexture()を用いて動的に迷路スプライトを用意する
前回使用したやり方では迷路用のgraphicsの中で膨大な量のfillRectが動作しているので、graphicsをそのままゲームに使用するのはパフォーマンス的に望ましくありません。
graphics.generateTextureを用いてスプライト化し負荷を軽減します。
前回は道のほうを描画していたのですが、今回は壁のほうをスプライト化したいのでdrawWall関数を用意します。
サンプル元ではmaze配列の値が1以外のときに道と判断していたので、単純に1のときに壁と判断してみます。
public drawWall(posX, posY) {
    //道ではなく壁を描画する
    for (let i = 0; i < this.mazeHeight; i++) {
        for (let j = 0; j < this.mazeWidth; j++) {
            if (this.maze[i][j] == 1) {
                this.graphics.fillStyle(0xffffff, 1);
                this.graphics.fillRect(j * this.tileSize, i * this.tileSize, this.tileSize, this.tileSize);
            }
        }
    }

}
上記でgraphics内に壁用のrectangle群を描画できました。
drawMazeの代わりにdrawWallを呼び出し、そのあとにgenerateTextureを実行します。
generateTextrure(key, width, height)でkeyをキーとしたwidth * heightのテクスチャが作成され、keyを用いてsprite等のテクスチャに使用することができます。
テクスチャの作成後はパフォーマンス改善のためにgraphicsオブジェクトを破棄します。
preload(){
~~

//迷路を描画
this.drawWall(posX, posY);

//テクスチャの作成
this.graphics.generateTexture("maze");
let sprite = this.add.image(0, 0, "maze")
sprite.setTint(0x05fbff, 0x05fbff, 0x1e00ff, 0x1e00ff)
sprite.setOrigin(0, 0);

//graphicsは破棄
this.graphics.destroy();
これでgraphicsをスプライト化することができました。
tintでグラデーションをかけてみると一枚のスプライトであることがよくわかると思います。
プロシージャル生成の部分はそのままなので読み込みごとに形が変わります。
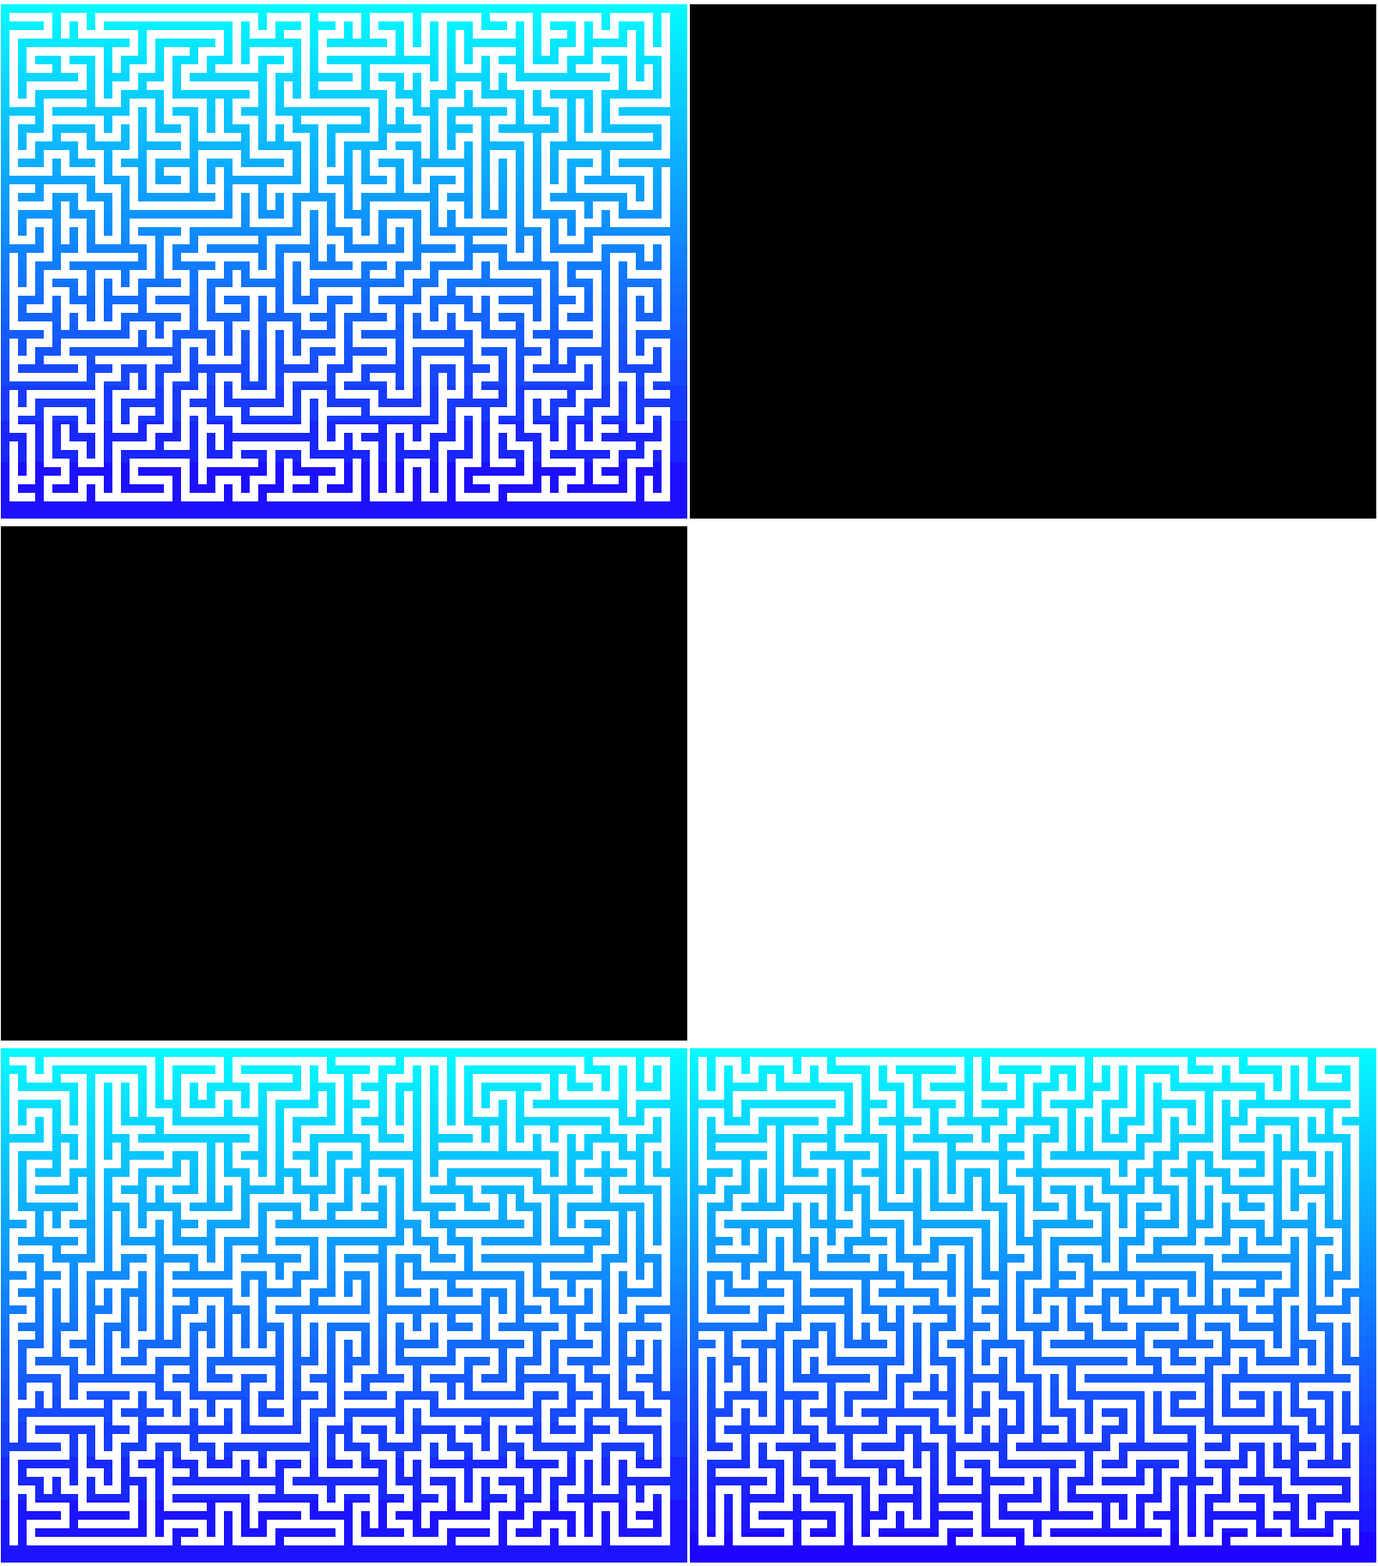
ループ部分で物理ボディを作ってみる
テクスチャができたので、今度は迷路に物理ボディを設定してみます。
matterにはスプライトのalphaから自動で物理ボディを作ってくれるような機能はないようなので、drawWallのループ部分でボディを設定します。
public drawWall(posX, posY) {
    //道ではなく壁を描画する
    for (let i = 0; i < this.mazeHeight; i++) {
        for (let j = 0; j < this.mazeWidth; j++) {
            if (this.maze[i][j] == 1) {
                this.graphics.fillStyle(0xffffff, 1);
                this.graphics.fillRect(j * this.tileSize, i * this.tileSize, this.tileSize, this.tileSize);
                let rect = this.matter.add.rectangle(j * this.tileSize + this.tileSize / 2, i * this.tileSize + this.tileSize / 2, this.tileSize, this.tileSize, { isStatic: true });
            }
        }
    }
}
update内に画面クリックで物理ボディを追加する処理を書いてみました。
update() {

    if (this.input.activePointer.isDown) {
        let block = this.matter.add.image(this.input.activePointer.x, this.input.activePointer.y, "block");
        block.setTint(0x000000,0x000000,0x000000,0x000000)
        block.setScale(0.2);
    }

}
上記の実行結果がこちらです。
見やすくなるように迷路の道幅は40に設定しました。
 スプライトの迷路と重なるように物理ボディが設定されているのがわかります。
壁はstaticに設定してあるので、迷路の幅を10にして壁用の物理ボディが増えてしまっても十分な速度がでます。

今回のソースはこちらになります。
namespace MyGame {

    export class MyScene1 extends Phaser.Scene {

        public graphics: Phaser.GameObjects.Graphics;

        //迷路の幅、高さ
        public mazeWidth: number = 0;
        public mazeHeight: number = 0;
        public maze: number[][] = [];

        //迷路の道幅
        public tileSize: number = 10;

        public vertex = "";
        constructor() {
            super({ key: 'MyScene1', active: false });
        }
        preload() {
            this.load.image("block", "assets/images/block1.png")
            //背景を白に
            this.cameras.main.setBackgroundColor("#ffffff");

            //グラフィックスオブジェクトを追加
            this.graphics = this.add.graphics();

            //移動データ用配列
            var moves = [];

            //キャンバスの大きさから迷路の配列サイズを設定
            this.mazeWidth = this.sys.canvas.width / this.tileSize
            this.mazeHeight = this.sys.canvas.height / this.tileSize

            for (var i = 0; i < this.mazeHeight; i++) {
                this.maze[i] = [];
                for (var j = 0; j < this.mazeWidth; j++) {
                    this.maze[i][j] = 1;
                }
            }

            //迷路の初期位置を設定
            var posX = 1;
            var posY = 1;

            //初期位置には0(壁ではない)を設定
            this.maze[posX][posY] = 0;
            moves.push(posY + posY * this.mazeWidth);

            while (moves.length !== 0) {
                //moveに次の進行可能箇所を設定する
                var possibleDirections = "";
                if (posX + 2 > 0 && posX + 2 < this.mazeHeight - 1 && this.maze[posX + 2][posY] == 1) {
                    possibleDirections += "S";
                }
                if (posX - 2 > 0 && posX - 2 < this.mazeHeight - 1 && this.maze[posX - 2][posY] == 1) {
                    possibleDirections += "N";
                }
                if (posY - 2 > 0 && posY - 2 < this.mazeWidth - 1 && this.maze[posX][posY - 2] == 1) {
                    possibleDirections += "W";
                }
                if (posY + 2 > 0 && posY + 2 < this.mazeWidth - 1 && this.maze[posX][posY + 2] == 1) {
                    possibleDirections += "E";
                }
                if (possibleDirections) {
                    var move = Phaser.Math.Between(0, possibleDirections.length - 1);
                    switch (possibleDirections[move]) {
                        case "N":
                            this.maze[posX - 2][posY] = 0;
                            this.maze[posX - 1][posY] = 0;
                            posX -= 2;
                            break;
                        case "S":
                            this.maze[posX + 2][posY] = 0;
                            this.maze[posX + 1][posY] = 0;
                            posX += 2;
                            break;
                        case "W":
                            this.maze[posX][posY - 2] = 0;
                            this.maze[posX][posY - 1] = 0;
                            posY -= 2;
                            break;
                        case "E":
                            this.maze[posX][posY + 2] = 0;
                            this.maze[posX][posY + 1] = 0;
                            posY += 2;
                            break;
                    }
                    moves.push(posY + posX * this.mazeWidth);
                }
                else {
                    var back = moves.pop();
                    posX = Math.floor(back / this.mazeWidth);
                    posY = back % this.mazeWidth;
                }

            }

            //迷路を描画
            this.drawWall(posX, posY);

            //テクスチャの作成
            this.graphics.generateTexture("maze");
            let sprite = this.add.image(0, 0, "maze");
            sprite.setOrigin(0, 0);
            sprite.setTint(0x000000, 0x000000, 0x000000, 0x000000)

            //graphicsは破棄
            this.graphics.destroy();
        }

        create() {


        }

        update() {

            if (this.input.activePointer.isDown) {
                let block = this.matter.add.image(this.input.activePointer.x, this.input.activePointer.y, "block");
                block.setTint(0x000000,0x000000,0x000000,0x000000)
                block.setScale(0.2);
            }

        }

        public drawMaze(posX, posY) {
            //道を表示
            this.graphics.fillStyle(0x000000, 1);

            for (let i = 0; i < this.mazeHeight; i++) {
                for (let j = 0; j < this.mazeWidth; j++) {
                    if (this.maze[i][j] !== 1) {
                        let rect = this.graphics.fillRect(j * this.tileSize, i * this.tileSize, this.tileSize, this.tileSize);
                    }
                }
            }

        }

        public drawWall(posX, posY) {
            //道ではなく壁を描画する
            for (let i = 0; i < this.mazeHeight; i++) {
                for (let j = 0; j < this.mazeWidth; j++) {
                    if (this.maze[i][j] == 1) {
                        this.graphics.fillStyle(0xffffff, 1);
                        this.graphics.fillRect(j * this.tileSize, i * this.tileSize, this.tileSize, this.tileSize);
                        let rect = this.matter.add.rectangle(j * this.tileSize + this.tileSize / 2, i * this.tileSize + this.tileSize / 2, this.tileSize, this.tileSize, { isStatic: true });
                    }
                }
            }

        }
    }


}
phaser 3: 迷路ゲームを作る① timerによるイベントループ
迷路ゲームの作成に挑戦してみます。

のチュートリアルに従い、迷路を自動生成してみます。
上記のサンプルはphaser2のjavascriptのものなので、phaser3のtypescript用コードに書き直します。
まずは迷路の各パラメータの設定をします。
public graphics: Phaser.GameObjects.Graphics;

//迷路の幅、高さ
public mazeWidth: number = 0;
public mazeHeight: number = 0;
public maze: number[][] = [];

//迷路の道幅
public tileSize: number = 10;
~~
create() {

    //背景を白に
    this.cameras.main.setBackgroundColor("#ffffff");

    //グラフィックスオブジェクトを追加
    this.graphics = this.add.graphics();

    //移動データ用配列
    var moves = [];

    //キャンバスの大きさから迷路の配列サイズを設定
    this.mazeWidth = this.sys.canvas.width / this.tileSize + 1
    this.mazeHeight = this.sys.canvas.height / this.tileSize + 1

    for (var i = 0; i < this.mazeHeight; i++) {
        this.maze[i] = [];
        for (var j = 0; j < this.mazeWidth; j++) {
            this.maze[i][j] = 1;
        }
    }

    //迷路の初期位置を設定
    var posX = 1;
    var posY = 1;

}
timerでループイベントを設定
サンプル元は逐次実行で迷路を作り上げていく形なので、timerでループイベントを設定します。
time.addeventでタイマーを作り、timer.collbackでコールバックを追加できます。
create(){
~~
    //timerを設定、10ミリ秒ごとにcallbackをループする
    let timer = this.time.addEvent({
        delay: 10,
        loop: true
    });

    //タイマーのコールバック
    timer.callback = () => {
上記のdelay:10,loop:trueの設定であれば10秒ごとにcollbackを呼びます。
callbackの中に迷路描画処理を書きます。
    //タイマーのコールバック
    timer.callback = () => {
        //moveに次の進行可能箇所を設定する
        var possibleDirections = "";
        if (posX + 2 > 0 && posX + 2 < this.mazeHeight - 1 && this.maze[posX + 2][posY] == 1) {
            possibleDirections += "S";
        }
        if (posX - 2 > 0 && posX - 2 < this.mazeHeight - 1 && this.maze[posX - 2][posY] == 1) {
            possibleDirections += "N";
        }
        if (posY - 2 > 0 && posY - 2 < this.mazeWidth - 1 && this.maze[posX][posY - 2] == 1) {
            possibleDirections += "W";
        }
        if (posY + 2 > 0 && posY + 2 < this.mazeWidth - 1 && this.maze[posX][posY + 2] == 1) {
            possibleDirections += "E";
        }
        if (possibleDirections) {
            var move = Phaser.Math.Between(0, possibleDirections.length - 1);
            switch (possibleDirections[move]) {
                case "N":
                    this.maze[posX - 2][posY] = 0;
                    this.maze[posX - 1][posY] = 0;
                    posX -= 2;
                    break;
                case "S":
                    this.maze[posX + 2][posY] = 0;
                    this.maze[posX + 1][posY] = 0;
                    posX += 2;
                    break;
                case "W":
                    this.maze[posX][posY - 2] = 0;
                    this.maze[posX][posY - 1] = 0;
                    posY -= 2;
                    break;
                case "E":
                    this.maze[posX][posY + 2] = 0;
                    this.maze[posX][posY + 1] = 0;
                    posY += 2;
                    break;
            }
            moves.push(posY + posX * this.mazeWidth);
        }
        else {
            var back = moves.pop();
            posX = Math.floor(back / this.mazeWidth);
            posY = back % this.mazeWidth;
        }
        //迷路を描画
        this.drawMaze(posX, posY);
    }
fillRectで矩形描画
上記でループ実行部分を移植できました。
次はコールバックの各ループ最後に呼ばれている描画処理を移植します。
this.graphicsの中にfillRectで矩形を描画します。
fillRectの直前に呼ばれたfillStyleの形式に沿って矩形が描画されます。
道の色には黒を、現在位置の色には緑を指定しました。
public drawMaze(posX, posY) {
    //道を表示
    this.graphics.fillStyle(0x000000, 1);

    for (let i = 0; i < this.mazeHeight; i++) {
        for (let j = 0; j < this.mazeWidth; j++) {
            if (this.maze[i][j] !== 1) {
                this.graphics.fillRect(j * this.tileSize, i * this.tileSize, this.tileSize, this.tileSize);
            }
        }
    }

    //現在位置を表示
    this.graphics.fillStyle(0x00ff00, 1);
    this.graphics.fillRect(posY * this.tileSize, posX * this.tileSize, this.tileSize, this.tileSize);

}
以上で迷路のプロシージャル生成アルゴリズムができました。
サンプルでは生成経過を見せるために逐次実行する形式になっているのかと思いますが、while等で迷路の生成を待てば一気に迷路を作り上げることができます。
その場合800*600の画面で数秒程度で迷路が出来上がります。
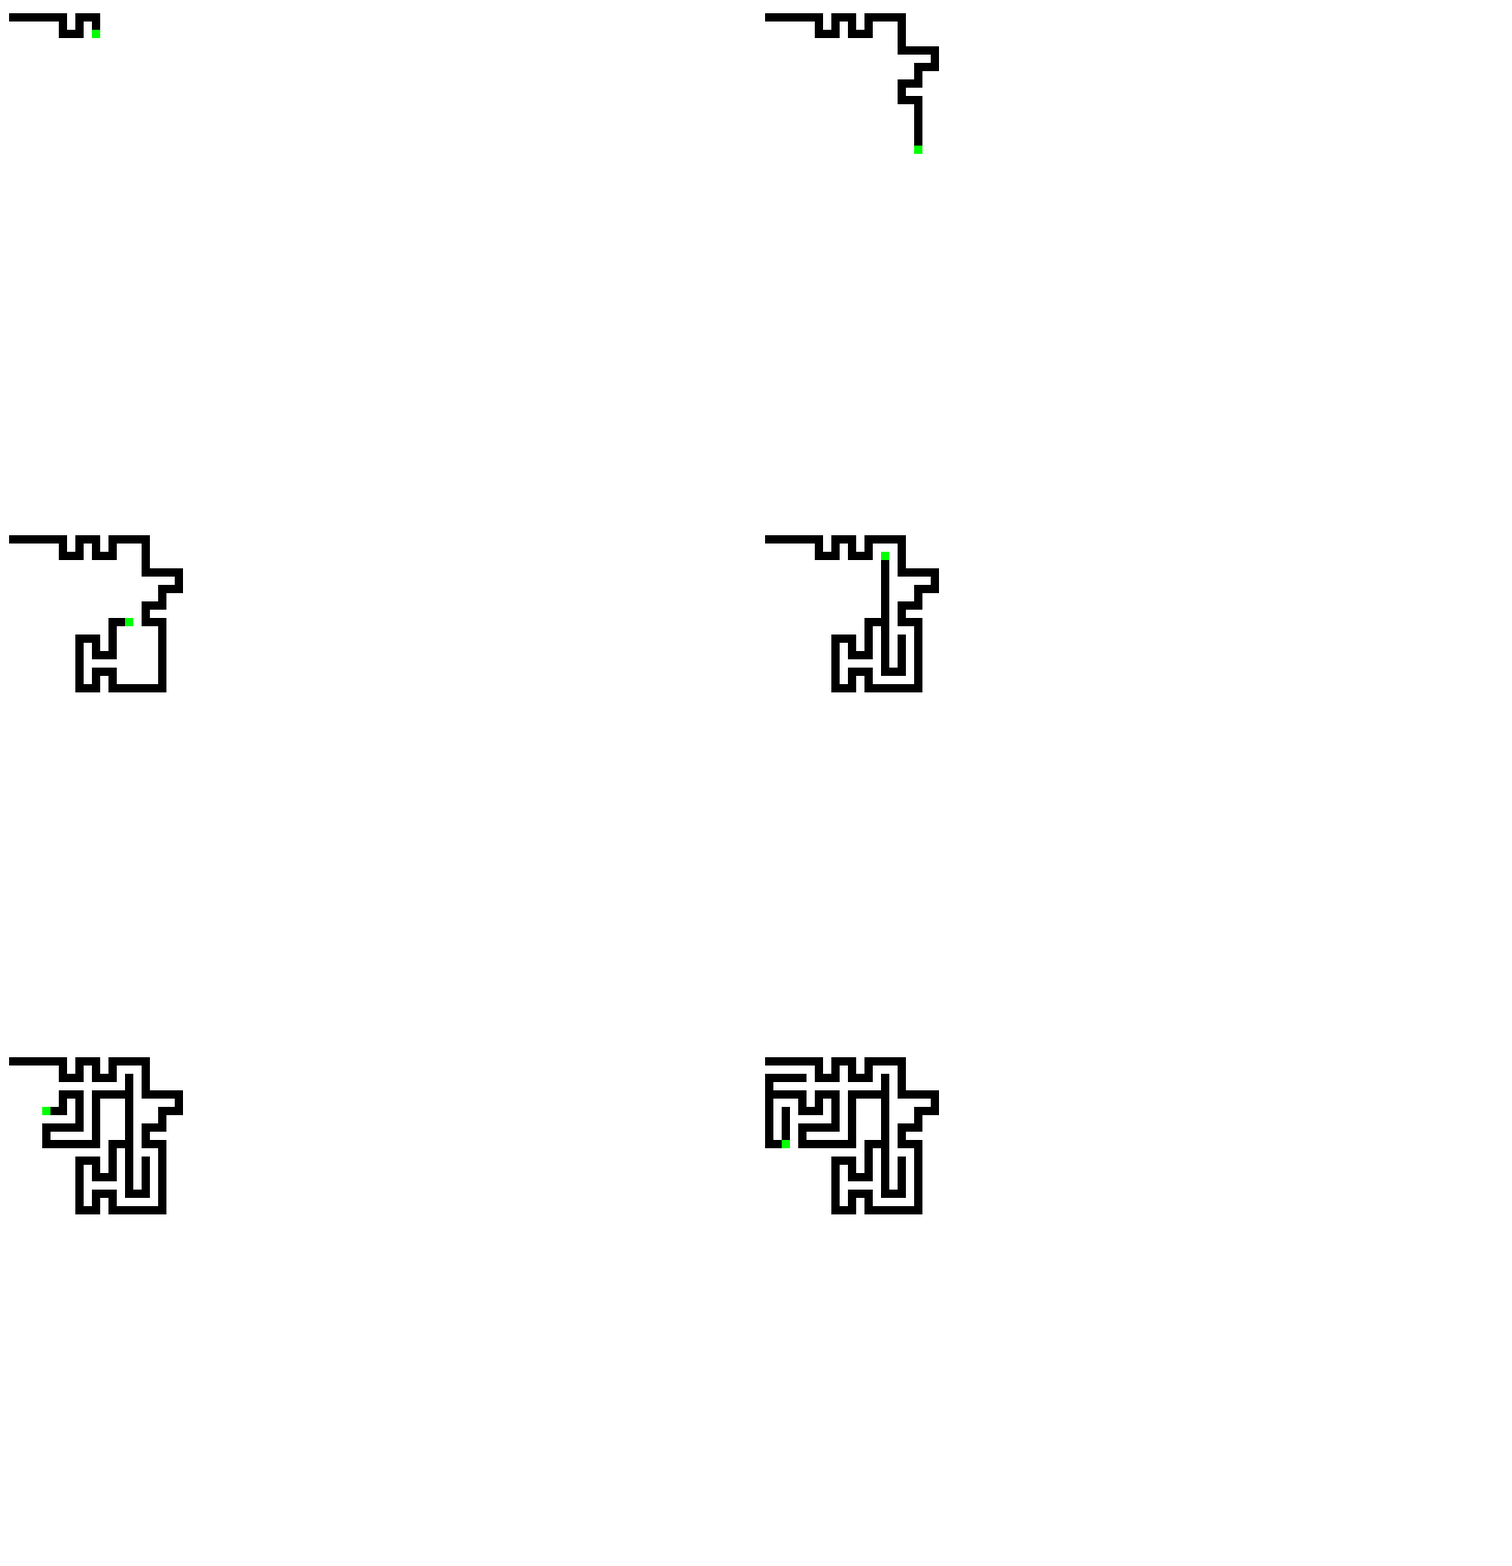

今回のソースはこちらになります。
/// <reference path="../app.ts" />
namespace MyGame {

    export class MyScene1 extends Phaser.Scene {

        public graphics: Phaser.GameObjects.Graphics;

        //迷路の幅、高さ
        public mazeWidth: number = 0;
        public mazeHeight: number = 0;
        public maze: number[][] = [];

        //迷路の道幅
        public tileSize: number = 10;

        constructor() {
            super({ key: 'MyScene1', active: false });
        }

        create() {

            //背景を白に
            this.cameras.main.setBackgroundColor("#ffffff");

            //グラフィックスオブジェクトを追加
            this.graphics = this.add.graphics();

            //移動データ用配列
            var moves = [];

            //キャンバスの大きさから迷路の配列サイズを設定
            this.mazeWidth = this.sys.canvas.width / this.tileSize + 1
            this.mazeHeight = this.sys.canvas.height / this.tileSize + 1

            for (var i = 0; i < this.mazeHeight; i++) {
                this.maze[i] = [];
                for (var j = 0; j < this.mazeWidth; j++) {
                    this.maze[i][j] = 1;
                }
            }

            //迷路の初期位置を設定
            var posX = 1;
            var posY = 1;

            //初期位置には0(壁ではない)を設定
            this.maze[posX][posY] = 0;
            moves.push(posY + posY * this.mazeWidth);

            //timerを設定、10ミリ秒ごとにcallbackをループする
            let timer = this.time.addEvent({
                delay: 10,
                loop: true
            });

            //タイマーのコールバック
            timer.callback = () => {
                //moveに次の進行可能箇所を設定する
                var possibleDirections = "";
                if (posX + 2 > 0 && posX + 2 < this.mazeHeight - 1 && this.maze[posX + 2][posY] == 1) {
                    possibleDirections += "S";
                }
                if (posX - 2 > 0 && posX - 2 < this.mazeHeight - 1 && this.maze[posX - 2][posY] == 1) {
                    possibleDirections += "N";
                }
                if (posY - 2 > 0 && posY - 2 < this.mazeWidth - 1 && this.maze[posX][posY - 2] == 1) {
                    possibleDirections += "W";
                }
                if (posY + 2 > 0 && posY + 2 < this.mazeWidth - 1 && this.maze[posX][posY + 2] == 1) {
                    possibleDirections += "E";
                }
                if (possibleDirections) {
                    var move = Phaser.Math.Between(0, possibleDirections.length - 1);
                    switch (possibleDirections[move]) {
                        case "N":
                            this.maze[posX - 2][posY] = 0;
                            this.maze[posX - 1][posY] = 0;
                            posX -= 2;
                            break;
                        case "S":
                            this.maze[posX + 2][posY] = 0;
                            this.maze[posX + 1][posY] = 0;
                            posX += 2;
                            break;
                        case "W":
                            this.maze[posX][posY - 2] = 0;
                            this.maze[posX][posY - 1] = 0;
                            posY -= 2;
                            break;
                        case "E":
                            this.maze[posX][posY + 2] = 0;
                            this.maze[posX][posY + 1] = 0;
                            posY += 2;
                            break;
                    }
                    moves.push(posY + posX * this.mazeWidth);
                }
                else {
                    var back = moves.pop();
                    posX = Math.floor(back / this.mazeWidth);
                    posY = back % this.mazeWidth;
                }
                //迷路を描画
                this.drawMaze(posX, posY);
            }

        }

        public drawMaze(posX, posY) {
            //道を表示
            this.graphics.fillStyle(0x000000, 1);

            for (let i = 0; i < this.mazeHeight; i++) {
                for (let j = 0; j < this.mazeWidth; j++) {
                    if (this.maze[i][j] !== 1) {
                        this.graphics.fillRect(j * this.tileSize, i * this.tileSize, this.tileSize, this.tileSize);
                    }
                }
            }

            //現在位置を表示
            this.graphics.fillStyle(0x00ff00, 1);
            this.graphics.fillRect(posY * this.tileSize, posX * this.tileSize, this.tileSize, this.tileSize);

        }
    }
}