Phaser 3 : 迷路ゲームを作る③ カメラのズーム
引き続き迷路ゲームを作っていきます。
今回は迷路を移動できるプレイヤーオブジェクトを作ってみます。
gpnotes.hatenablog.jp
画面からキャンバスサイズ以上のスプライトを作成する
迷路が画面サイズだとせせこましくなるので、大き目の迷路を作っておきます。
tileSizeを40、mazeWidthとmazeHeightを画面幅の二倍に設定します。
MyScene1
~~
//迷路の道幅
public tileSize: number = 40;

Preload(){
~~
//大きいステージを作るために幅と高さを2倍に
this.mazeWidth = this.sys.canvas.width *2/ this.tileSize
this.mazeHeight = this.sys.canvas.height *2/ this.tileSize
~~
}
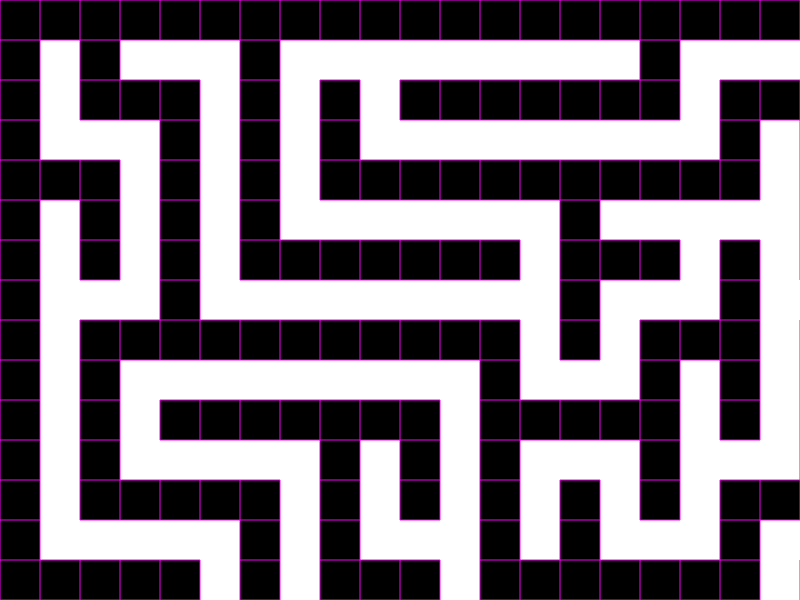
generateTextureはデフォルトでは画面幅でしかテクスチャを作成してくれませんが、引数を指定するとキャンバスに描画されていない部分もきちんとテクスチャ化してくれます。
//テクスチャの作成
this.graphics.generateTexture("maze",this.sys.canvas.width*2,this.sys.canvas.height*2);
実行すると大きくなった迷路が取得できます。
camera.zoomとcamera.centerOnでカメラを調節する
全体を映すためにカメラをズームアウトしてみます。
camera.zoomでカメラのズーム率を変更できます。
今回は迷路の二辺を画面サイズの二倍で作っているので、ズーム率に0.5を指定します。

ズームはされたものの、中心がずれてしまっているので、camera.centerOnを使って中心を指定します。
camera.centerOnの引数に迷路の中心点(800,600)を指定します。
this.cameras.main.centerOn(800, 600);
これでカメラが迷路全体を映せるようになりました。
前回の結果と大差ないように見えますが全体の大きさが二倍になっています。

カメラをプレイヤーに追従させる
迷路内を移動できるプレイヤーを作成してみます。
移動の制御には前回のブロック崩しで作成したコントローラーシーンを流用します。
MyScene1{
~~
//プレイヤー
public player: Phaser.Physics.Matter.Image;

//自機の移動速度
public speed: number = 10;

//入力検知シーンの設定
public controller: InputManager;
~~
preload(){

//InputManagerシーンを実行
this.scene.launch("InputManager")
this.controller = this.scene.get("InputManager") as InputManager;
~~
//球を画面中央に配置
this.player = this.matter.add.image(50, 50, 'block');
this.player.setScale(0.5, 0.5);
this.player.setTint(0x1a1a1a, 0x1a1a1a, 0x1a1a1a, 0x1a1a1a);
this.player.setIgnoreGravity(true);
}

update(){
//プレイヤーの移動処理
this.player.angle += this.controller.xRotate * this.speed;
this.player.setVelocity(this.controller.xAxis * this.speed, this.controller.yAxis * this.speed);
}
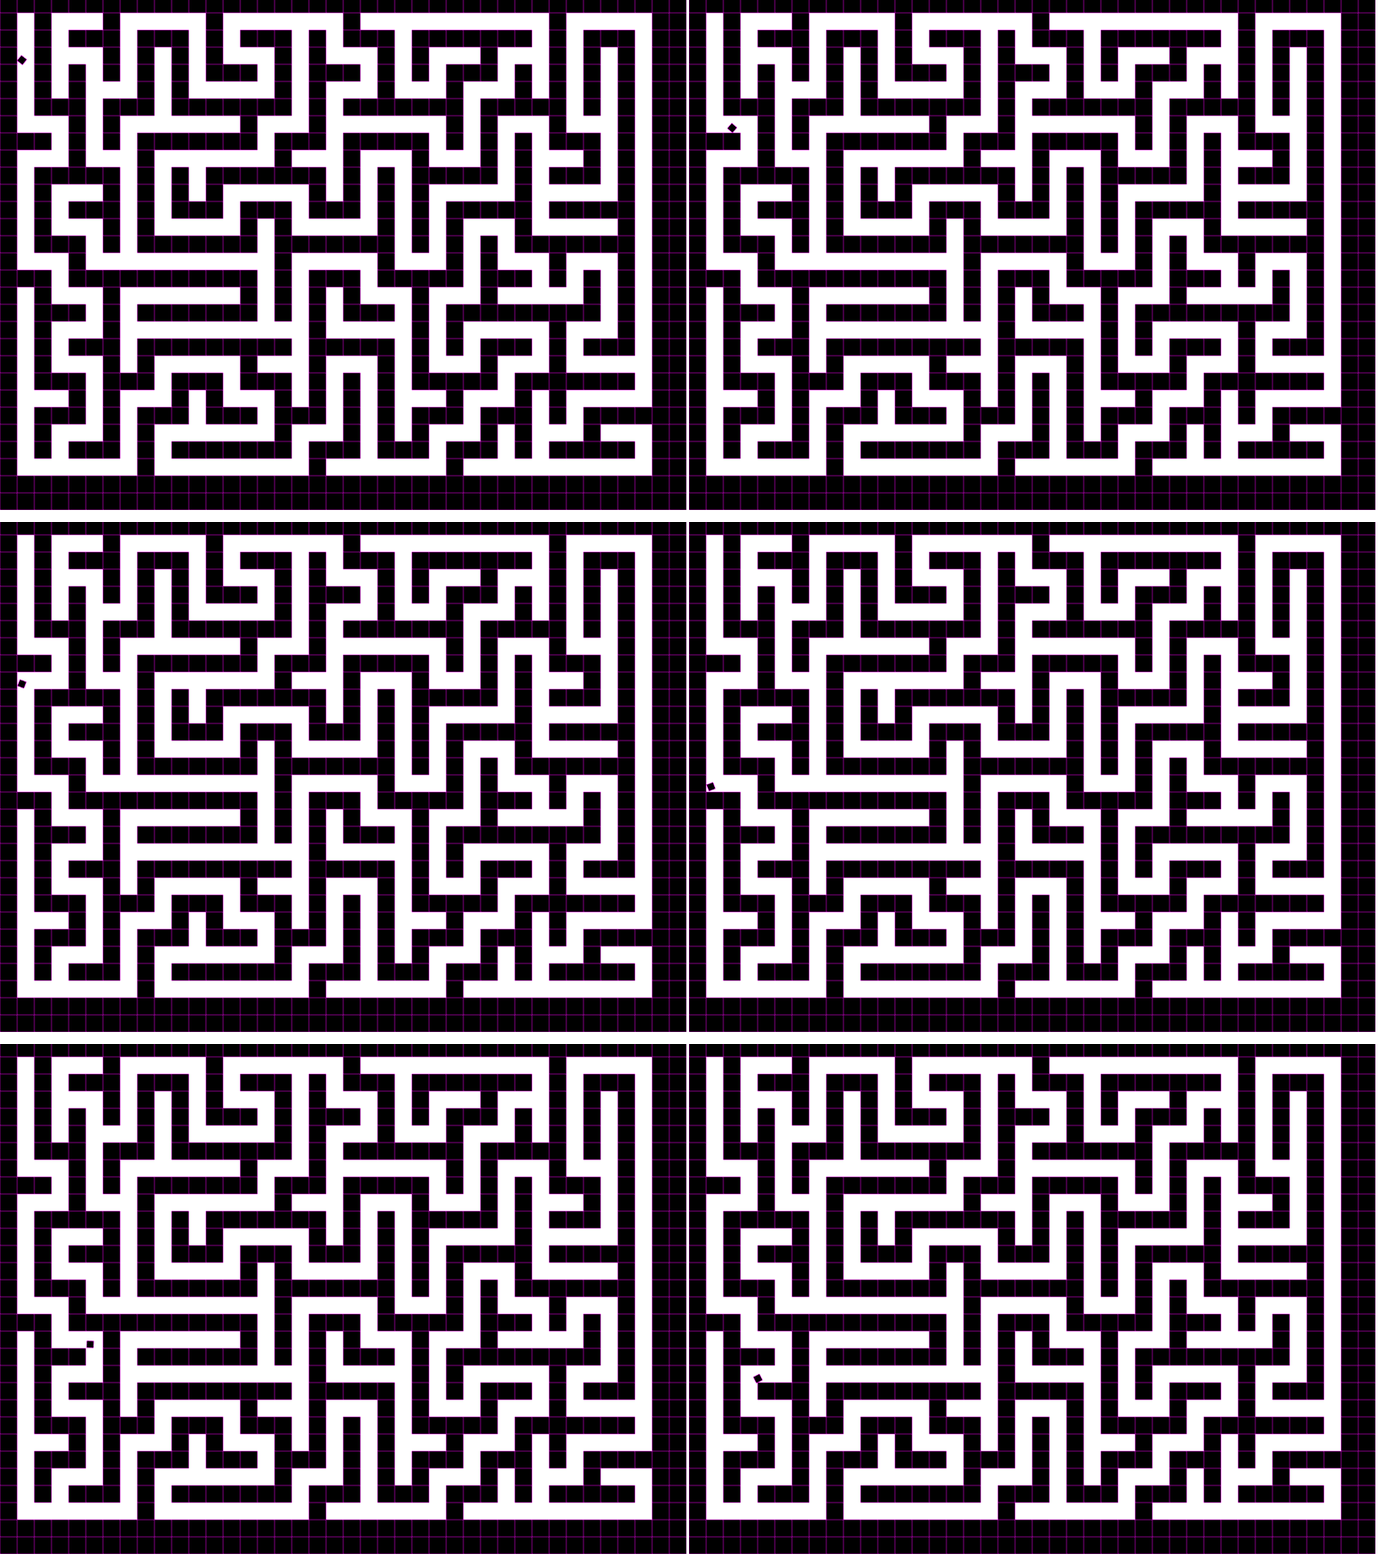
zoomとcenterOnを用いズームイン/アウトを切り替える機能とプレイヤーへのカメラ追従機能を付けます。
update() {

    //プレイヤーの移動処理
    this.player.angle += this.controller.xRotate * this.speed;
    this.player.setVelocity(this.controller.xAxis * this.speed, this.controller.yAxis * this.speed);

    if (this.zoom) {
        this.cameras.main.centerOn(this.player.x, this.player.y);
    }

    if (this.input.activePointer.justDown) {
        if (this.zoom) {
            //全体カメラ
            this.cameras.main.zoom = 0.5;
            this.cameras.main.centerOn(800, 600);
        } else {
            //自機中心カメラ
            this.cameras.main.zoom = 1;
            this.cameras.main.centerOn(this.player.x, this.player.y);
        }

        this.zoom = !this.zoom

    }

}
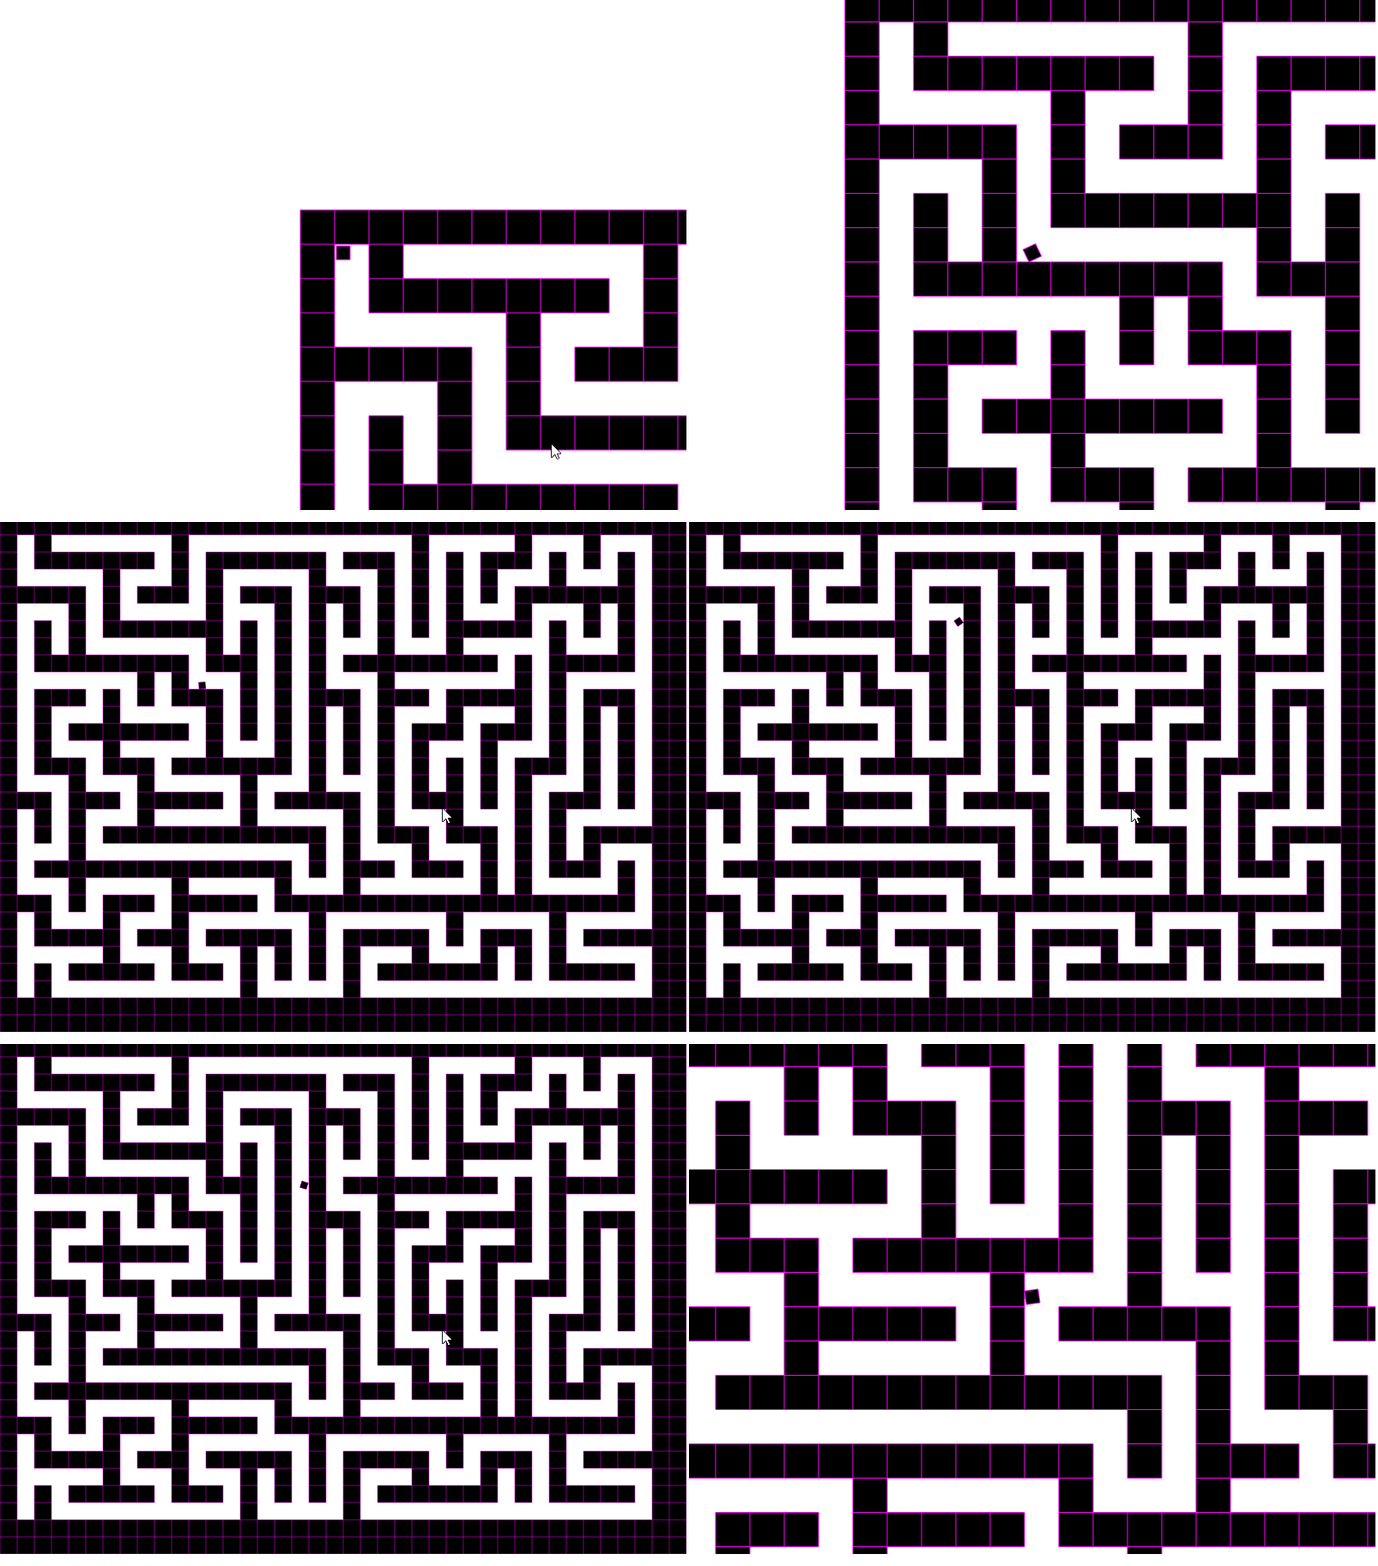
これで迷路内を動くプレイヤーに追従するカメラができました。
今回のソースはこちらになります。
http://firestorage.jp/download/8648795eb14f5c5e89f642568d0dc9ace21b38f1
phaser 3: 迷路ゲームを作る② generateTexutureによるテクスチャの動的生成
前回に引き続き探索ゲームを作成します。
generateTexture()を用いて動的に迷路スプライトを用意する
前回使用したやり方では迷路用のgraphicsの中で膨大な量のfillRectが動作しているので、graphicsをそのままゲームに使用するのはパフォーマンス的に望ましくありません。
graphics.generateTextureを用いてスプライト化し負荷を軽減します。
前回は道のほうを描画していたのですが、今回は壁のほうをスプライト化したいのでdrawWall関数を用意します。
サンプル元ではmaze配列の値が1以外のときに道と判断していたので、単純に1のときに壁と判断してみます。
public drawWall(posX, posY) {
    //道ではなく壁を描画する
    for (let i = 0; i < this.mazeHeight; i++) {
        for (let j = 0; j < this.mazeWidth; j++) {
            if (this.maze[i][j] == 1) {
                this.graphics.fillStyle(0xffffff, 1);
                this.graphics.fillRect(j * this.tileSize, i * this.tileSize, this.tileSize, this.tileSize);
            }
        }
    }

}
上記でgraphics内に壁用のrectangle群を描画できました。
drawMazeの代わりにdrawWallを呼び出し、そのあとにgenerateTextureを実行します。
generateTextrure(key, width, height)でkeyをキーとしたwidth * heightのテクスチャが作成され、keyを用いてsprite等のテクスチャに使用することができます。
テクスチャの作成後はパフォーマンス改善のためにgraphicsオブジェクトを破棄します。
preload(){
~~

//迷路を描画
this.drawWall(posX, posY);

//テクスチャの作成
this.graphics.generateTexture("maze");
let sprite = this.add.image(0, 0, "maze")
sprite.setTint(0x05fbff, 0x05fbff, 0x1e00ff, 0x1e00ff)
sprite.setOrigin(0, 0);

//graphicsは破棄
this.graphics.destroy();
これでgraphicsをスプライト化することができました。
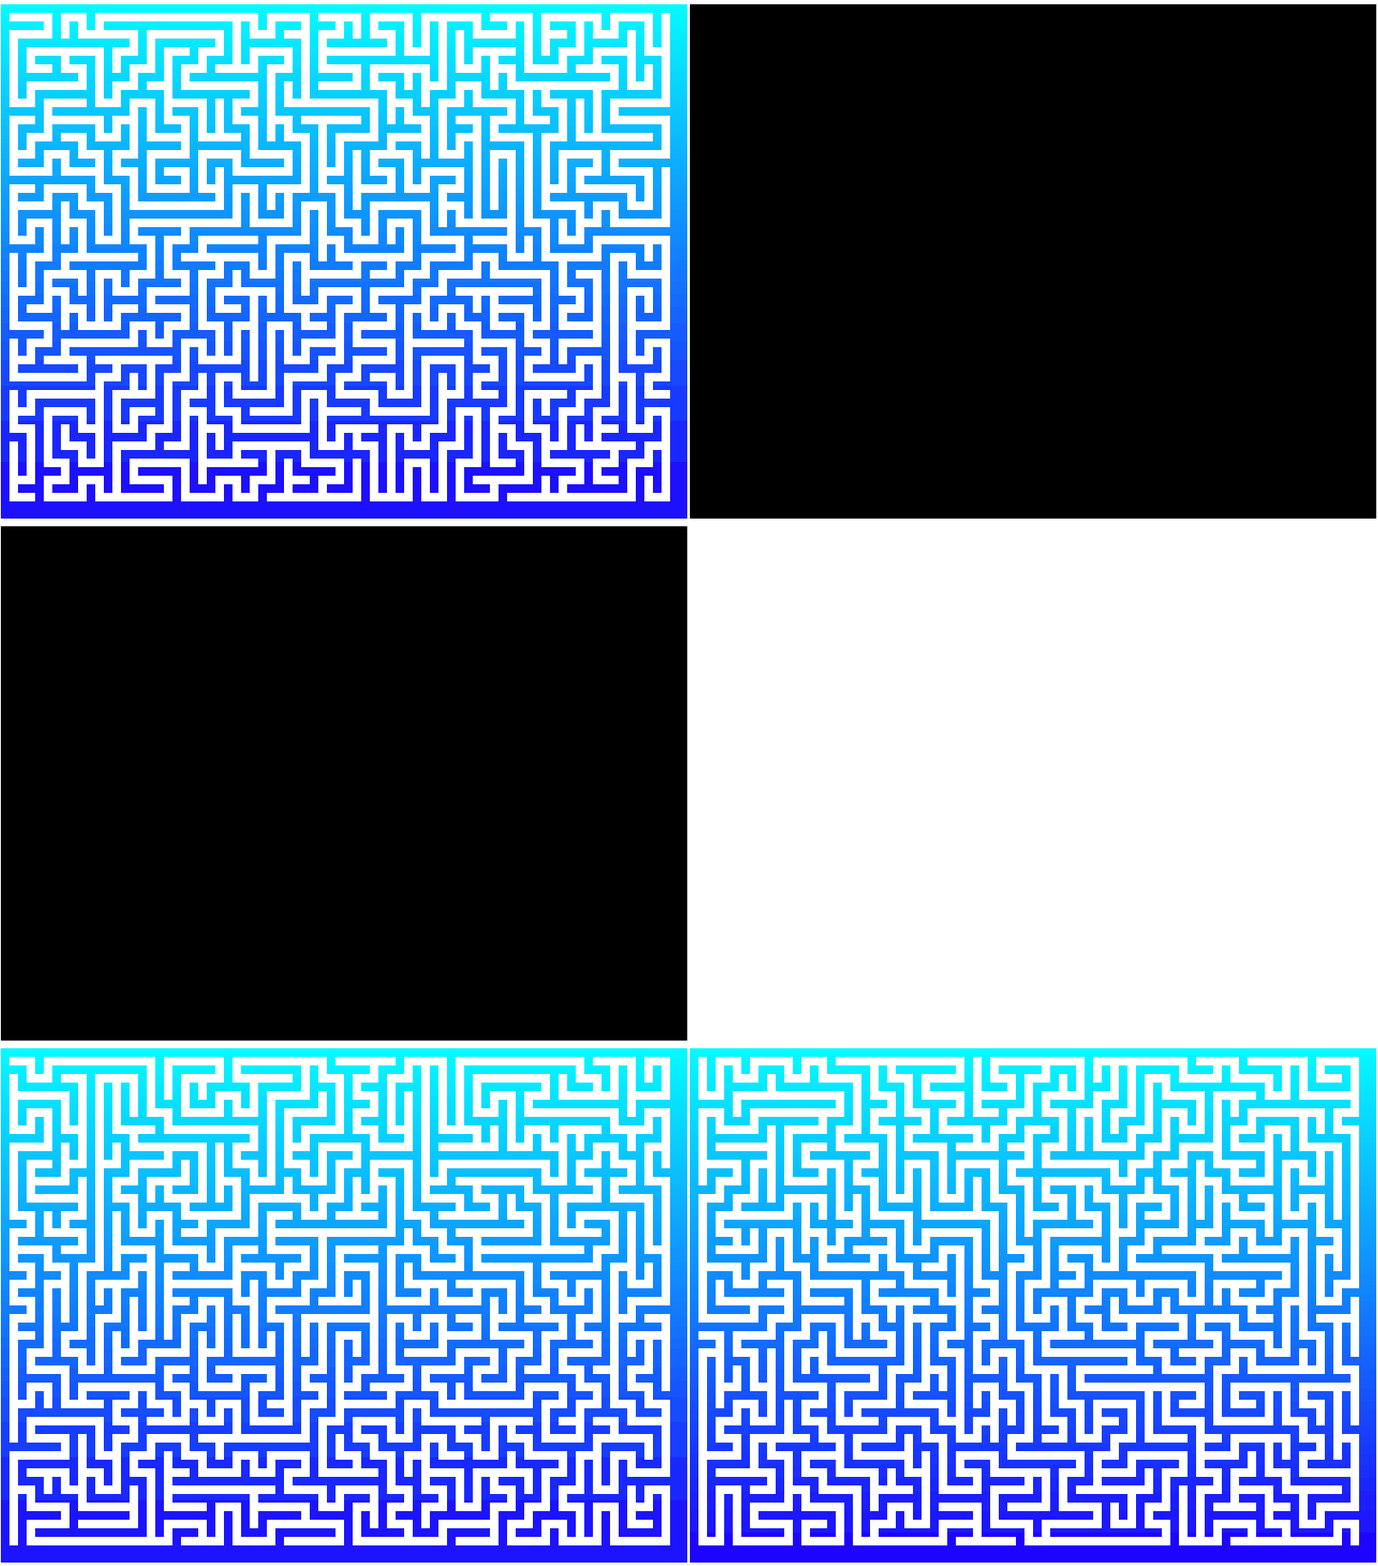
tintでグラデーションをかけてみると一枚のスプライトであることがよくわかると思います。
プロシージャル生成の部分はそのままなので読み込みごとに形が変わります。
ループ部分で物理ボディを作ってみる
テクスチャができたので、今度は迷路に物理ボディを設定してみます。
matterにはスプライトのalphaから自動で物理ボディを作ってくれるような機能はないようなので、drawWallのループ部分でボディを設定します。
public drawWall(posX, posY) {
    //道ではなく壁を描画する
    for (let i = 0; i < this.mazeHeight; i++) {
        for (let j = 0; j < this.mazeWidth; j++) {
            if (this.maze[i][j] == 1) {
                this.graphics.fillStyle(0xffffff, 1);
                this.graphics.fillRect(j * this.tileSize, i * this.tileSize, this.tileSize, this.tileSize);
                let rect = this.matter.add.rectangle(j * this.tileSize + this.tileSize / 2, i * this.tileSize + this.tileSize / 2, this.tileSize, this.tileSize, { isStatic: true });
            }
        }
    }
}
update内に画面クリックで物理ボディを追加する処理を書いてみました。
update() {

    if (this.input.activePointer.isDown) {
        let block = this.matter.add.image(this.input.activePointer.x, this.input.activePointer.y, "block");
        block.setTint(0x000000,0x000000,0x000000,0x000000)
        block.setScale(0.2);
    }

}
上記の実行結果がこちらです。
見やすくなるように迷路の道幅は40に設定しました。
 スプライトの迷路と重なるように物理ボディが設定されているのがわかります。
壁はstaticに設定してあるので、迷路の幅を10にして壁用の物理ボディが増えてしまっても十分な速度がでます。

今回のソースはこちらになります。
namespace MyGame {

    export class MyScene1 extends Phaser.Scene {

        public graphics: Phaser.GameObjects.Graphics;

        //迷路の幅、高さ
        public mazeWidth: number = 0;
        public mazeHeight: number = 0;
        public maze: number[][] = [];

        //迷路の道幅
        public tileSize: number = 10;

        public vertex = "";
        constructor() {
            super({ key: 'MyScene1', active: false });
        }
        preload() {
            this.load.image("block", "assets/images/block1.png")
            //背景を白に
            this.cameras.main.setBackgroundColor("#ffffff");

            //グラフィックスオブジェクトを追加
            this.graphics = this.add.graphics();

            //移動データ用配列
            var moves = [];

            //キャンバスの大きさから迷路の配列サイズを設定
            this.mazeWidth = this.sys.canvas.width / this.tileSize
            this.mazeHeight = this.sys.canvas.height / this.tileSize

            for (var i = 0; i < this.mazeHeight; i++) {
                this.maze[i] = [];
                for (var j = 0; j < this.mazeWidth; j++) {
                    this.maze[i][j] = 1;
                }
            }

            //迷路の初期位置を設定
            var posX = 1;
            var posY = 1;

            //初期位置には0(壁ではない)を設定
            this.maze[posX][posY] = 0;
            moves.push(posY + posY * this.mazeWidth);

            while (moves.length !== 0) {
                //moveに次の進行可能箇所を設定する
                var possibleDirections = "";
                if (posX + 2 > 0 && posX + 2 < this.mazeHeight - 1 && this.maze[posX + 2][posY] == 1) {
                    possibleDirections += "S";
                }
                if (posX - 2 > 0 && posX - 2 < this.mazeHeight - 1 && this.maze[posX - 2][posY] == 1) {
                    possibleDirections += "N";
                }
                if (posY - 2 > 0 && posY - 2 < this.mazeWidth - 1 && this.maze[posX][posY - 2] == 1) {
                    possibleDirections += "W";
                }
                if (posY + 2 > 0 && posY + 2 < this.mazeWidth - 1 && this.maze[posX][posY + 2] == 1) {
                    possibleDirections += "E";
                }
                if (possibleDirections) {
                    var move = Phaser.Math.Between(0, possibleDirections.length - 1);
                    switch (possibleDirections[move]) {
                        case "N":
                            this.maze[posX - 2][posY] = 0;
                            this.maze[posX - 1][posY] = 0;
                            posX -= 2;
                            break;
                        case "S":
                            this.maze[posX + 2][posY] = 0;
                            this.maze[posX + 1][posY] = 0;
                            posX += 2;
                            break;
                        case "W":
                            this.maze[posX][posY - 2] = 0;
                            this.maze[posX][posY - 1] = 0;
                            posY -= 2;
                            break;
                        case "E":
                            this.maze[posX][posY + 2] = 0;
                            this.maze[posX][posY + 1] = 0;
                            posY += 2;
                            break;
                    }
                    moves.push(posY + posX * this.mazeWidth);
                }
                else {
                    var back = moves.pop();
                    posX = Math.floor(back / this.mazeWidth);
                    posY = back % this.mazeWidth;
                }

            }

            //迷路を描画
            this.drawWall(posX, posY);

            //テクスチャの作成
            this.graphics.generateTexture("maze");
            let sprite = this.add.image(0, 0, "maze");
            sprite.setOrigin(0, 0);
            sprite.setTint(0x000000, 0x000000, 0x000000, 0x000000)

            //graphicsは破棄
            this.graphics.destroy();
        }

        create() {


        }

        update() {

            if (this.input.activePointer.isDown) {
                let block = this.matter.add.image(this.input.activePointer.x, this.input.activePointer.y, "block");
                block.setTint(0x000000,0x000000,0x000000,0x000000)
                block.setScale(0.2);
            }

        }

        public drawMaze(posX, posY) {
            //道を表示
            this.graphics.fillStyle(0x000000, 1);

            for (let i = 0; i < this.mazeHeight; i++) {
                for (let j = 0; j < this.mazeWidth; j++) {
                    if (this.maze[i][j] !== 1) {
                        let rect = this.graphics.fillRect(j * this.tileSize, i * this.tileSize, this.tileSize, this.tileSize);
                    }
                }
            }

        }

        public drawWall(posX, posY) {
            //道ではなく壁を描画する
            for (let i = 0; i < this.mazeHeight; i++) {
                for (let j = 0; j < this.mazeWidth; j++) {
                    if (this.maze[i][j] == 1) {
                        this.graphics.fillStyle(0xffffff, 1);
                        this.graphics.fillRect(j * this.tileSize, i * this.tileSize, this.tileSize, this.tileSize);
                        let rect = this.matter.add.rectangle(j * this.tileSize + this.tileSize / 2, i * this.tileSize + this.tileSize / 2, this.tileSize, this.tileSize, { isStatic: true });
                    }
                }
            }

        }
    }


}
phaser 3: 迷路ゲームを作る① timerによるイベントループ
迷路ゲームの作成に挑戦してみます。

のチュートリアルに従い、迷路を自動生成してみます。
上記のサンプルはphaser2のjavascriptのものなので、phaser3のtypescript用コードに書き直します。
まずは迷路の各パラメータの設定をします。
public graphics: Phaser.GameObjects.Graphics;

//迷路の幅、高さ
public mazeWidth: number = 0;
public mazeHeight: number = 0;
public maze: number[][] = [];

//迷路の道幅
public tileSize: number = 10;
~~
create() {

    //背景を白に
    this.cameras.main.setBackgroundColor("#ffffff");

    //グラフィックスオブジェクトを追加
    this.graphics = this.add.graphics();

    //移動データ用配列
    var moves = [];

    //キャンバスの大きさから迷路の配列サイズを設定
    this.mazeWidth = this.sys.canvas.width / this.tileSize + 1
    this.mazeHeight = this.sys.canvas.height / this.tileSize + 1

    for (var i = 0; i < this.mazeHeight; i++) {
        this.maze[i] = [];
        for (var j = 0; j < this.mazeWidth; j++) {
            this.maze[i][j] = 1;
        }
    }

    //迷路の初期位置を設定
    var posX = 1;
    var posY = 1;

}
timerでループイベントを設定
サンプル元は逐次実行で迷路を作り上げていく形なので、timerでループイベントを設定します。
time.addeventでタイマーを作り、timer.collbackでコールバックを追加できます。
create(){
~~
    //timerを設定、10ミリ秒ごとにcallbackをループする
    let timer = this.time.addEvent({
        delay: 10,
        loop: true
    });

    //タイマーのコールバック
    timer.callback = () => {
上記のdelay:10,loop:trueの設定であれば10秒ごとにcollbackを呼びます。
callbackの中に迷路描画処理を書きます。
    //タイマーのコールバック
    timer.callback = () => {
        //moveに次の進行可能箇所を設定する
        var possibleDirections = "";
        if (posX + 2 > 0 && posX + 2 < this.mazeHeight - 1 && this.maze[posX + 2][posY] == 1) {
            possibleDirections += "S";
        }
        if (posX - 2 > 0 && posX - 2 < this.mazeHeight - 1 && this.maze[posX - 2][posY] == 1) {
            possibleDirections += "N";
        }
        if (posY - 2 > 0 && posY - 2 < this.mazeWidth - 1 && this.maze[posX][posY - 2] == 1) {
            possibleDirections += "W";
        }
        if (posY + 2 > 0 && posY + 2 < this.mazeWidth - 1 && this.maze[posX][posY + 2] == 1) {
            possibleDirections += "E";
        }
        if (possibleDirections) {
            var move = Phaser.Math.Between(0, possibleDirections.length - 1);
            switch (possibleDirections[move]) {
                case "N":
                    this.maze[posX - 2][posY] = 0;
                    this.maze[posX - 1][posY] = 0;
                    posX -= 2;
                    break;
                case "S":
                    this.maze[posX + 2][posY] = 0;
                    this.maze[posX + 1][posY] = 0;
                    posX += 2;
                    break;
                case "W":
                    this.maze[posX][posY - 2] = 0;
                    this.maze[posX][posY - 1] = 0;
                    posY -= 2;
                    break;
                case "E":
                    this.maze[posX][posY + 2] = 0;
                    this.maze[posX][posY + 1] = 0;
                    posY += 2;
                    break;
            }
            moves.push(posY + posX * this.mazeWidth);
        }
        else {
            var back = moves.pop();
            posX = Math.floor(back / this.mazeWidth);
            posY = back % this.mazeWidth;
        }
        //迷路を描画
        this.drawMaze(posX, posY);
    }
fillRectで矩形描画
上記でループ実行部分を移植できました。
次はコールバックの各ループ最後に呼ばれている描画処理を移植します。
this.graphicsの中にfillRectで矩形を描画します。
fillRectの直前に呼ばれたfillStyleの形式に沿って矩形が描画されます。
道の色には黒を、現在位置の色には緑を指定しました。
public drawMaze(posX, posY) {
    //道を表示
    this.graphics.fillStyle(0x000000, 1);

    for (let i = 0; i < this.mazeHeight; i++) {
        for (let j = 0; j < this.mazeWidth; j++) {
            if (this.maze[i][j] !== 1) {
                this.graphics.fillRect(j * this.tileSize, i * this.tileSize, this.tileSize, this.tileSize);
            }
        }
    }

    //現在位置を表示
    this.graphics.fillStyle(0x00ff00, 1);
    this.graphics.fillRect(posY * this.tileSize, posX * this.tileSize, this.tileSize, this.tileSize);

}
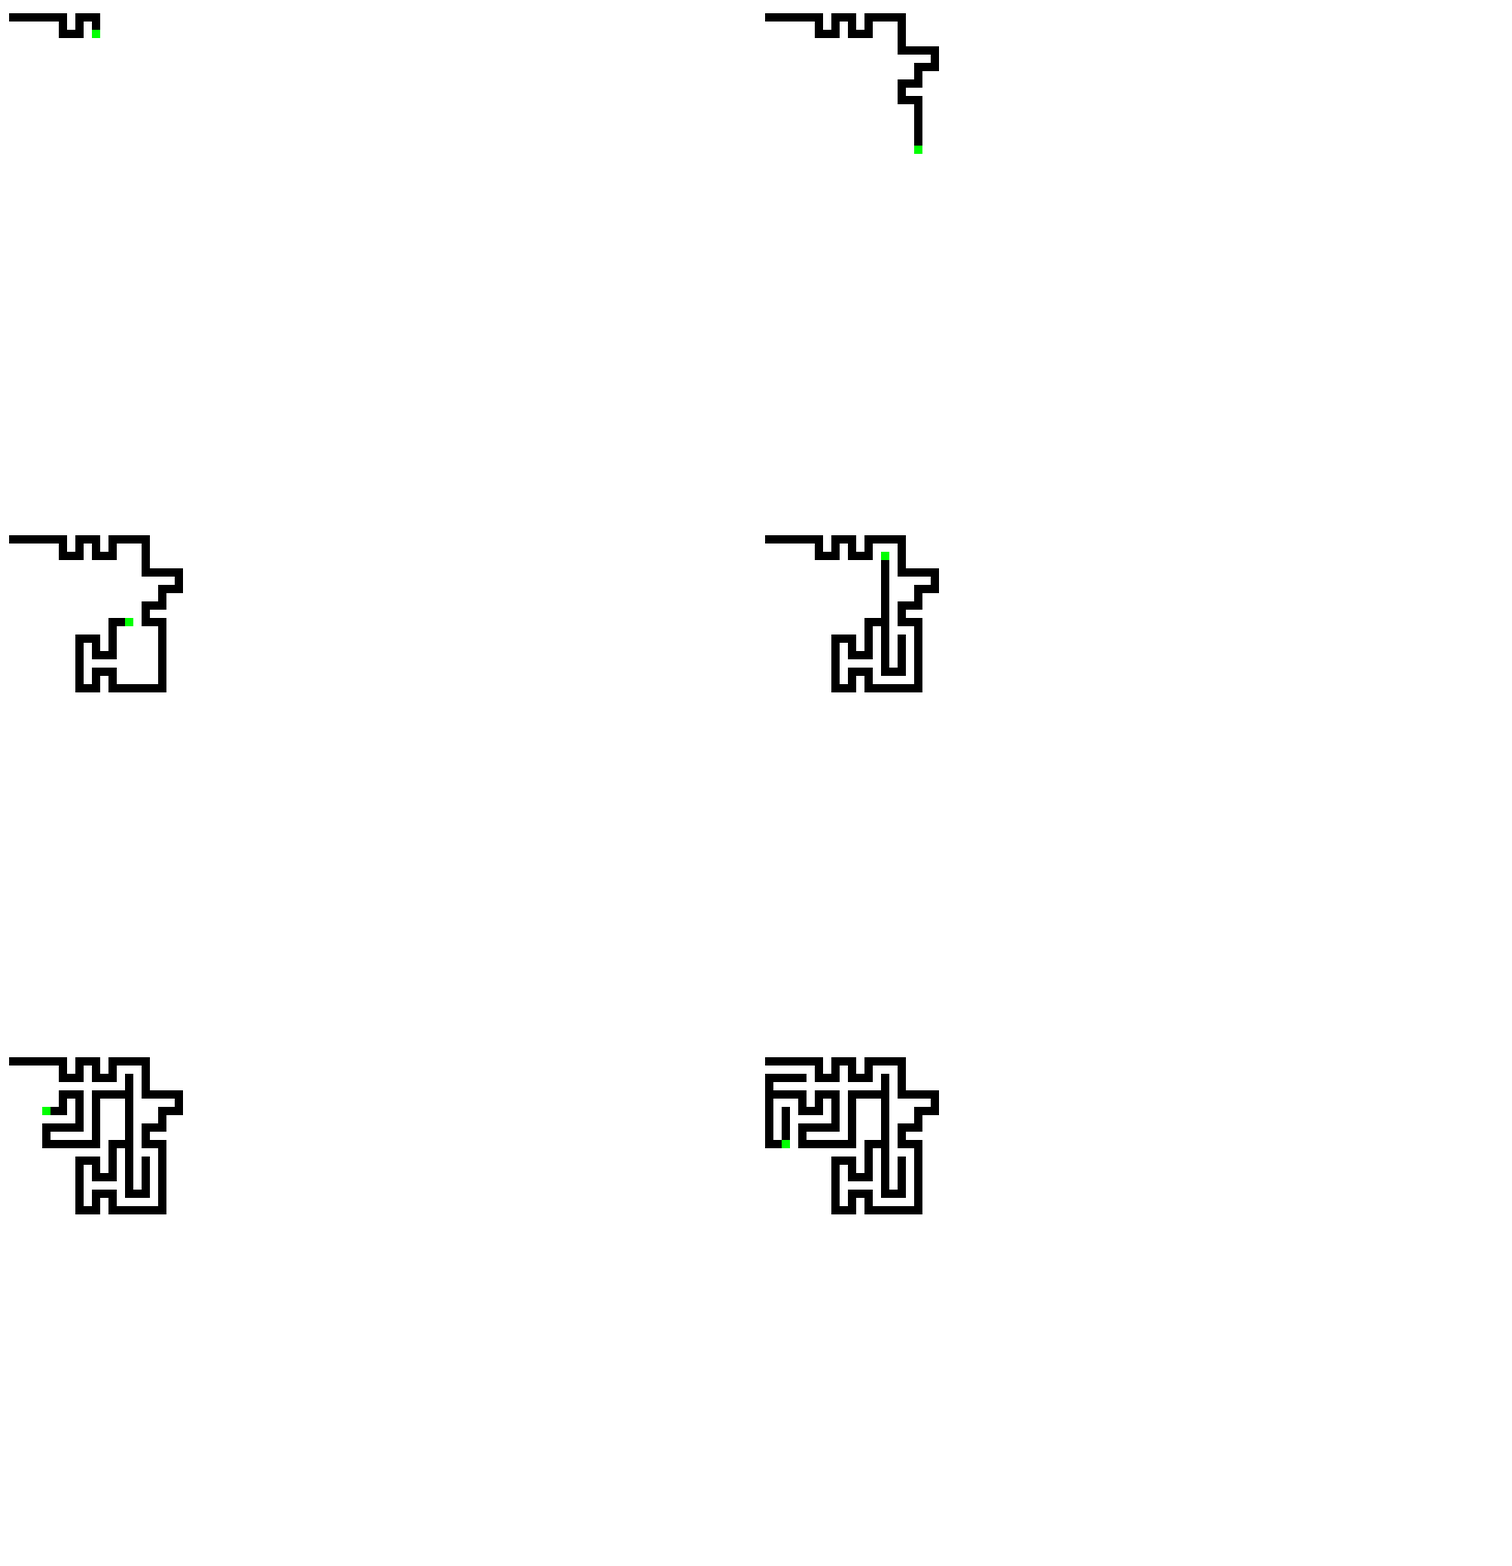
以上で迷路のプロシージャル生成アルゴリズムができました。
サンプルでは生成経過を見せるために逐次実行する形式になっているのかと思いますが、while等で迷路の生成を待てば一気に迷路を作り上げることができます。
その場合800*600の画面で数秒程度で迷路が出来上がります。

今回のソースはこちらになります。
/// <reference path="../app.ts" />
namespace MyGame {

    export class MyScene1 extends Phaser.Scene {

        public graphics: Phaser.GameObjects.Graphics;

        //迷路の幅、高さ
        public mazeWidth: number = 0;
        public mazeHeight: number = 0;
        public maze: number[][] = [];

        //迷路の道幅
        public tileSize: number = 10;

        constructor() {
            super({ key: 'MyScene1', active: false });
        }

        create() {

            //背景を白に
            this.cameras.main.setBackgroundColor("#ffffff");

            //グラフィックスオブジェクトを追加
            this.graphics = this.add.graphics();

            //移動データ用配列
            var moves = [];

            //キャンバスの大きさから迷路の配列サイズを設定
            this.mazeWidth = this.sys.canvas.width / this.tileSize + 1
            this.mazeHeight = this.sys.canvas.height / this.tileSize + 1

            for (var i = 0; i < this.mazeHeight; i++) {
                this.maze[i] = [];
                for (var j = 0; j < this.mazeWidth; j++) {
                    this.maze[i][j] = 1;
                }
            }

            //迷路の初期位置を設定
            var posX = 1;
            var posY = 1;

            //初期位置には0(壁ではない)を設定
            this.maze[posX][posY] = 0;
            moves.push(posY + posY * this.mazeWidth);

            //timerを設定、10ミリ秒ごとにcallbackをループする
            let timer = this.time.addEvent({
                delay: 10,
                loop: true
            });

            //タイマーのコールバック
            timer.callback = () => {
                //moveに次の進行可能箇所を設定する
                var possibleDirections = "";
                if (posX + 2 > 0 && posX + 2 < this.mazeHeight - 1 && this.maze[posX + 2][posY] == 1) {
                    possibleDirections += "S";
                }
                if (posX - 2 > 0 && posX - 2 < this.mazeHeight - 1 && this.maze[posX - 2][posY] == 1) {
                    possibleDirections += "N";
                }
                if (posY - 2 > 0 && posY - 2 < this.mazeWidth - 1 && this.maze[posX][posY - 2] == 1) {
                    possibleDirections += "W";
                }
                if (posY + 2 > 0 && posY + 2 < this.mazeWidth - 1 && this.maze[posX][posY + 2] == 1) {
                    possibleDirections += "E";
                }
                if (possibleDirections) {
                    var move = Phaser.Math.Between(0, possibleDirections.length - 1);
                    switch (possibleDirections[move]) {
                        case "N":
                            this.maze[posX - 2][posY] = 0;
                            this.maze[posX - 1][posY] = 0;
                            posX -= 2;
                            break;
                        case "S":
                            this.maze[posX + 2][posY] = 0;
                            this.maze[posX + 1][posY] = 0;
                            posX += 2;
                            break;
                        case "W":
                            this.maze[posX][posY - 2] = 0;
                            this.maze[posX][posY - 1] = 0;
                            posY -= 2;
                            break;
                        case "E":
                            this.maze[posX][posY + 2] = 0;
                            this.maze[posX][posY + 1] = 0;
                            posY += 2;
                            break;
                    }
                    moves.push(posY + posX * this.mazeWidth);
                }
                else {
                    var back = moves.pop();
                    posX = Math.floor(back / this.mazeWidth);
                    posY = back % this.mazeWidth;
                }
                //迷路を描画
                this.drawMaze(posX, posY);
            }

        }

        public drawMaze(posX, posY) {
            //道を表示
            this.graphics.fillStyle(0x000000, 1);

            for (let i = 0; i < this.mazeHeight; i++) {
                for (let j = 0; j < this.mazeWidth; j++) {
                    if (this.maze[i][j] !== 1) {
                        this.graphics.fillRect(j * this.tileSize, i * this.tileSize, this.tileSize, this.tileSize);
                    }
                }
            }

            //現在位置を表示
            this.graphics.fillStyle(0x00ff00, 1);
            this.graphics.fillRect(posY * this.tileSize, posX * this.tileSize, this.tileSize, this.tileSize);

        }
    }
}
Phaser 3 Tween 標準実装のeasingを見比べる
phaser3のTweenはPhaser2から宣言の仕方が変わっています。
新しい機能も増えており、特に実行中のtweenの値をリアルタイムにアップデートするupdateToはいろいろと使い道がありそうです。
https://labs.phaser.io/view.html?src=src\tweens\update%20to.js
easingを見比べる
今回は標準で実装されているeasingを見比べます。
Phaser.Math.Easingの中にeasingの定数があり、さらにその中にIn,Out,InOutの三つの定数があります。
forループでinを使って定数をいっきに取得してみましょう。
create() {

    this.cameras.main.setBackgroundColor("#ffffff");

    this.text = this.add.text(10, 10, "0");
    let index = 0;

    //inで定数を取得
    for (let o in Phaser.Math.Easing) {
        //取得した文字列をキーにしてさらに取得
        for (let oo in Phaser.Math.Easing[o]) {

            //イージングを表示するためのテキスト
            let text = this.add.text(10, 60 * index, o +"."+ oo);
            text.setFontSize(20);
            text.setColor("#1a1a1a")

            //tweenさせるスプライト
            let sprite = this.add.sprite(100, text.y+40, 'block');
            sprite.setScale(0.5);

            //tweenの作成
            let tween = this.tweens.add({

                //tweenを適応させる対象
                targets: sprite,
                //tweenさせる値
                x: 400,
                //tweenにかかる時間
                duration: 3000,
                //tween開始までのディレイ
                delay: 0,
                //tweenのリピート回数(-1で無限)
                repeat: -1,
                //easingの指定
                ease: Phaser.Math.Easing[o][oo],
            });

            index += 1;
        }
    }

    //キーボードの入力を取得してスクロールさせる
    this.input.keyboard.on('keydown_UP', function (event) {
            this.cameras.main.scrollY -= 10;
    }, this);

    this.input.keyboard.on('keydown_DOWN', function (event) {
            this.cameras.main.scrollY += 10;
    }, this);
}
ボールのアニメーションが複数表示されました。
 しかし、これではすべてのeasingを表示できていません。
camera.scrollでカメラのスクロール
カメラをスクロールさせて画面外のeasingも確認できるようにします。
Camera.scrollYでカメラを縦方向にスクロールすることができます。
createにキーボードイベントを設定し、camera.main.scrollYの値を変更します。
//キーボードの入力を取得してスクロールさせる
this.input.keyboard.on('keydown_UP', function (event) {
        this.cameras.main.scrollY -= 10;
}, this);

this.input.keyboard.on('keydown_DOWN', function (event) {
        this.cameras.main.scrollY += 10;
},this);
カメラをスクロールさせることができました。
 単純にxの値を加算させるtweenでもeasingによって挙動がさまざまに変わることがわかります。
Phaser3 サンプルを活用する
ブロック崩しの勉強はひとまず中断し、新機能の勉強をしようと思います。
Phaser 3のサンプル集
公式で用意されているPhaser3のサンプル集は2のころよりも実用的なものが大量にあります。 Phaser 3 Examples
このブログで今まで扱った新機能のリンクを一部抜き出してみます。
Actions(オブジェクトの配置)
Data(オブジェクトに任意の値を持たせられる)
Input(各種入力)
Container(オブジェクトの関連付け)
Particle(パーティクル)
Physics(物理)
右上の検索窓でサンプルを検索することもできます。

Phaser 3 SandBoxを活用する
サンプル中の「Edit」を押すとオンラインのエディタを開くことができます。
コードを変更したら上のRunで実行できます。
Saveでjsファイルをダウンロードすることもできます。

Typescript形式で書くことはできず、インテリセンスもないのでこの上で制作をするのは難しいと思いますが、サンプルを少し改変したいといったときには役立ちます。
Phaser 3 SandBoxでソースを編集してみる
パーティクルのサンプル、Create Emitterを開いてみます。
https://labs.phaser.io/edit.html?src=src\game%20objects\particle%20emitter\create%20emitter.js
単純なパーティクルエミッタがのサンプルです。

今回はエミットされる画像を変更してみましょう。
Preloadで
this.load.image('spark', 'assets/particles/blue.png');
を読み込んでいますね。
chromeの開発者ツールで見てみると読み込み元はhttps://labs.phaser.io/assets/particles/blue.pngとなっています。
 どうやらアセットは単純にhttps://labs.phaser.io/assets/の中にあるようです。
assets/particlesの中からgreen-orb.pngを選び、エディタ内のコードを変更してみます。
this.load.image('spark', 'assets/particles/green-orb.png');
Run Codeを実行するとパーティクルが変更されたのがわかります。

Phaser 3 : ブロック崩しを作ってみる ⑥ 演出を作っていく
引き続きブロック崩しを作っていきます。
今回は演出を強化していきます。
接触演出を強化する
開始までボールを待機させる
演出を強化する前に、入力があるまでボールをバーにくっつけておき、任意のタイミングでボールを発射してゲームを開始できるようにします。
MyScene1にwaitフラグを、InputManagerシーンにlaunchフラグをそれぞれ設定します。
InputManagerシーンでスペースかゲームパッドのAの入力があればlaunchフラグをtrueにし、MyScene1のwaitフラグがtrueの時にlaunchフラグがtrueになればボールを発射します。
MyScene1
~~
update() {
~~
    if (this.wait) {
        this.ball.x = this.center.x + 100 * Math.cos(this.center.rotation);
        this.ball.y = this.center.y + 100 * Math.sin(this.center.rotation);
        if (this.controller.launch) {
            this.ball.setVelocityX(this.ball.x - this.center.x);
            this.ball.setVelocityY(this.ball.y - this.center.y);
            this.wait = false;
        }
    }

~~
InputManager
~~
//発射ボタンの入力
public launch: boolean = false;
~~
private keySpace: Phaser.Input.Keyboard.Key;
~~
create() {
~~
    this.keySpace = this.input.keyboard.addKey(Phaser.Input.Keyboard.KeyCodes.SPACE);
~~

update() {
    if (this.gamepad) {
~~
        if (this.gamepad.A) {
            this.launch = true;
        } else {
            this.launch = false;
        }

    } else {
~~
        //ゲームパッドの発射ボタンを取得
        if (this.keySpace.isDown) {
            this.launch = true;
        } else {
            this.launch = false;
        }
    }
}
以上でゲーム開始時の入力待機処理ができました。
次にPhaser.Actionを用いてブロックに円運動をさせるようにしました。
MyScene1
update(){
~~
    Phaser.Actions.RotateAroundDistance(this.blockGroup.getChildren(), { x: 400, y: 300 }, 0.02,300);
~~
}
Actions.RotateAroundDistanceをupdateで用いると、第二引数の座標を中心に第四引数で指定した半径で円運動させることができます。
次にmatter.onに追記して衝突時の速度に応じてパーティクルの勢いが変わるようにします。
this.matter.world.on('collisionstart', function (event) {
~~
this.particleManager.splash.setSpeed({ min: 0, max: (event.pairs[i].bodyA as Phaser.Physics.Arcade.Body).velocity.x * (event.pairs[i].bodyA as Phaser.Physics.Arcade.Body).velocity.x + (event.pairs[i].bodyA as Phaser.Physics.Arcade.Body).velocity.y * (event.pairs[i].bodyA as Phaser.Physics.Arcade.Body).velocity.y  });
~~
ここまでの実行結果がこちらです。
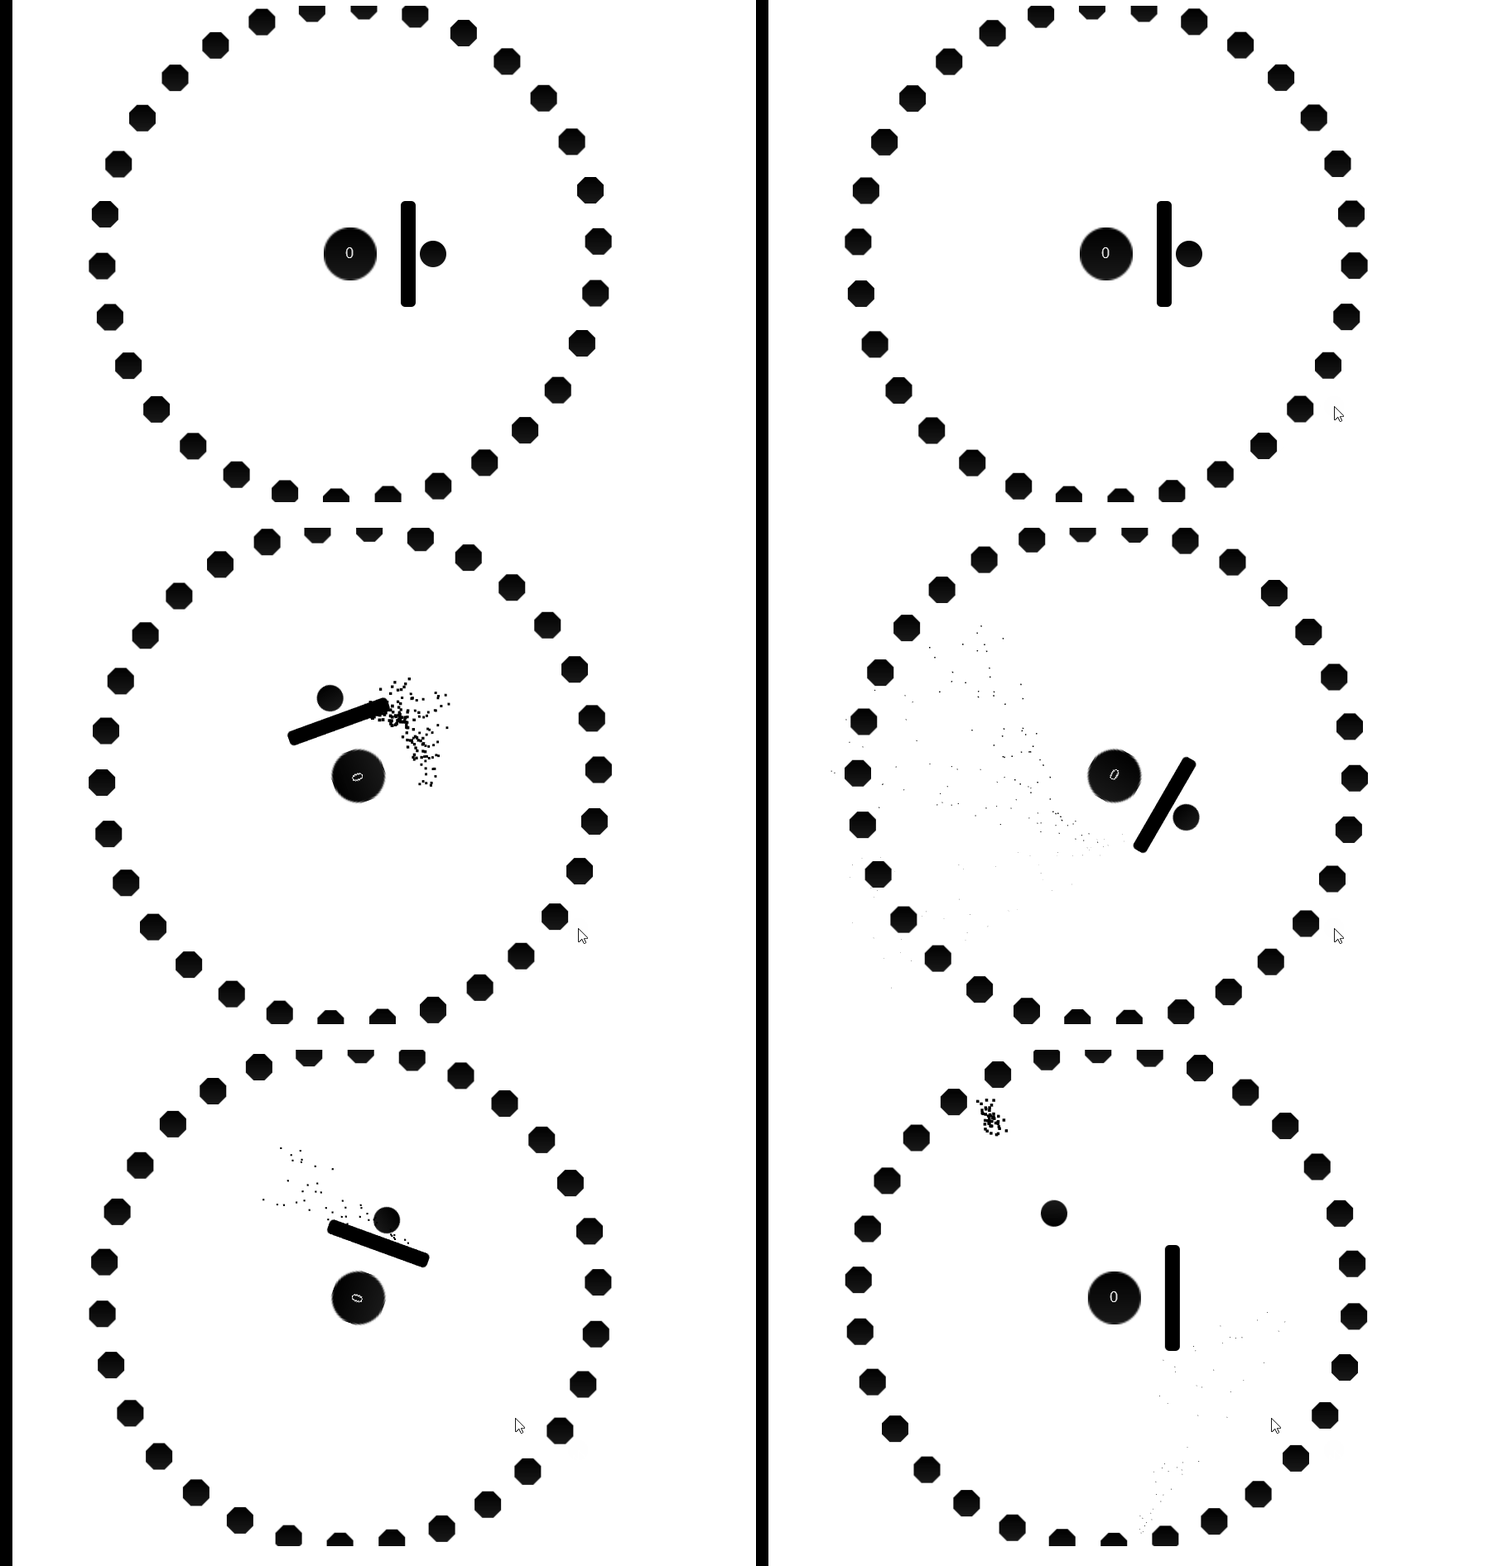
ボールがくっついているのと、ブロックの回転が確認できます。
自機の回転時にボールとバーが接触した判定ができているのか、パーティクルもエミットされています。
ボールの速度を監視する
ボールが加速しすぎると画面外に飛び出てしまうことがあります。
かといってボールの反発係数を弱めるとボールが止まってしまいブロック崩しが進行できなくなってしまうので、updateでボールの速度を監視して一定の数値以上ならボールの速度を弱めます。
ArcadeのPhysicsにはvelocityの上限値を決めるsetVelocity関数があるのですが、matterにはないようなので、ここの処理は自作するしかないようです。
update間に加速して画面外に飛び出てしまうことがあったので、whileで確実に速度を落とすようにしました。
Phaser.Physics.Arcade.Body.speedで物理オブジェクトの速度をとることができます。
だいたい40以上になると画面外に飛び出してしまうようなので、安全のために30を超えたら減衰させるようにします。
MyScene1
update(){
~~
    //ボールの速度の取得
    let body = this.ball.body as Phaser.Physics.Arcade.Body;
    while (body.speed > 30) {
        this.ball.setVelocity(body.velocity.x * 0.9, body.velocity.y * 0.9);
    }
~~
パーティクルとカメラシェイクを使って自機のダメージ表現
ParticleManagerに新しいエミッタringを追加します。
波紋状のエフェクトにしたいため、自作したリング型のスプライトを拡大するようなエフェクトにしてみました。
ParticleManager
create(){
~~
//エミッターを設定
this.ring = this.add.particles('ring').createEmitter({
    x: 0,
    y: 0,

    //パーティクルのスケール(2から0へ遷移)
    scale: { start: 2, end: 3 },
    alpha: { start: 1, end: 0 },

    quantity: 0,
    lifespan: 500,
    tint: 0x000000
});
~~
次にカメラシェイクを追加します。
this.cameras.揺らしたいカメラ.shake(揺らしたいピクセル)でカメラを揺らすことができます。
今回はmainしかカメラを使っていないので、mainを揺らすようにします。
MyScene1
Create(){
~~
this.matter.world.on('collisionstart', function (event) {
~~
//自機がボールかブロックにぶつかった場合
if ((bodyA.label === "center" && bodyB.label === "block") ||
    (bodyA.label === "block" && bodyB.label === "center") ||
    (bodyA.label === "ball" && bodyB.label === "center") ||
    (bodyA.label === "center" && bodyB.label === "ball")
) {
    this.center.setData("count", this.center.getData("count") + 1);
    this.particleManager.ring.explode(1, this.center.x, this.center.y);
    this.cameras.main.shake(50);
}
以上までの処理を追加した結果がこちらです。
 カメラシェイクはgifではわかりにくいようです。
結構揺れるのですが、揺り戻しの周期と撮影タイミングが一致してしまっているのでしょうか。
リングエフェクトはしっかり確認できます。
ブロック数監視用のグループをつくる
次にブロックが減ってきたら追加する処理を作成します。
まずはブロック数監視のためのallblockグループを追加します。
MyScene1

public allBlock: Phaser.GameObjects.Group;
~~
create(){
~~
this.allBlock = this.add.group();
~~
ブロック作成時にallBlockへの登録も行うようにします。
Group.children.sizeでグループ内の要素を取得することができるので、updateで実行すればブロックの数を監視することができます。
ブロック追加のためのAddBlock関数を作成し、ブロックの数が10以下になったら追加します。
MyScene1
update(){
~~
//画面内のブロックが10以下の場合
if (this.allBlock.children.size < 10) {
    this.AddBlock();
}
~~
}

public AddBlock() {

    let c = this.matter.add.image(
        Phaser.Math.Between(0,this.sys.canvas.width),
        Phaser.Math.Between(0,this.sys.canvas.height),
        'ball', null,
        { label: "block", ignorePointer: true }
    );
    c.setData("count", 0);
    c.setTint(0x000000, 0x000000, 0x000000, 0x000000);

    this.tweens.add({
        targets: c,
        x:Phaser.Math.Between(0, this.sys.canvas.width),
        y:Phaser.Math.Between(0, this.sys.canvas.height),

        duration: 3000,
        ease: 'Power2',
        completeDelay: 3000
    });

    //ブロックグループに追加
    this.allBlock.add(c);

    //Dataの変更時に実行されるイベントを記述
    c.on('changedata', function (gameObject, key, value, resetValue) {
        //countが変更された場合
        if (key === 'count') {
            //ぶつかった回数が2回以上ならオブジェクトを削除
            if (value > 2) {
                c.destroy();
            }
        }

    }, this);

    let array:Phaser.Physics.Matter.Image[] =[]
    for (let i = 0; i < 10; i++) {
        //物理オブジェクトを作成
        let block = this.matter.add.image(
            this.sys.canvas.width / 2,
            50,
            'block1', null,
            { label: "block", ignorePointer: true }
        );
        //スプライトに色付け
        block.setTint(0x000000, 0x000000, 0x1a1a1a, 0x1a1a1a);

        //ブロックの反発係数などを設定
        block.setBounce(1.2);
        (block.body as Phaser.Physics.Arcade.Body).mass = 10

        //Dataの初期設定
        block.setData("count", 0);
        block.setIgnoreGravity(true);

        //Dataの変更時に実行されるイベントを記述
        block.on('changedata', function (gameObject, key, value, resetValue) {
            //countが変更された場合
            if (key === 'count') {
                //ぶつかった回数が2回以上ならオブジェクトを削除
                if (value > 2) {
                    block.destroy();
                }
            }

        }, this);
        block.setFrictionAir(1);

        //コンストレイントを追加
        this.matter.add.constraint(c, block, 50)

        this.allBlock.add(block);
        array.push(block);
    }
    //円状に配置
    var circle = new Phaser.Geom.Circle(c.x, c.y, 70);
    Phaser.Actions.PlaceOnCircle(array, circle);

}
上記の実行結果がこちらです。
 黒い丸を中心としたブロック塊が追加されています。
塊を作りたかったのでconstraintを使いましたが、constraintは相互に位置を決めあうものらしく、動きがぎこちなくなっています。
次からはいったんブロック崩しの作成は中断し、containerの使い方について詳しく学習していこうと思います。
まとめ
- camera.shakeで画面を揺らすことができる
Phaser 3 : ブロック崩しを作ってみる ⑤ Container、Particleを使ってみる
今回はContainer、Particleを使ってオブジェクトの衝突時の処理を付け足していきます。 https://github.com/samme/phaser3-faq/wiki#how-do-i-add-a-child-sprite
まずはContainerを使って自機の衝突判定回数を視覚化します。
Containerを使ってオブジェクトを関連付ける
ContainerはPhaser3から追加された機能です。
以前はSpriteなどの一部のゲームオブジェクトはaddchildを用いて親子付けすることができたのですが、Phaser3からはaddchildが軒並み廃止されたようです。
(Groupにはまだ残っています)
そのためオブジェクト同士の関係を作るためにはContainerを用いるかゲームオブジェクトを拡張する必要があります。
https://github.com/samme/phaser3-faq/wiki#how-do-i-add-a-child-sprite
厳密な親子付けを行えるのは拡張を行ったときのみで、containerを用いたやり方はコンテナと個々のオブジェクトとの親子関係しか作成できません。
containerの動きと親としてふるまわせたいオブジェクトの動きを同期することで親のように振舞わせることができるといった感じのようです。
今回の接触回数カウンタは自機の動きに追従すればいいだけなのでcontainerで事足りると思います。
こちらのサンプルを参考にして作成します。
Phaser Labに掲載されているサンプルは「Edit」でソースを見ることができます。
https://labs.phaser.io/view.html?src=src\game%20objects\container\matter%20physics%20body%20test.js
物理演算付きのコンテナを作るためには まずはcreate内で自機スプライトを用意した後にcontainerを作ります。
create(){
~~
//球を画面中央に配置
let center = this.add.image(0,0,'ball')
center.setScale(2, 2)

//コンテナを作る
let container = this.add.container(0, 0, center);
~~
次に自機の子となるテキストオブジェクトを作成し、先ほど作成したコンテナにaddします。
//テキストを作る
var text = this.add.text(0, 0, '0');
text.setColor("#fff");
text.setOrigin(0.5);
text.setFontSize(20);
container.add(text);
これでスプライトとテキストオブジェクトの親子付けができましたが、自機は物理オブジェクトとして作成したいので、上のコンテナに物理演算つきのコンテナにする必要があります。
matter.add.gameObjectでゲームオブジェクトを物理オブジェクトとして登録できます。
//コンテナを物理オブジェクト化する
this.center = (this.matter.add.gameObject(container, { shape: { type: 'circle', radius: 32 }, label: "center", ignorePointer: true }) as Phaser.Physics.Matter.Image);
以上で物理演算付きのコンテナを作ることができました。
続いて衝突時のカウント処理を書いていきます。
今回もdataを使います。
this.center.setData("count", 0);

this.center.on('changedata', function (gameObject, key, value, resetValue) {
       //countが変更された場合
       if (key === 'count') {
             text.setText(value);
            }, this);

//物理オブジェクトの当たり判定
this.matter.world.on('collisionstart', function (event) {

    for (var i = 0; i < event.pairs.length; i++) {

        var bodyA = this.GetCollide(event.pairs[i].bodyA);
        var bodyB = this.GetCollide(event.pairs[i].bodyB);

        //自機がボールかブロックにぶつかった場合
        if ((bodyA.label === "center" && bodyB.label === "block") ||
            (bodyA.label === "block" && bodyB.label === "center") ||
            (bodyA.label === "ball" && bodyB.label === "center") ||
            (bodyA.label === "center" && bodyB.label === "ball")
        ) {
            this.center.setData("count", this.center.getData("count") + 1);
        }
~~
これで自機に追従して動く衝突回数カウンタができました。
 できたにはできた…のですが、Containerを用いた方法は直感的に作れず、処理をつくるのが結構大変でした。
containerは引き続きサンプルを引きながら慣れていきたいと思います。
Particleを使い
今回はParticleを使って衝突時のエフェクトを作成したいと思います。
ParticleはPhaser2に比べて格段に強化されており、非常に扱いやすくなっています。
https://labs.phaser.io/index.html?dir=game%20objects/particle%20emitter/&q=
emitterを作る
まずはパーティクル管理用のParticleManagerシーンを作りました。
2x2のドットスプライトを作り読み込みます。
    export class ParticleManager extends Phaser.Scene {

        public emitter: Phaser.GameObjects.Particles.ParticleEmitter;

        constructor() {
            super({ key: 'ParticleManager', active: false });
        }

        preload() {
            //パーティクル用のスプライト
            this.load.image('2x2', 'assets/images/2x2.png');
        }
    }
次にCreateでエミッターを設定します。
各値には{min: , max:}の形で範囲を設定することができます。
//エミッターを設定
this.emitter = this.add.particles('2x2').createEmitter({
    x: 0,
    y: 0,

    //パーティクルのスケール(2から0へ遷移)
    scale: { start: 2, end: 0 },

    //パーティクルの速度(minからmaxの範囲)
    speed: { min: -100, max: 100 },

    //パーティクルの角度(minからmaxの範囲)
    angle: { min: -30, max: 30 },

    //パーティクルの放出数(エミット時に指定するので0を入れておく)
    quantity: 0,

    //パーティクルの寿命
    lifespan: 500,
    tint: 0x000000
});
setEmitZoneでエミッターの形を設定
次にemitter.setEmitZoneでエミッターの形を設定します。
下記コードでは半径10の範囲からエミットされます。
typeにはedgeとrandomがあり、edgeを設定するとemitZoneとして指定した図形の縁から、randomを設定すると指定した図形の範囲内のランダムな点からエミットされます。
//エミッターの形を設定
this.emitter.setEmitZone({
    source: new Phaser.Geom.Circle(0, 0, 10),
    type: 'random',
    quantity: 0
});
これでParticleManagerシーンの作成は終わりです。
次にメインのシーンからParticleManagerシーンを読み込みます。
export class MyScene1 extends Phaser.Scene {
~~
    public particleManager: ParticleManager;
    ~~
   //ParticleManagerシーンを実行
   this.scene.launch("ParticleManager")
   this.particleManager = this.scene.get("ParticleManager") as ParticleManager;
~~
emiter.explodeでパーティクルの単発エミット
あとは衝突時の処理です。
this.matter.world.on内に
//ぶつかった場合にパーティクルをエミット
let angle = Math.atan2((event.pairs[i].bodyA as Phaser.Physics.Arcade.Body).velocity.y, (event.pairs[i].bodyA as Phaser.Physics.Arcade.Body).velocity.x) * 180 / Math.PI + 180
this.particleManager.emitter.setAngle({ min: angle - 30, max:angle+30});
this.particleManager.emitter.explode(50, event.pairs[i].collision.supports[0].x, event.pairs[i].collision.supports[0].y);
を追記します。
let angle = Math.atan2((event.pairs[i].bodyA as Phaser.Physics.Arcade.Body).velocity.y, (event.pairs[i].bodyA as Phaser.Physics.Arcade.Body).velocity.x) * 180 / Math.PI + 180
this.particleManager.emitter.setAngle({ min: angle - 30, max:angle+30});
ではぶつかったオブジェクトのベクトルからエミットする角度を計算し、
this.particleManager.emitter.explode(50, event.pairs[i].collision.supports[0].x, event.pairs[i].collision.supports[0].y);
では物理オブジェクトが衝突したポイントを取得してemitter.explodeでパーティクルをエミットしています。
上記の実行結果がこちらです。
 角度計算が間違っている感じもありますが、移動ベクトルに応じてエミット角度が変更されているのがわかると思います。
Phaser2には作成済のエミッターのAngleを変更する方法がなかったように思います。
(少なくとも直感的なものではありませんでした)
なのでこれは非常に大きな変化だと思います。
まとめ
* オブジェクトを関連付けるにはcontainerを使う
- createEmitterでエミッタを作成、emitter.explodeでエミット
今日のソースはこちらになります。
http://firestorage.jp/download/0728bcb572d6486128172395e5e6ef92da92db51